Configuring User Masks
UserMasks are additional tabs for DBM entries with customized fields for customers. Such UserMasks can be obtained and new ones can be ordered at DAVID Systems. They have to be manually integrated into the DigaSystem; there are two different technologies and each one has an own installation procedure that will be explained in this chapter.
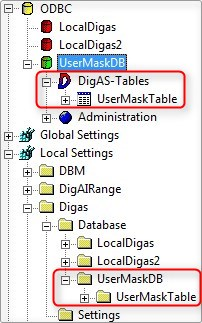
Preparation: Convert the database
Create a new ODBC connection (System or File DSN according to chapter 6) and a database for it. Name it e.g. "UserMaskDB" and make sure this database has at least the Version 3.
Then create a new table in this database called "UserMaskTable" (Sound directory: %MediaDir%\UserMaskTable)
XSL UserMasks
As example of the older XSL technology we will install the UserMask "Example". You can download the necessary files with this link:
We will use the variable %DigasDir% that represents the DigaSystem root directory (The variable is defined under Local Settings|Variables).
1. File installation
File | Target directory |
|---|---|
DigaSQL2Com.dll | %DigasDir% (this file should already exist) |
CreateUniqueIDAttribute.xsl | %DigasDir%\UserMasks |
Example.xml | %DigasDir%\UserMasks\Example |
2. Parameter configuration
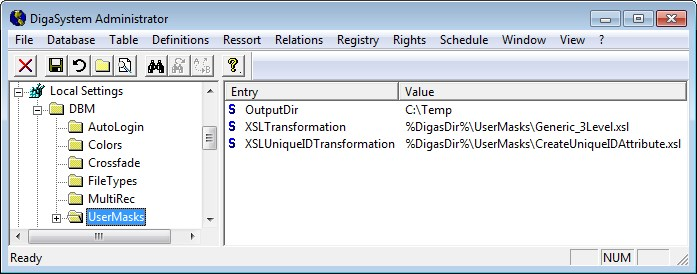
Create the folder Local Settings|DBM|UserMasks ("UserMasks" with a capital U and M) and enter the following parameters:
- OutputDir = %DigasDir%\UserMasks
- XSLTransformation = %DigasDir%\UserMasks\Generic_3Level.xsl
- XSLUniqueIDTransformation = %DigasDir%\UserMasks\CreateUniqueIDAttribute.xsl
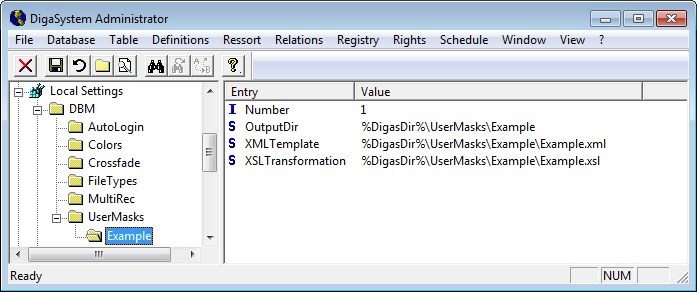
The following parameters are specifically for each UserMask and need to be defined using their corresponding subfolder of "DBM|UserMasks", in this case: Local Settings|DBM|UserMasks|Example|
Parameter/ Value | Description |
|---|---|
Number (Integer parameter!) | The value (e.g. 1) represents a distinct ID and defines the order of appearance in the DBM entry mask, therefore every custom mask needs an own ID number. |
OutputDir | This directory is needed for temporarily created html files, e.g. in order to display the mask; C:\Temp is not recommended; do not forget to create this directory in the file system. |
XMLTemplate | Enter the path of the user mask's xml file. |
XSLTransformation | Enter the path of the user mask's xsl file |
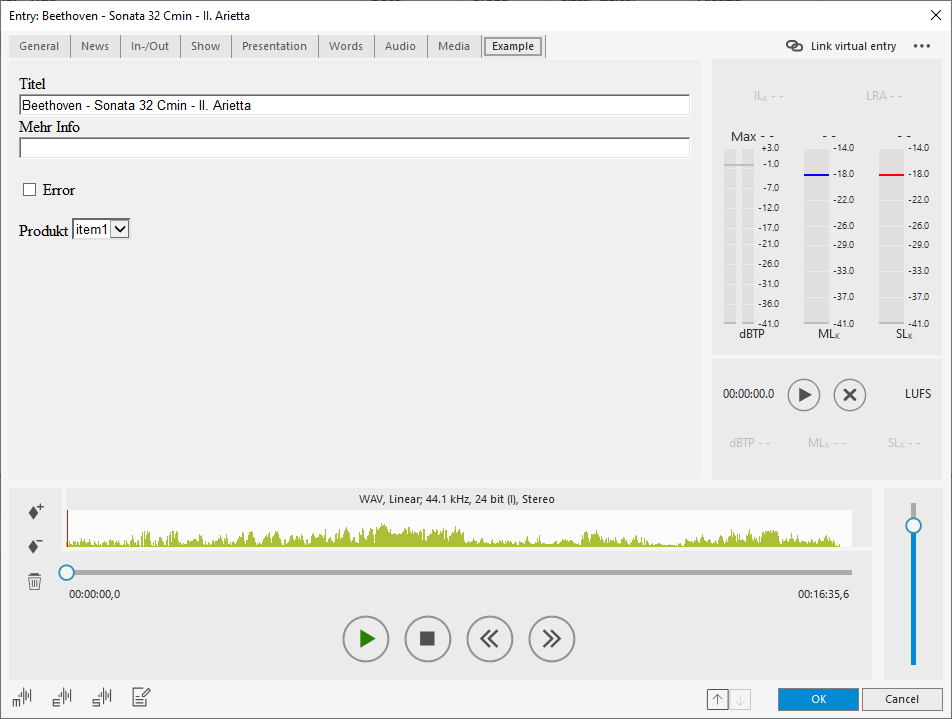
3. UserMask Activation
Close all DigaSystem applications and restart the DigaSystem Administrator. Connect to UserMaskDB in the ODBC section, enlarge the UserMaskTable key and click on "Classes". In the appearing list a column called "Example" should appear on the right (if it doesn't check the previous steps again). Set now some markers to make the tab available in DBM for this table.
Use the disc symbol 
.NET UserMasks
Requires: .Net 4.5 from DigaContentTabHost.dll version 1.1.3
.Net user masks are a more modern variant; they are easier to program (not necessarily by DAVID Systems) and several masks can be combined to one dll file.
The following configuration example refers to the XML user mask "AContentTab", that can be downloaded with the link in section XSL UserMasks above.
- Copy the file AContentTab.dll into the folder *%DigasDir%\UserMasks\AContentTab*
- In DigaSystem Administrator enter these parameters under Local Settings|DBM|UserMasks|ACon tent Tab|:
Parameter/ Value | Description |
|---|---|
Number (Integer parameter!) | The value (e.g. 2) represents a distinct ID and defines the order of appearance in the DBM entry mask, therefore every custom mask needs an own ID number. |
Assembly | As value enter the path of the .net mask dll file. |
Name | Enter the name of the user mask. |
After the parameters have been entered restart the DigaSystem Administrator and open the ODBC Section. Expand the database you want to configure with the .Net user mask and activate the user mask by settings check marks under Classes. Setting a check mark in e.g. the line "Music" means the .Net user mask will be displayed in a music class DBM entry. Click on the disc icon
The user mask is not configured and available in DBM.