Working with Table Groups
Overview
When the number of tables you regularly work with grows, the "table groups" feature helps you to organize your tables. Each table can be a member of no group, of one group, or of several groups. In DBM, you can restrict displayed tables to those that are members of a specific group.
Table groups must be created and populated by an administrator.
Configuring Table Groups
Open the "Settings" dialog, navigate to the "View" page, and open the "Initial table group" combo box. The dropped-down list contains an empty entry to the top, followed by "All", followed by a list of table groups.
Click on the name of the group which you want to have selected when DBM starts, or click on "All" if you don't want to select a specific group. Then close "Settings" with the "OK" button.
This is a per-user setting. The administrator can provide global defaults which come into effect until the user makes their own selection.
Restart DBM.
Selecting a Table Group
Having restarted DBM, you see an additional combo-type control in the head of the "TABLES" area.
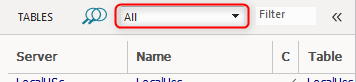
You can select "All" or one of the table groups in the list by clicking the downward pointing triangle. The list of displayed tables will be restricted to members of the selected group.
Removing the Table Groups Combo
In the "Settings" dialog, on the "View" page, set "Initial table group" to the empty entry. Exit with "OK", then restart DBM. This removes the table group selection combo control from the "GROUPS" area but only if no LOCAL or GLOBAL default table was defined by the administrator.