In order to change the columns in DBM on a per-table basis you must:
-
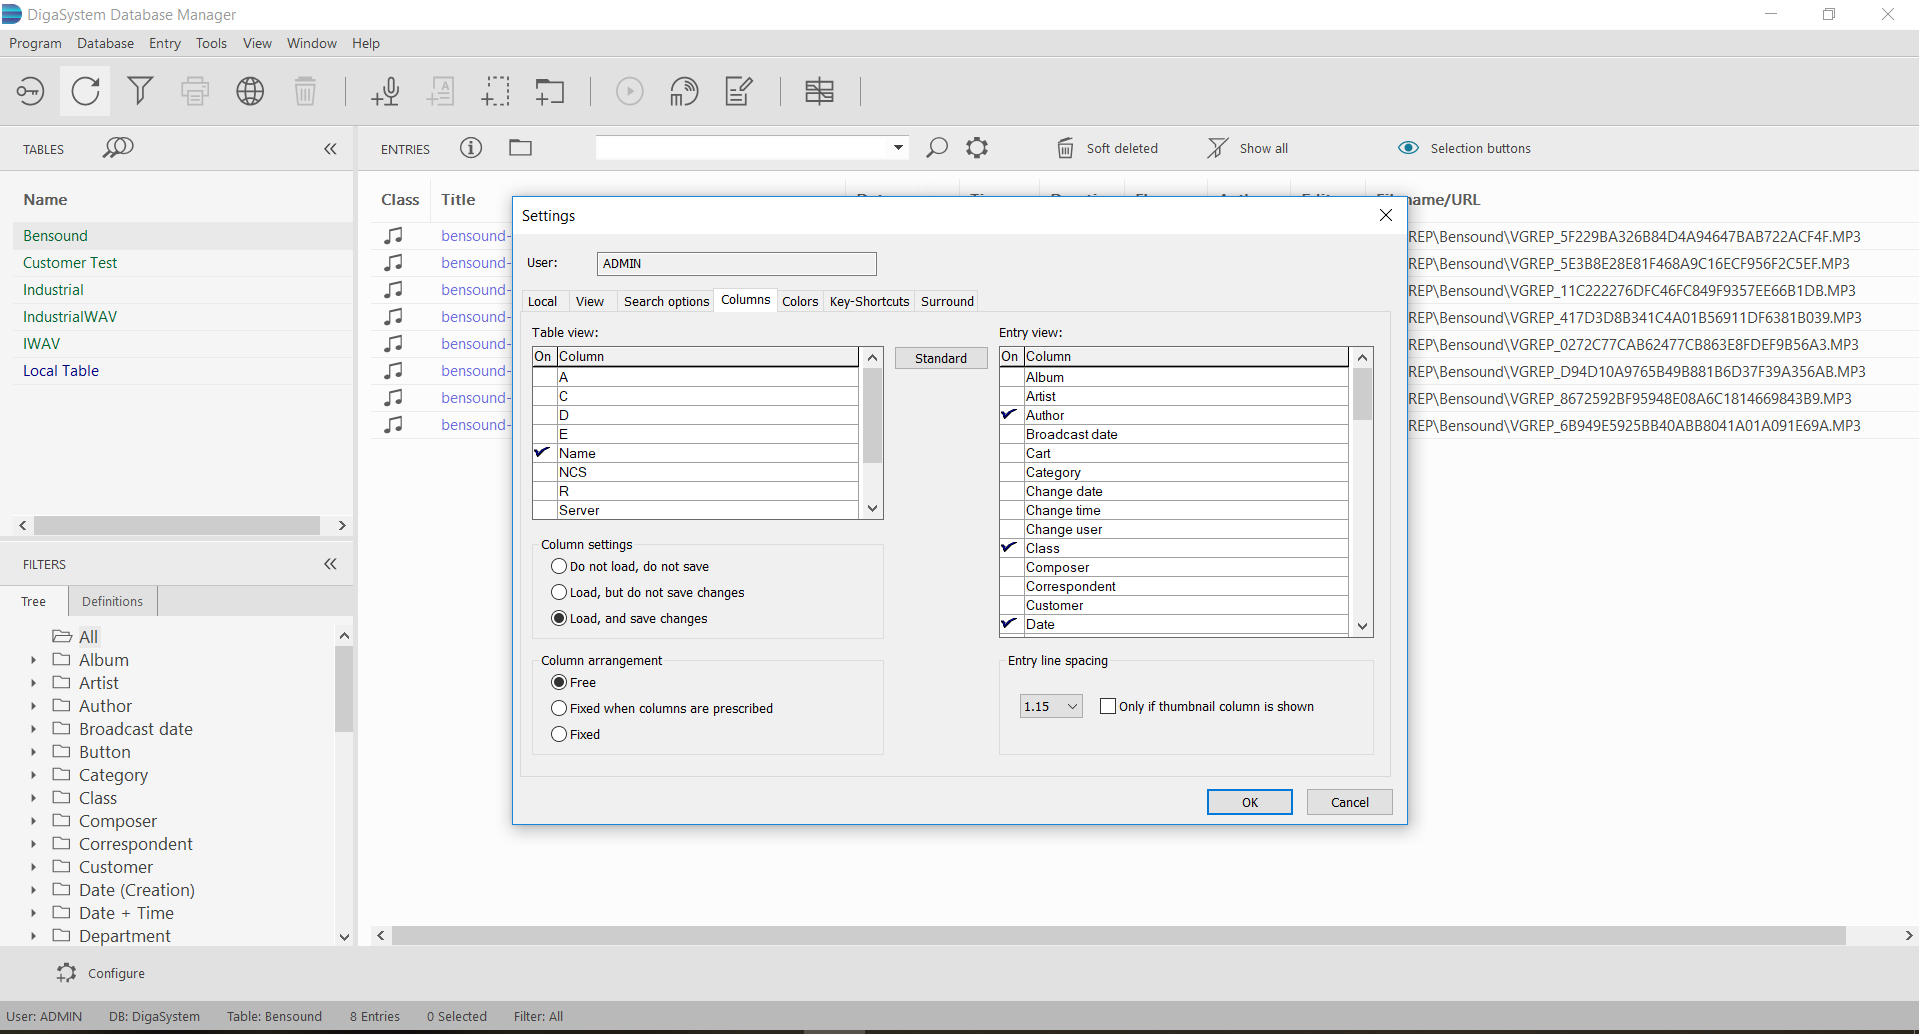
Log into the Admin account in DBM and open Program | Settings | Columns.
-
Check the boxes of the columns you want to apply (this will apply to all tables, globally {for that user}, so we will be undoing it in a bit, unless you want them all to match).
-
Be sure to select Load and Save Changes.
-
This can be done on any user account to set their table preferences, so long as global defaults haven't been set.
-
-
Go to Programs | Manage column settings.
-
Select the table you wish to make your currently established, on the Admin account, columns the default for.
-
Click ‘Use actual settings’. That will make these the default across the board, and users will not be able to change them.
-
Once they are set, you can repeat the process, changing columns and making them defaults, until you are satisfied with how it appears.

-
Return the settings to how they were prior to step 1.
-
Rinse and repeat as many times as needed to have all the tables configured. Once they are all done, if changes need to be made, be certain to only remove column settings for such tables that you wish to make changes to.