Volume Editing
The volume can be edited for the broadcast. These modifications affect the playback volume during the broadcast show and have no effect on the audio volume itself.
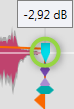
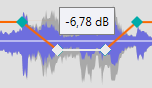
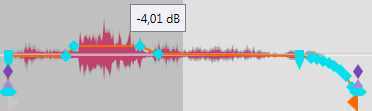
Setting Fade Points
| Between the Mark In and Mark Out the volume line can be manipulated by clicking on it with the left mouse button; this will create a fade point that you can move as you like. | ||
Set a fade point where you click | Ctrl key and a left mouse button click in the element, will set a fade point where you click. | ||
| Alt key and click on Fade In / Out | You can move Fade In / Out vertically. | |
| Snap to next fade point's value | Click on Alt key and fade point to snap to the value of next located fade point. Shortly the volume line between the two fade points flashes white. | |
| Vertical moving of horizontal level | Click on Alt key and move the volume line vertically up or down. | |
| Level all fade points | All fade points, also disabled one of 1st and last element, can be dragged up/down together with left mouse button when the user holds the SHIFT key. | |
Remove fade point | To remove a fade point, click on it with the right mouse button. | ||
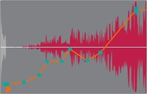

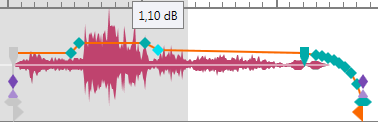
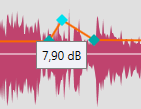
Fade Points with Positive Values
If for some reasons the audio level is too low, since OTM version 2.3 your may set fade points with positive values. Therefore configure the parameter FadePointUpperScale to your needs in all setups with the same value.
IMORTANT NOTE
![]() If you define the parameter FadePointUpperScale (see Parameter Descriptions), you absolutely need to configure the same value on all used setups of DigAIRange and Turbo Player! Otherwise on setups where FadePointUppperScale has different values, including "0", the volume line will not match and every saved change will mess up the volume line.
If you define the parameter FadePointUpperScale (see Parameter Descriptions), you absolutely need to configure the same value on all used setups of DigAIRange and Turbo Player! Otherwise on setups where FadePointUppperScale has different values, including "0", the volume line will not match and every saved change will mess up the volume line.
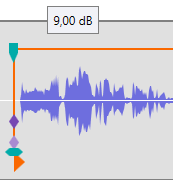
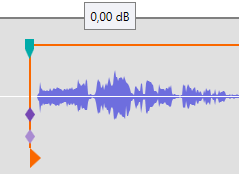
F.e. in DigAIRange OTM is configured to FadePointUppperScale=9 but in Turbo Player OTM the default is used and FadePointUppperScale has not been configured. If you now raise the element's volume line in DigAIRange OTM to 9 dB and save this changes, the changes will not be reflected in Turbo Player OTM and the volume is reset to 0dB.
DigAIRange - FadePointUpperScale=9 Turbo Player default settings
![]() Shows created in OTM 2.3 with this parameter are not supported in older OTM versions! The volume line can be messed up on older OTM versions as this feature has not been implemented in versions below 2.3.
Shows created in OTM 2.3 with this parameter are not supported in older OTM versions! The volume line can be messed up on older OTM versions as this feature has not been implemented in versions below 2.3.
Ducking
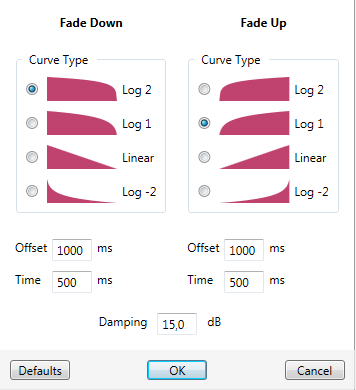
| Clicking the Duck button in the Marker Details section will lower the volume of all other show elements and next show item where they overlap the selected show item. With a right click on this button the “Duck Settings” dialog opens: | ||||
All settings on the left half will affect the Fade Down (begin of ducking) part of the ducking, the right half applies to the Fade Up (end of ducking). |
| ||||
Curve Type | Select between four different fading curves behaviors | ||||
Offset | Fading curve will start after a delay of x milliseconds | ||||
Time | Length of each fade curve in milliseconds | ||||
Damping | The audio volume will be lowered by this value in dB between the fadings | ||||
The default settings will be restored on the next OTM launch. | |||||

| This icon in the Track Head allows the element in this track to be ducked (enabled as default) Click on it to toggle:
If you press the Control Key while toggle the ducking state, all audio tracks will be set to the same state. | ||||


The default settings can be defined with parameters. If they are changed in the application, the default will be restored on the next OTM launch.
Create a Crossfade
| With a rights click on the Crossfade button (Marker Details section) this settings dialog opens. | ||
At a transition point of two audio elements the settings on the left side will affect the Fade Out of the first element and the right side the Fade In of the second. | |||
Curve Type | Select between four different fading curves behaviors | ||
Time | Length of each fade curve in milliseconds; only usable if “Depends on sound head” is not active | ||
Depends on sound head | If active the Fade In/Out will begin at the sound head position. | ||
Don’t change fade curve | This check mark disables the “Curve type”. | ||

The default settings can be defined with parameters. If they are changed in the application, the default will be restored on the next OTM launch.
By default in Multitrack Mode the following areas CANNOT be edited to avoid unwanted changes regarding bordering audio elements currently not being loaded in the timeline:
First track's in markers: This area is probably a transition point to the previous audio element.
Last track's out markers: This area is probably a transition point to the following audio element.
Tipp: Modify all markers of first and last element in show
To allow modification of start markers on first element in show and end markers of last element in show, you need to configure EditBeginAndEndOfShow . Please note that this parameter allows marker's modifications only of first and last element of a show. If you load any other element than the first and last element of the show to OTM, the In and Out markers of first and last element are still NOT allowed to modify.