Firewall and Security Management for ROAD Web Service
Firewall Settings
The ROAD Service needs Inbound TCP ports (with standard configuration):
- 11003 (http)
- 11004 (web socket)
- 11005 (https) open
- 11006 (secure web socket)
In case RoadService.exe is to be run in non-service mode (usually only for development purposes) under a non-system user account, use the following command to allow it to listen on these ports by either running it under administrator privileges or by running these commands:
netsh http add urlacl url=http://+:11003/ user=<username>
netsh http add urlacl url=https://+:11005/ user=<username>
where <username> is a local Windows user name or domain\username (e.g. DAVID-GMBH\abc) or \everyone
Usually the firewall permissions are requested for confirmation from the user when the RoadService.exe is started for the first time. (This default behavior may be switched off by a general Windows firewall setting.)
Certificates for ROAD Service
To allow trusted connections to the ROAD Service via https (REST) and/or wss (secure web socket) there must be installed a valid certificate on the local system.
Installing a Test Certificate
For testing it is possible to install a self-signed certificate via IIS (Internet Information Service) Manager, which is an optional standard component of Windows 10.
Mind this is only usable for testing reasons. Web browser clients will show a warning message instead of a security symbol (usually a lock symbol) telling the communication is encrypted, but the server isn't authenticated.
Create Certificate
We need to create a certificate for the url we want to use. It has to be exact, 'localhost' is not the same as 'server42.davidsystems.com' even if it refer to the same computer. The 'Issued To' parameter of the certificate has to be equal to the used hostname to access the ROAD Server.
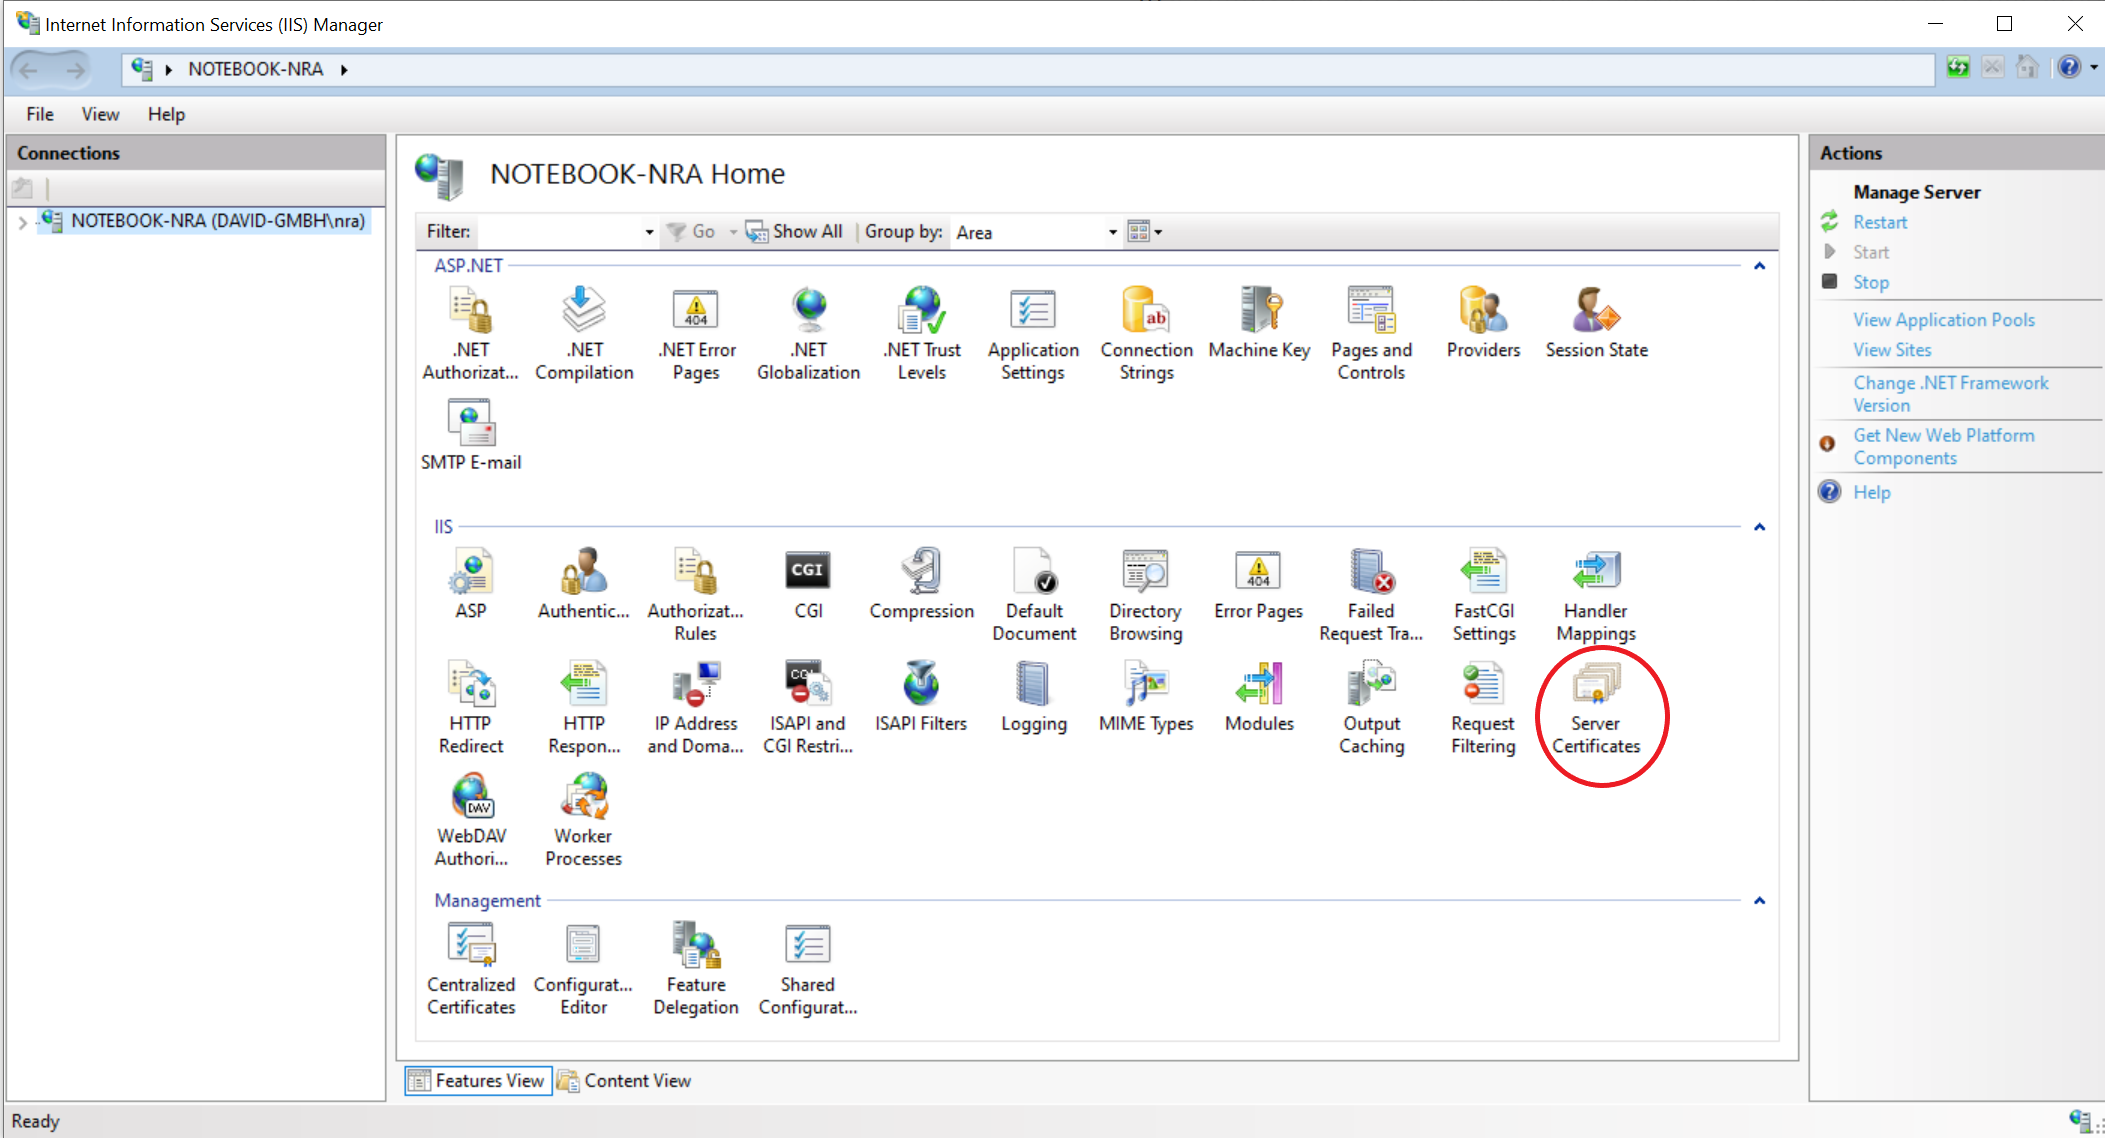
Using IIS:
For testing purposes you can use IIS Manager to create a Certificate.
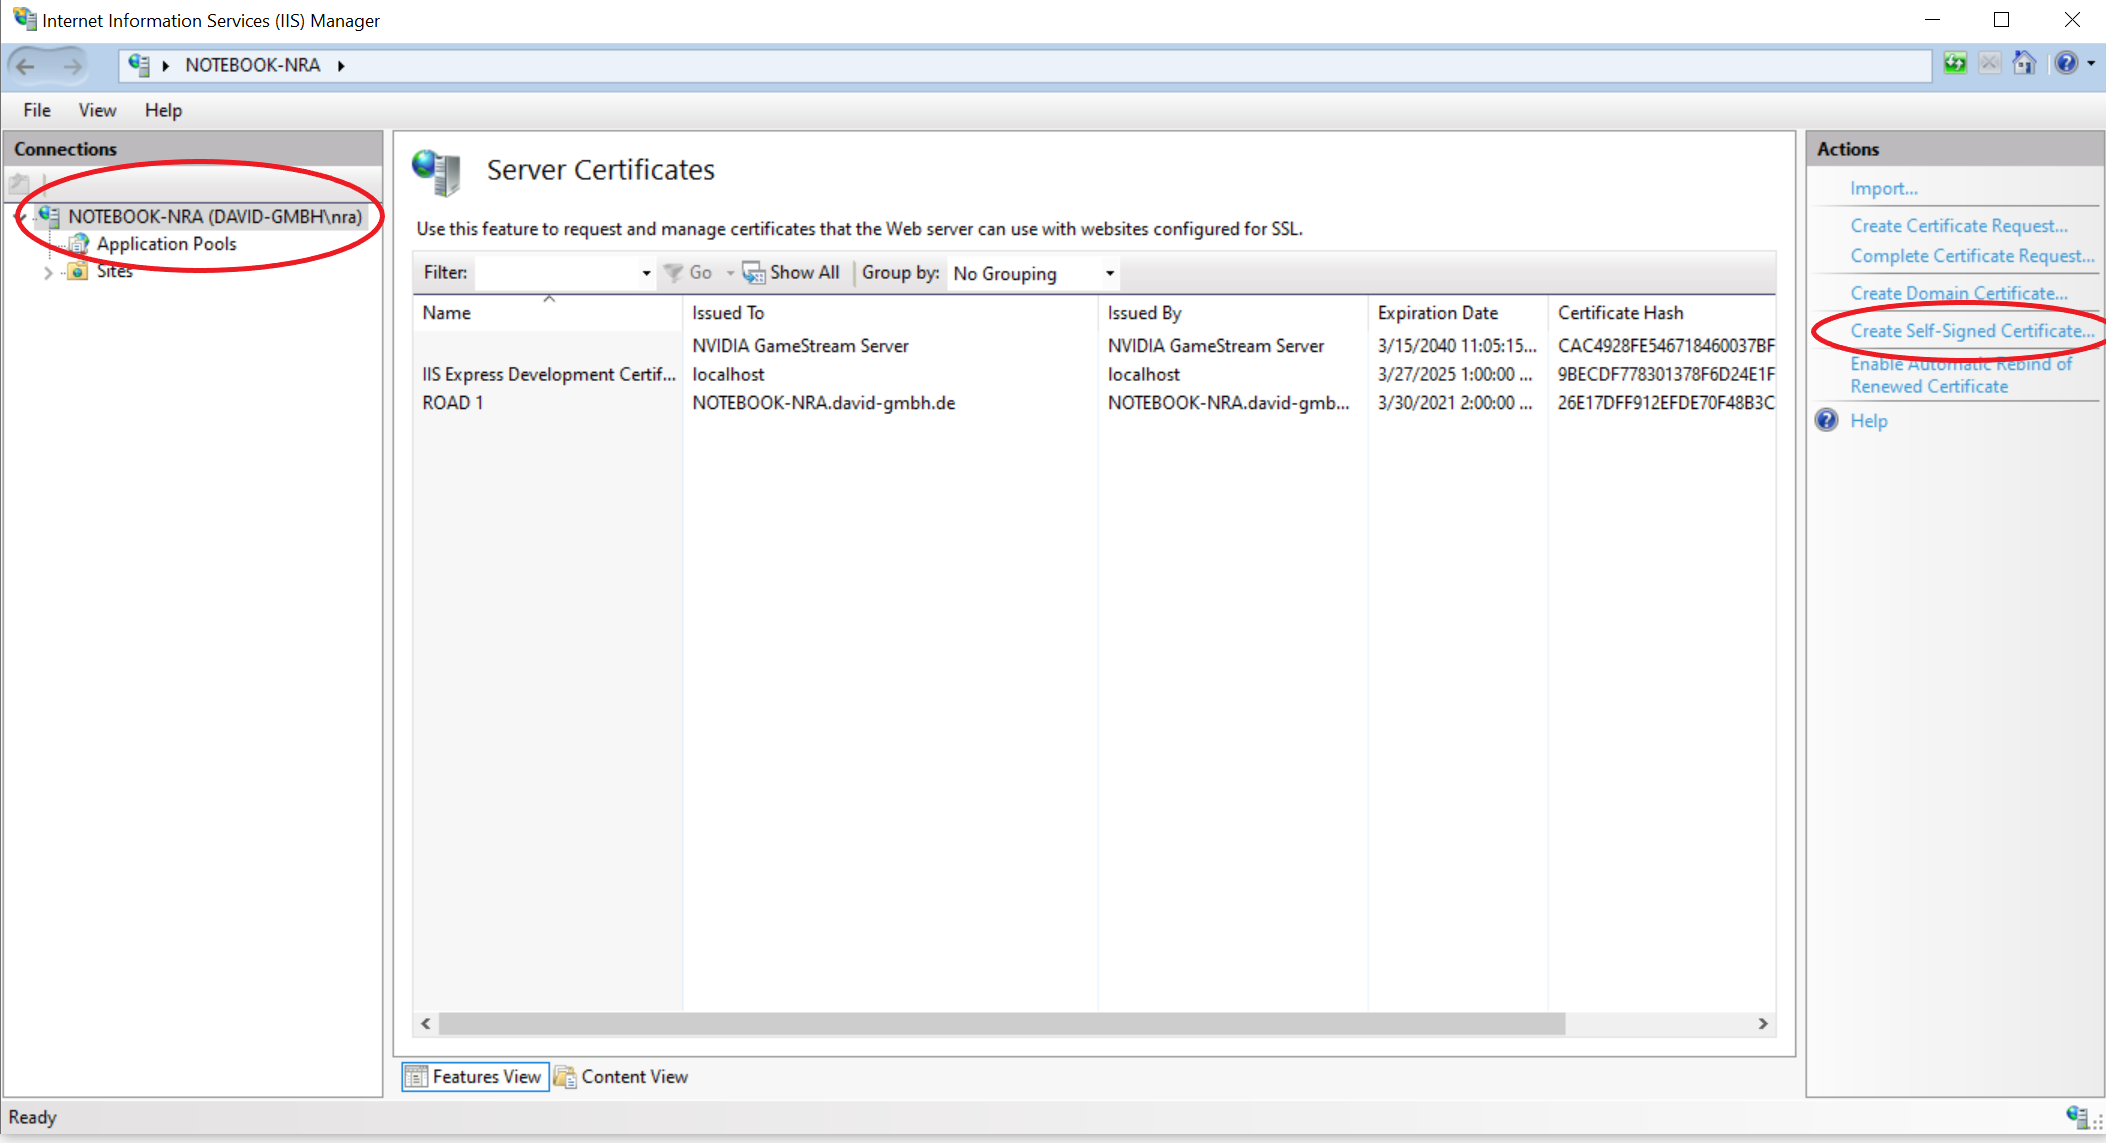
Start IIS Manager.
Make sure the root path of the computer is selected and press "Create Self-Signed certificate".
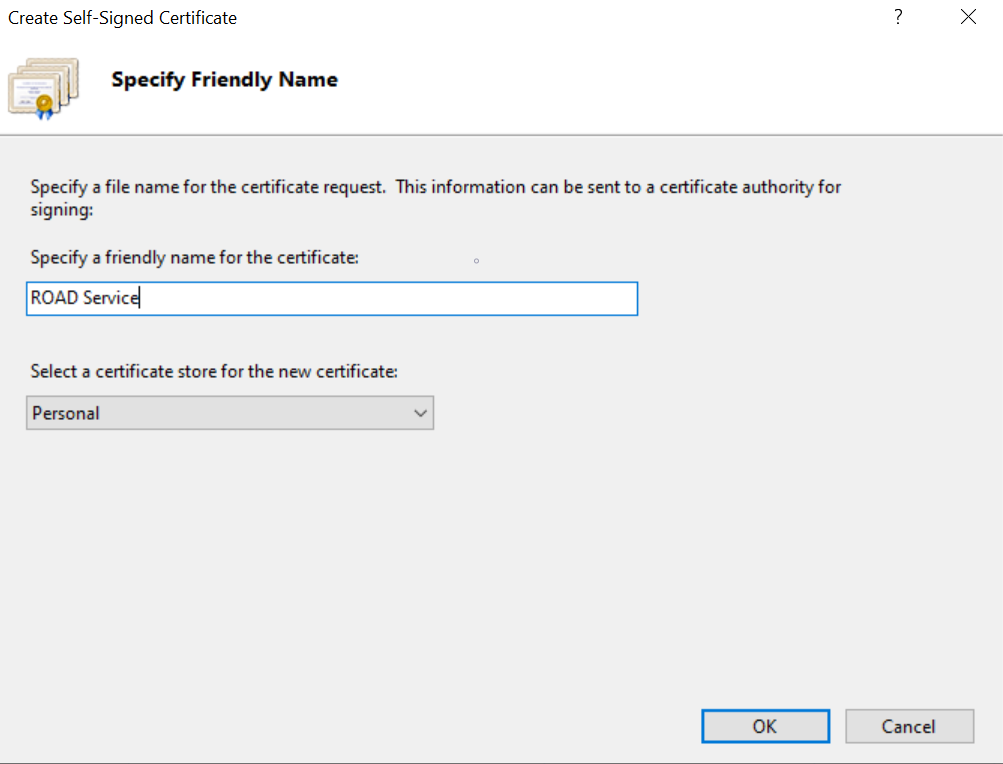
Specify a friendly name and specify the 'Personal' certificate store.
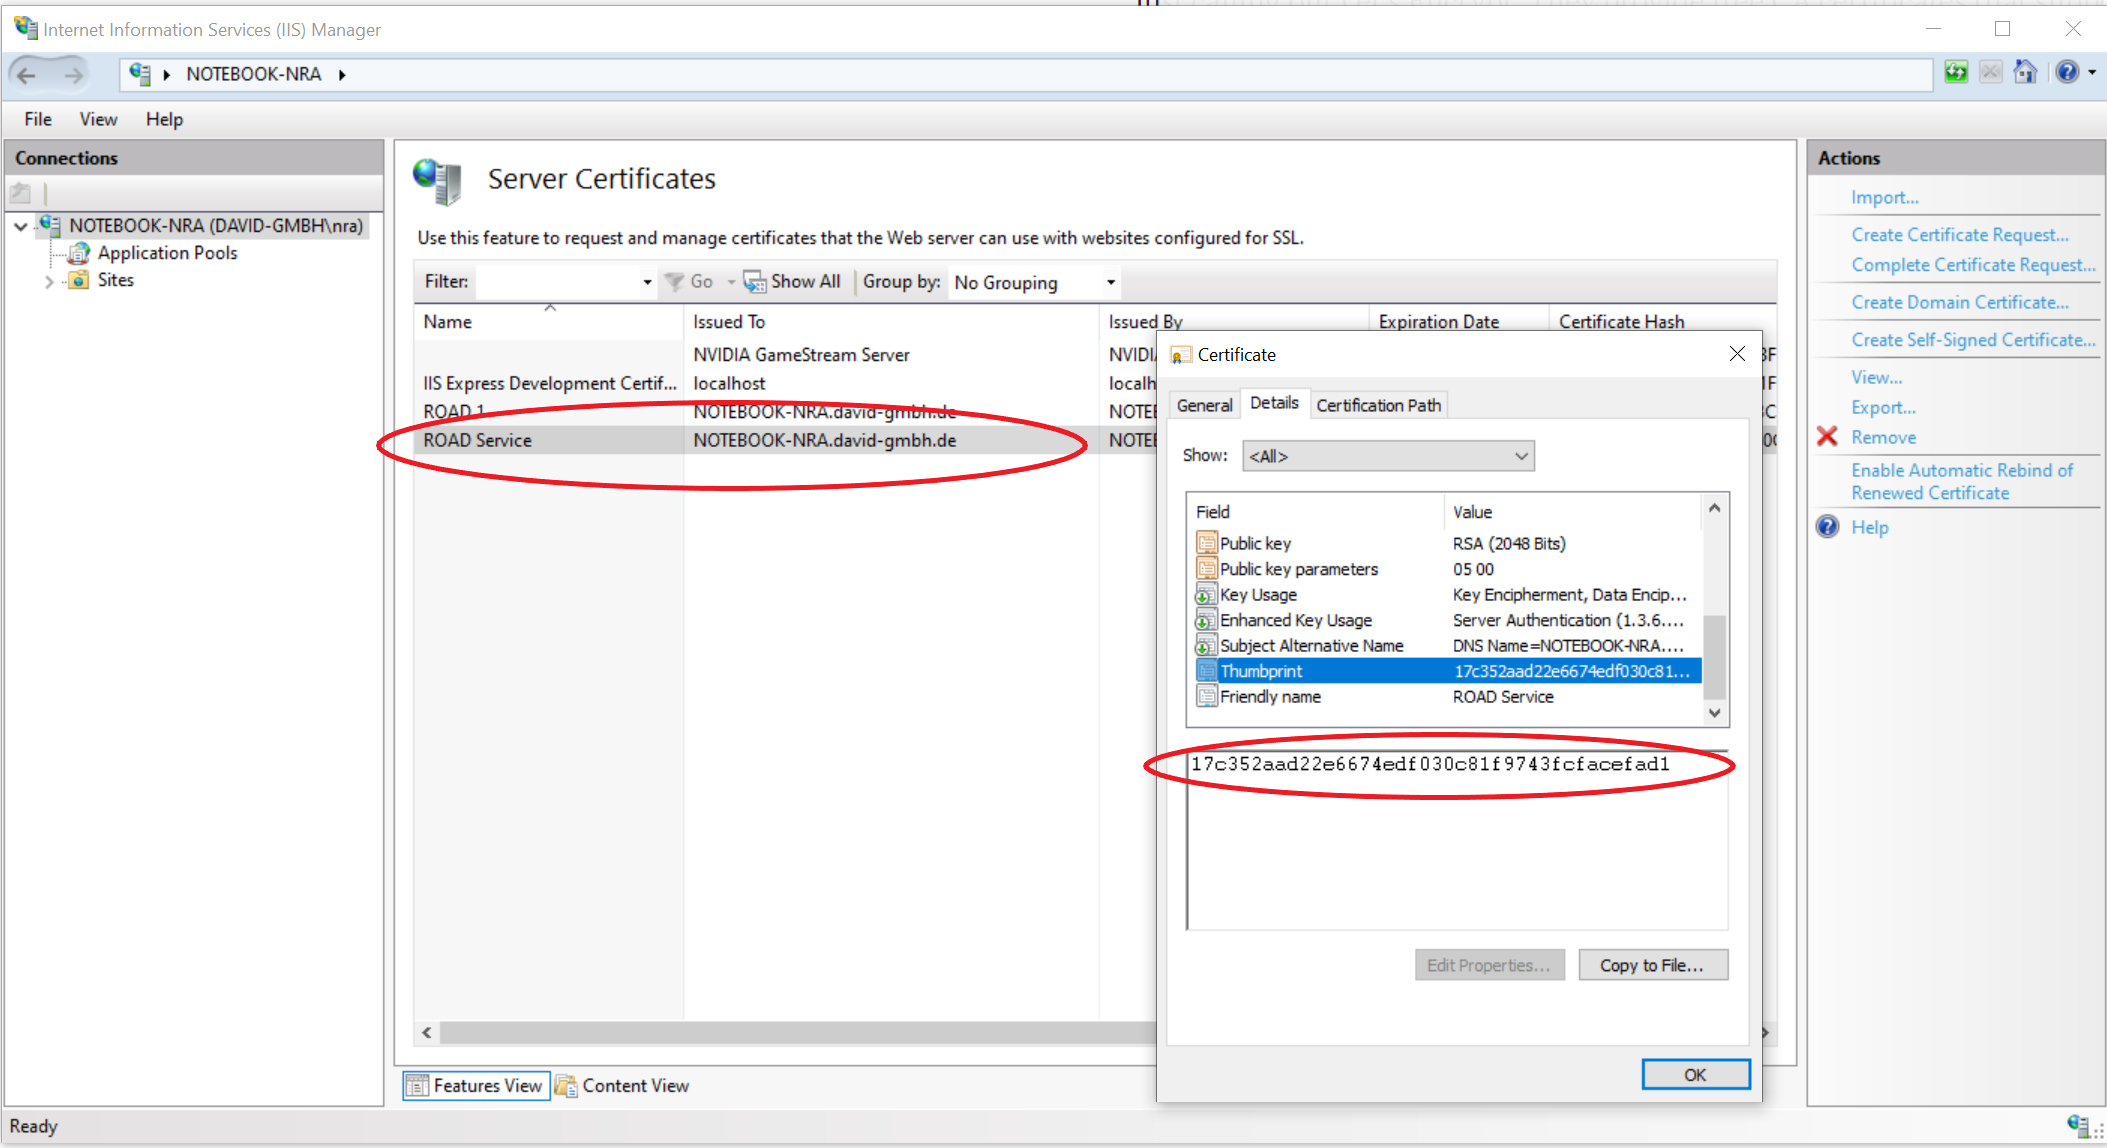
After pressing OK you have now a new certificate.

Double-click the new certificate to see its parameters. After switching to "Detail" and scrolling to the "Thumbprint" parameter, you see the hash value we need later on to assign the certificate to the IP port and you see the 'Issued To' value in the IIS main window.
You can open IIS Manager again to access your certificates.
Assign Certificate to port
To assign the certificate to the port you need an elevated command shell. You have to replace the value in 'certhash=' with the "Thumbprint" value of you certificate.
The create command is (replace the value for certhash by the one from IIS' Thumbprint):
netsh http add sslcert ipport=0.0.0.0:11005 certhash=0102030405060708090A appid={00112233-4455-6677-8899-AABBCCDDEEFF}
To delete the entry you use:
netsh http delete sslcert ipport=0.0.0.0:11005