The "Picture Podcast" functionality of the SingleTrack screen aids you in creating and publishing a podcast with underlying pictures and other graphic elements.
Overview
The SingleTrack screen, contained in all three audio editors (SingleTrack, EasyTrack, and MultiTrack) can display an additional "timeline" which can be filled with pictures from the editor's clipboard. Each picture is assigned a starting time on the timeline. When you're finished, you launch the external "PodcastRenderer" tool which renders pictures, audio, and (if present) speech transcript into a video. The transcript is displayed in a karaoke-like manner while the pictures are used as background for the podcast.
The resulting video file creates a fascinating experience for users who want to listen, or want to read, or even both, with background illustrations catching the user's attention even more than sole audio or sole text could ever do. Watch an example here.
Requirements
Required Software
-
MultiTrack editor, EasyTrack editor, or SingleTrack Editor version 7.6.1652.0 or higher
-
To use pictures stored in the Digas database: DBM version 5.5.8019.0 or higher
-
BCGPEdit260U141.dll to see the transcript in the speech-to-text pane
-
PodcastComposer and PodcastRenderer
All of the above is available through DAVID Systems.
Software Installation
Both PodcastComposer and PodcastRenderer come with a standalone installer. Simply run the installer. During the installation process, you are presented with the installation directory (and you can change the directory if desired). You will need this directory in one of the next subsections, when it comes to configuring the audio editor.
Data Directories
Two directories are required to hold the podcast data. The first directory will contain "podcast template" which define the arrangement, color, etc. of podcast elements. The second directory will contain the rendered video files. You must create these directories manually, and enter their locations into the parameters as described n the next subsection.
Configuration
Use the Digas Administrator to configure the following parameters. They can be set at USER, LOCAL, or GLOBAL levels. LOCAL settings override GLOBAL settings, and USER settings override both GLOBAL and LOCAL settings.
|
|
Set to 1 to enable "Picture Podcast" functionality, or to 0 to disable. The default value is 0. |
|
|
Set to 1 to see the transcript of the audio file. The default value is 0. |
|
|
The full path of the PodcastComposer tool. This is the directory which was displayed during installation of PodcastComposer plus the filename "PodcastComposer.exe". |
|
|
The full path of the PodcastRenderer tool. This is the directory which was displayed during installation of PodcastRenderer plus the filename "PodcastRenderer.exe". |
|
|
The full path of the directory that stores podcast templates. |
|
|
The full path of the directory that stores the rendered video podcast files. |
Workflows
Load Pictures into the Audio Editor
Similar to audio files, pictures must be loaded into the audio editor's clipboard before you can use them. You can use picture files from a local or remote storage or pictures that are stored in the DigaSystem database.
To load a picture, drag it from the file system or from within DBM into the audio editor's clipboard; alternatively, you can use the "Open..." or "Import..." commands from the audio editor's main menu. When loading a picture from DBM, drag it to the MTE, ETE, or STE button, or select it and use the corresponding entry from the pop-up menu or from the main menu, or press the accelerator key "Send entry to MultiTrack" etc. if you have assigned one. In other words, you can load pictures exactly as you can load audio.
Display the Picture Track
Now that you have pictures in the clipboard, you need a place to arrange them. Go to main menu → View → Picture track. This menu entry toggles the picture track on and off. When it is switched on, the height of the audio edit window is decreased, and the picture track takes up some space between the overview window and the edit window.
Display the Transcript
If your audio file comes with a transcript, you can display the transcript in the Speech-to-text pane. Go to main menu → View → Speech to text. This toggles the Speech-to-text pane on or off. When switched on, it is displayed below the edit window. (Note: This pane can be moved to anywhere on the screen, even to a different monitor, so it might be located in an unexpected position.)

Arrange Pictures along the Picture Track
Drag pictures from the clipboard into the picture track. The first picture you drop in the picture track will fill it completely. Subsequent pictures will start at the drop position and extend until the end of the timeline. If you want to have time ranges with no picture, load an empty picture into the clipboard and place it on the timeline.
Edit the Picture Track
Once you have dropped pictures into the picture track, you may want to do some fine-tune editing so that picture boundaries coincide with the spoken text and the transcript.
-
To remove a picture from the picture track, right-click the picture, then click "Delete picture" on the pop-up menu.
-
To remove a picture from the picture track and from the clipboard, click the "X" button on the picture in the clipboard.
-
To insert a picture between two other pictures, drag the new picture to the picture track and drop it in the desired position.
-
When you hold down the Shift key while dropping the picture, it completely replaces the old picture.
-
When you hold down the Ctrl key (but not the Shift key) while dropping the picture, it replaces the old picture up to the drop point.
-
With none of these keys held down, it replaces the old picture from the drop point on.
-
-
To move the boundary between two pictures on the picture track, move the mouse to the boundary until it takes on the "resize" shape. Then press and hold down the left mouse button and drag the border into the desired position.
Create a Podcast Template
The podcast template defines the layout of the generated video. You can define s many templates as you like. They are stored in the directory which is configured in the PodcastTemplatesPath parameter.
To create a new template, follow these steps:
-
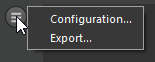
Click the "hamburger" menu button next to the picture track.
-
In the pop-up menu, click "Configure..."
In the podcast composer, you can rearrange the video layout and change foreground and background colors.
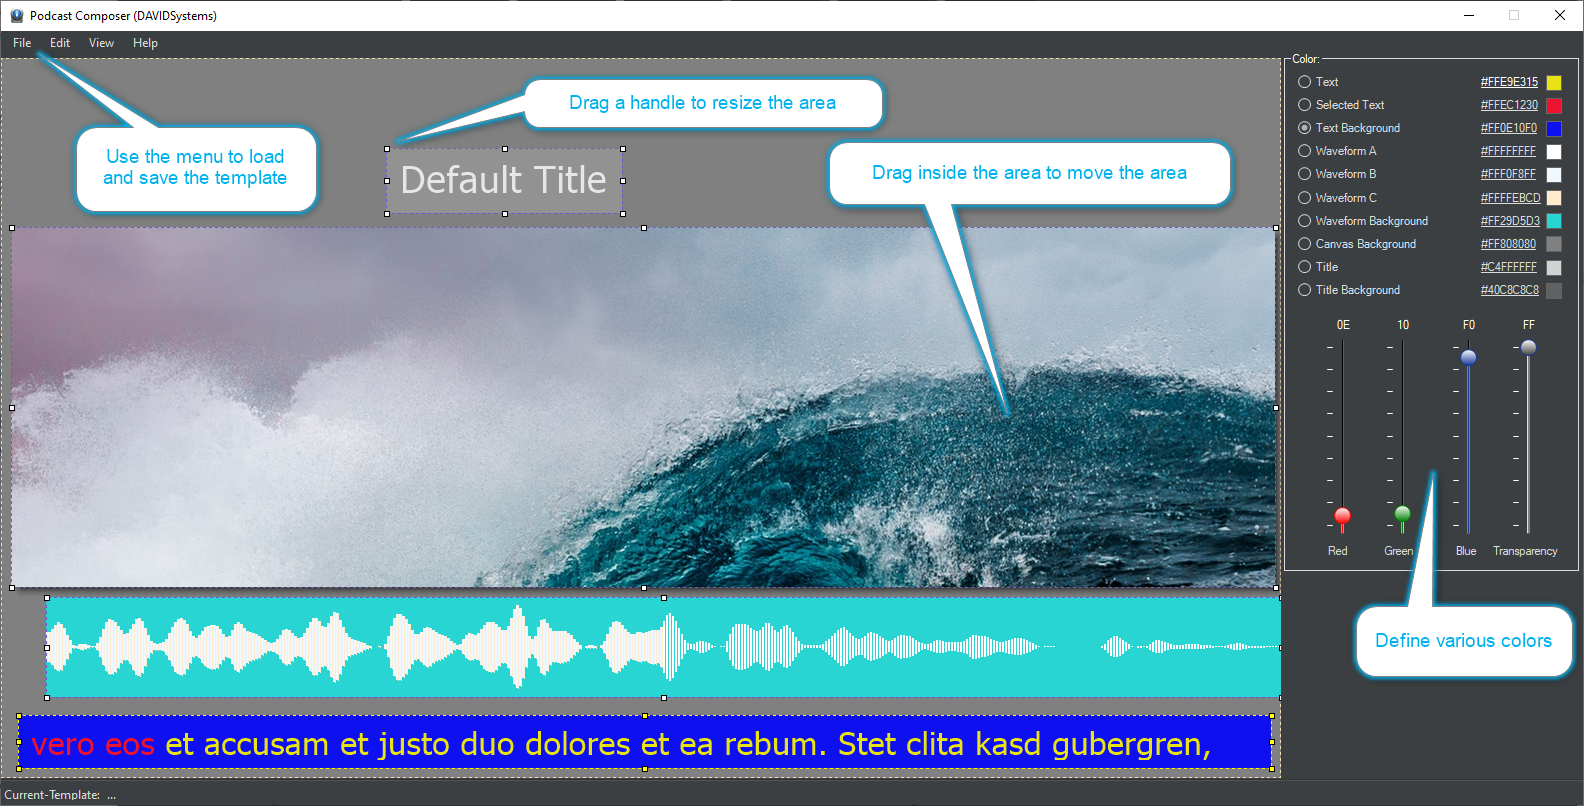
When you're done, don't forget to save your work. Then close podcast composer to return to the audio editor.
Create the Video
To actually create the video, follow these steps:
-
Click the "hamburger" menu button next to the picture track.
-
In the pop-up menu, click "Export..."
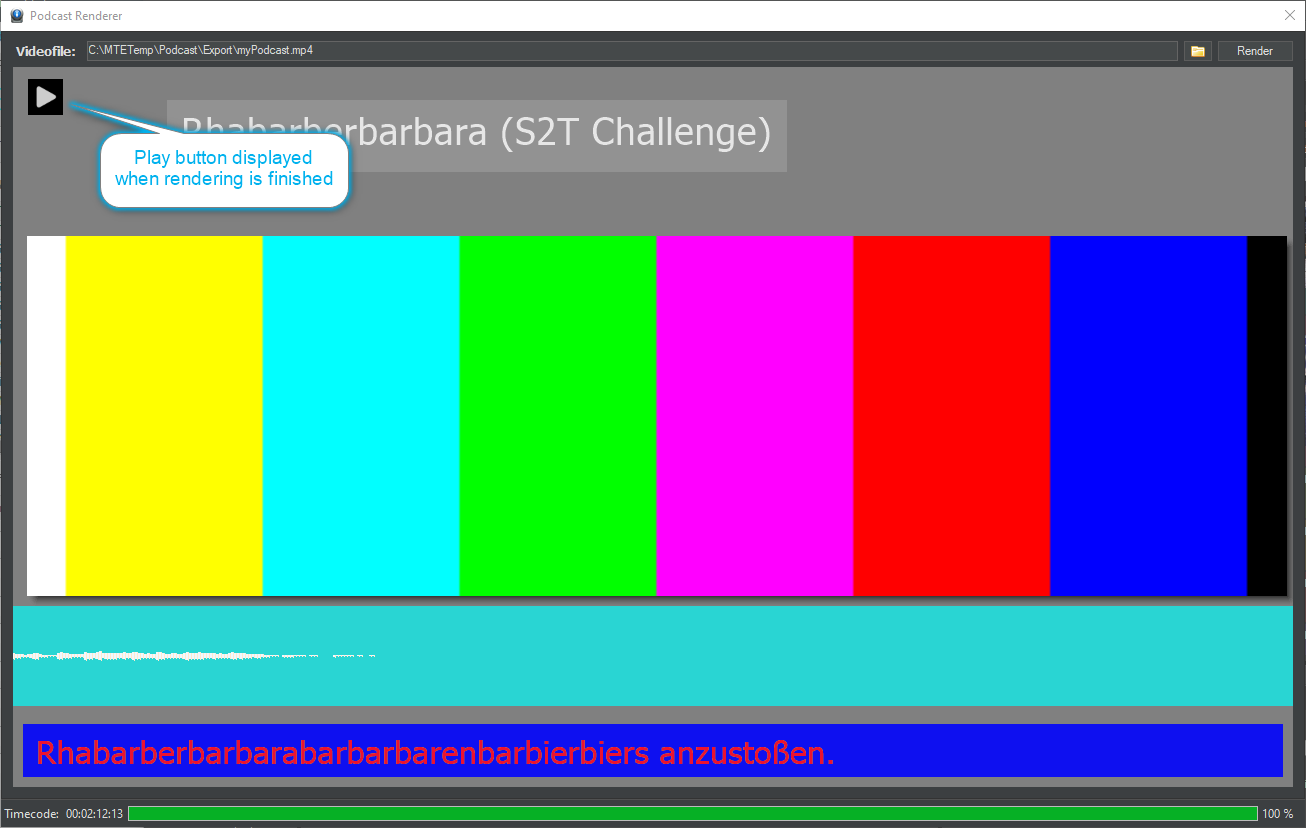
The audio editor now renders the audio file; then it opens the podcast video renderer tool. The tool immediately starts to work. A progress bar at the bottom of its window informs you about what is going on. Depending on the speed of your computer, you may have to wait for much longer than the total audio length.
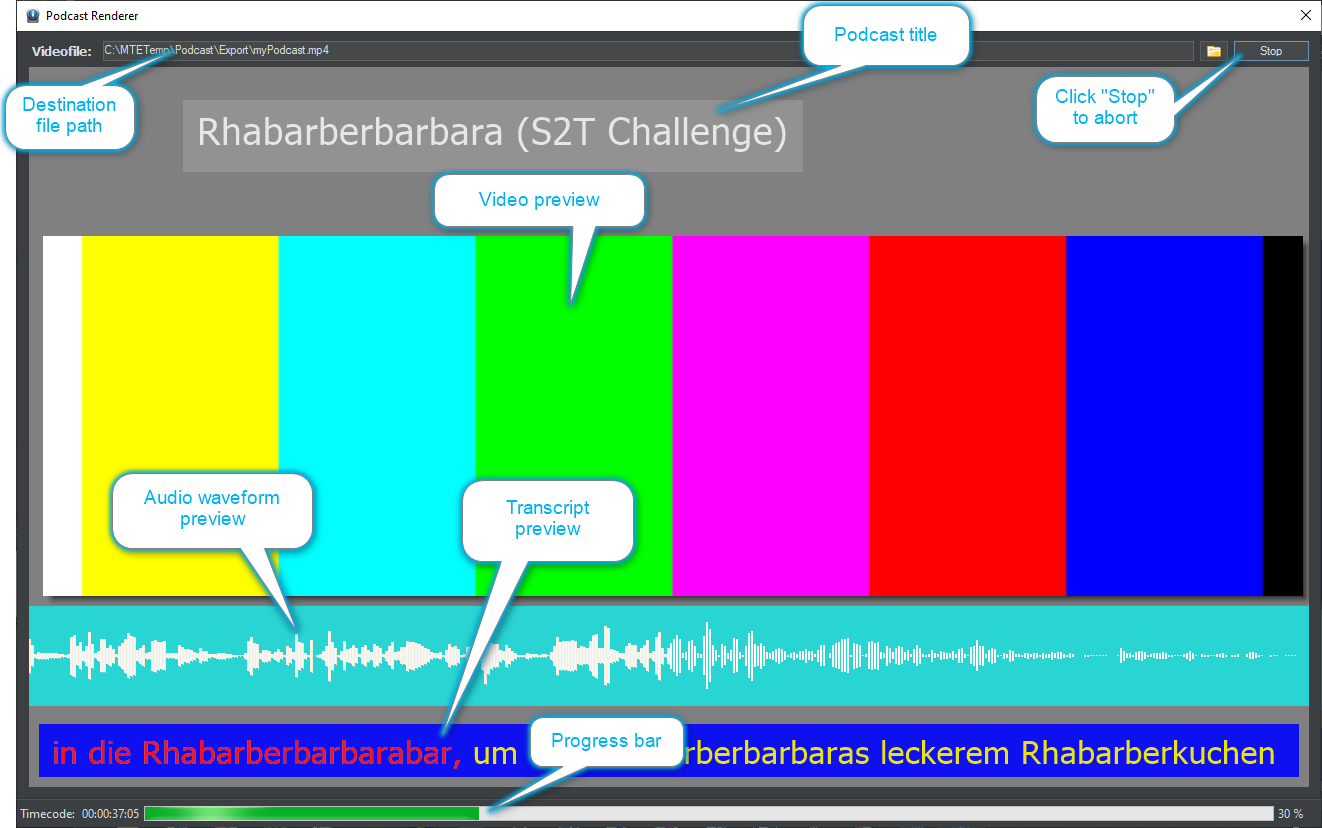
When the video file is complete, you can view it by pressing the "Play" button.