With the Record Mode screen, text and audio may be recorded and then saved as clips in the clipboard. The combination of audio and text within one clip is possible, enabling further workflows within the ReporterBox.
To change to the Record Mode screen, use the tabs at the lower screen edge. The background color then changes to red:

Define Recording Format Templates
With Options → Settings → Record, recording templates may be created. As soon as a template has been saved, a list box appears in the Record Mode screen and in the ReporterBox.
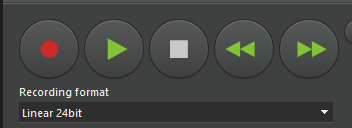
Before any recording, the desired Recording format template may be selected (here it is Linear 24bit). Without selecting a template, that format will be used which is defined in the Record tab.
Prepare Recording
|
|
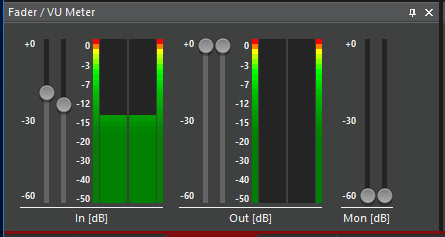
The recording function may be prepared without starting the actual recording. This is to listen to the audio source and to level the input signal.
|

Recording
A recording may be interrupted and restarted at any time - without deletion of previous recordings:
|
|
1. Click Record to prepare recording (as described above). |
|
|
2. Click Play to start recording. The waveform display shows the waveform of the current recording, and a red bar. |
|
|
3. Click Record to interrupt recording (pause). |
|
|
4. Click Play to continue recording. Recording resumes where it was previously paused. |
|
|
5. Click Stop to finish recording. |


Playback of Recording
To play the recording:
|
|
1. Double-click Stop to shift the sound head to the start position. |
|
|
2. Click Play to playback the recording. |
|
|
3. Click Stop to finish playback. |
Play from a selected Position
For moving the soundhead to a different position and starting the playback from there, you can
|
|
1. Click Play FFwd to start faster than normal audible run |
|
|
2. Click Play FRwd to start fast backward audible run |
|
|
3. Click Play to start playback in normal speed, or |
|
|
4. Click Stop to end audible runs or playback |


Alternatively, you can use the scroll bar:
|
|
|

Set Markers
Within the Record screen, markers may be set to visualize cut positions. When transferring the recording to the clipboard, these markers will be adopted.
|
|
Markers are set during recording, playback, or stop mode by clicking on the Add marker button. The marker will be set at the actual sound head position. |
|
|
Markers are deleted by clicking the Delete marker button. The marker at the current sound head position will be deleted. |


Name a Recording and Save as Clip
|
|
Before taking over a recording, a name must be assigned. Enter the name in Title, by replacing the default name “New recording”. In the fields First words and Last words, text may be entered to retrieve the start or the end of the audio clip later. |
|
|
To load the recording into the clipboard, click Audio take. The recording will be saved as audio take in the clipboard. Now you may change to another screen and continue editing the clip. |


Enter Text and save as Clip
Text may be entered via the text editor window. Marked text can be formatted:
|
Options →
|
Now, font, pitch, bold, italic, underlined, color, left/right/center justified und numeration may be defined. |
|
|
2. Clicking the Text clip button saves the text clip in the clipboard. Later, it may be edited via the ReporterBox |

