Reporter Box Screen
The Reporter Box is targeted for clip production in near-live environments. A good example may be the production of an interview, using already existing answers. Questions, initially available in the form of text scripts, can be recorded and arranged together with the answers.
Preparation: A script- and prompting area within the Reporter Box enables story preparation with texts and audio clips. Text may be generated locally, copied from Windows documents with drag&drop, imported from other applications, and then edited arbitrarily, with full RTF formatting support. Text paragraphs may be marked and saved as text clips in the clipboard. By simple drag&drop you can Insert audio and text clips from the clipboard and move them within a story.
At any time, the estimated total story time can be estimated using an adjustable speaker index.
Production: During recording, actual text blocks from scripts and prompting will be updated, thus allowing simple reading from screen. Audio clips may be inserted at any time to the current recording - just by button clicks.
Optionally, the speaker micro may be muted during playback, or stay open for verbal interaction.
Once the recording has been completed satisfactorily, then the production may be transferred to MultiTrack or EasyTrack for fine-tuning.
Window Sections and Elements
A typical screenshot of the Reporter Box is shown below, with explanations of elements differing from other screens. The Reporter Box serves the production of predefined elements saved in the clipboard. The reading of text parts from screen can be recorded and simultaneously sound bites can be added.
Reporter Box Screen has following Sections:
Symbol Bar (top left) | The symbol bar shows the valid commands for this screen (see details below). |
Sequence Board (middle left) | Audio and text components will be moved with drag&drop from the clipboard to the sequence board, which automatically scrolls with the start of the production. |
Clipboard (middle right) | The required clips can be moved from the clipboard to the according text field block |
Playback and Recording Track (below sequence board) | Shows the playback and recording track during the current production. |
Transport Buttons (lower right) | |
| Fader / VU Meter (lower left) |
The Symbol Bar
The symbol bar displays the available commands:

In detail:
| Open sound file. Opens the DigaSystem Database Manager or a Windows Select Box. After loading the selected file, it will be saved in the clipboard. | |
| Save sound file. Saving of the actual project as a new sound file. | |
| Undo last command. By clicking the arrow, a list of the last working steps will be displayed, from there, several steps may be selected and undone. | |
| Redo last command. By clicking the arrow, a list of the last undone steps will be displayed, from there, several steps may be selected and redone. | |
| Create clip. Saving of the finished production as a new clip, from the playback or recording track to the clipboard. | |
| Export of the finished production to another screen. The submenu offers the following options: Copy to one Track (in the MultiTrack or EasyTrack screen). An existing project will be overwritten. Copy to two Tracks (in the MultiTrack or EasyTrack screen). An existing project will be overwritten. Copy to one additional Track. Adding the finished production to one additional track in the MultiTrack screen (not available for EasyTrack). An existing project will be kept. Copy to two additional Tracks. Adding the finished production to two additional tracks in the MultiTrack screen (not available for EasyTrack). An existing project will be kept. Copy to SingleTrack Screen. Export of a finished production to the SingleTrack screen. | |
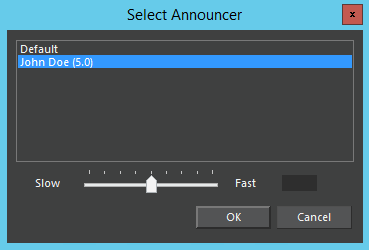
| Length Estimation. Calculation of the estimated production length. By clicking the arrow, several repositories listed in DigaSystem may be selected, or define a speed of speech.
The personal pace of speech may be determined with the application DigaSpeed (not part of the standard delivery, but may be requested from DAVID free of cost)
| |
| Live Mode: With the live mode activated, volume changes within the inserted audio material will be recorded by the DigaStudio Editor’s mixer during the current production. In this case however, the two tracks may not be edited individually, as the 2 sources (record track and added audio components) will be mixed into one track. | |


