Clipboard Tabs
Starting with version 7.2, you can use multiple tabs in the audio editor's clipboard to organize clips into groups.
What Tabs Are
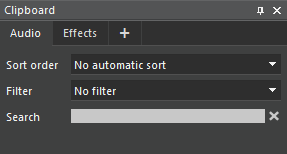
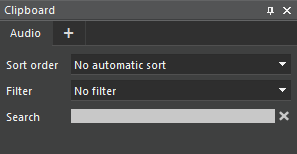
Like in a card box, tabs help you to keep your data in categories. Users of MultiTrackV7.exe have already seen tabs in the clipboard: "Audio" and "Effects". Users of EasyTrackV7.exe and SingleTrackV7.exe now also see the "Audio" tab in the clipboard.
Tabs in the clipboard of |
New: Tabs in the clipboard of |
When you click a tab, the connected page opens. This seems not very useful when only one page exists, but please be patient because you'll soon learn how to add tabs and pages.
The audio editors know three kinds of tabs:
- System tabs are "Audio" and (in the case if
MultiTrackV7.exe) "Effects". - Custom tabs are tabs that are created by the user, either interactively or through configuration values.
- The extension tab is labelled "+" and cannot be opened. You use it to create custom tabs.
Creating and Removing Tabs
Creating a Custom Tab
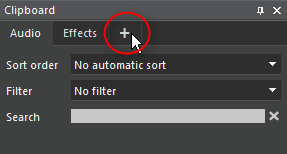
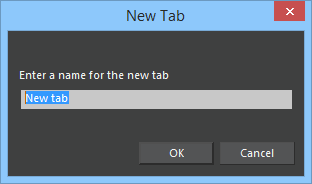
You can create a custom tab for clips by simply clicking the "+" extension tab of the clipboard. This pops up a dialog that asks you for the name of the new tab. There are no restrictions to the name, except that is must be unique among clipboard tabs. You should, of course, choose a name that has meaning in the context of your current work. Type the name, then click "OK".
|
|
Another way to create a new custom tab is to right-click an existing tab and then click "Add Tab..." from the pop-up menu.
Deleting a Tab
Too many tabs in your clipboard? Simply middle-click a tab to make it go away. Alternatively, right-click it and then click "Delete this Tab" from the pop-up menu.
Note that is not possible to delete the system tabs "Audio" and "Effects", nor, the "+" extension tab, nor a custom tab that has content; to delete a custom tab that has content, first move its content to a different tab.
Customizing Tab Names and Tab Order
Renaming a Tab
Don't like the tab name? Right-click, then click "Rename this Tab..." from the pop-up menu. Then enter the new name in the dialog that appears and click "OK". Again, the new name must be unique among clipboard tabs.
Only custom tabs can be renamed.
Changing Tab Order
Tabs have the wrong order? Simply press the left mouse button over a tab, then drag it (i.e. move the mouse while you hold the button down) to the desired position and finally release the mouse button. A small red line indicates the new position of the dragged tab.
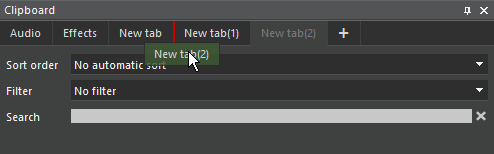
In this screenshot, the tab "New tab(2)" is being dragged; if the mouse button was released in this situation, the tab was inserted between "New tab" and "New tab(1)" as indicated by the red line.
The system tabs "Audio" and (for MultiTrackV7.exe) "Effects" always remain the left-most tabs. You cannot reorder them, nor can you place a custom tab in front of them. The "+" extension tab, on the other hand, always remains the last tab.
Using Tabs for Content
Now that you have learnt how to create, rename, reorder, and delete clipboard tabs, you may want to put them to use. This is as easy as it was with the old simple clipboard.
Basic Operation
- Open a clipboard tab to use it as "current tab". Drag audio and other items from the timeline, from DBM, or from the file system into the open clipboard and drop them there.
- Drag audio and other items from the timeline, from DBM, from the file system onto a clipboard tab that is not the current tab, and drop it there, to drop it into the respective tab without opening it; or hover over the tab (i.e. hold the mouse still while keeping the left mouse button down) to open and preview the tab before you drop the items.
- Drag items from the current clipboard tab onto a clipboard tab that is not the current tab, to move the items to that tab; or hover over the tab to open and preview it before you drop the items.
- Apply sort order, filter, and search terms as you used to. Each tab (except "Effects") maintains its own sort order, filter, and search terms.
- Select items in each tab by clicking them with the left mouse button; extend the selection by clicking while you hold down the SHIFT or CTRL keys. Each tab maintains its own list of selected items.
- Drag items from the current tab to the timeline, to the "Save" icon, or to DBM. For "bulk operations" (those that support multiple selection), only items from the current tab are used. For example, the keyboard accelerator "Delete selected clipboard objects" deletes from the current tab only.
Note: You can move every clipboard item to a different tab, but it is not possible to have the same item in more than one tab at a time, nor can items exist that are in no tab at all.
Scrolling
If you use many custom tabs, or custom tabs that have long names, it may happen that the clipboard is too narrow to display all tabs. In this case, scroll arrows are displayed.
Scroll arrows in vertical clipboard layout |
Scroll arrows in horizontal clipboard layout |
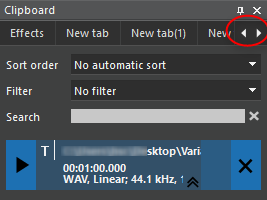
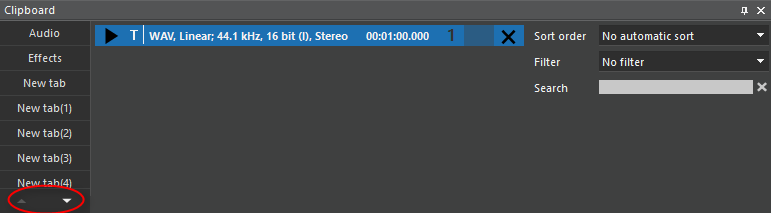
Click these buttons to scroll invisible tabs into view.
While you are dragging items into a clipboard tab, you can hover the mouse over a scroll arrow to scroll invisible tabs into view, so that you can drop items in tabs which are not displayed when you start dragging.
Preconfigured Tabs
Once you get used to working with custom tabs, you will want to have a set of custom tabs available whenever you start to work with the audio editor. Use the Digas "Admin" tool (or ask your administrator if you don't have the rights to use the tool) to define the following entry:
MultiTrackV7.exe |
|
EasyTrackV7.exe | EasyTrack\Settings\ClipboardTabs |
SingleTrackV7.exe | SingleTrack\Settings\ClipboardTabs |
The value which you must assign to this entry contains the custom tab names, ordered from left to right, and separated by vertical bars (|). For example, ClipboardTabs=Clips|Jingles|Music.
Each time you start the audio editor, these tabs are created for you. Still, they are custom tabs which you can rename, reorder, or delete.
Tabs in Projects
When you create and save a project in the audio editor, clipboard tabs are saved into the project file. When you load this project file, custom clipboards are re-created in the order in which they existed when the project was saved, and clips, takes, and other items are placed into the same tabs in which they had been when the project was created.
One notable exception occurs when, while loading the project, a clipboard should be created that already exists. In this case, the existing clipboard is simply re-used, and is neither re-created, nor is it moved to a different position.
To enable saving clipboard tabs, the project file format was carefully extended so that older versions of the audio editor can still read it. An old editor will, of course, ignore the clipboard configuration, and will place all clipboard items into the only tab it knows. When you then save the project from the old audio editor, the clipboard information is lost.