
The DigaSystem Audio Editors work with a pool of media objects which are listed in the Clipboard pane.
All editor screens share this clipboard. All objects in the timeline of any screen are part of the clipboard, which can provide even more material. Adding items to the clipboard can be done at any time from different sources.
Vertical layout
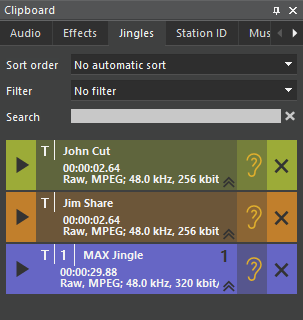
Horizontal layout

The clipboard pane contains some tabs which keep lists of items to get them organized. Two tabs are pre-defined: Audio and Effects. The Effects tab shows all available effect plugins.
General Usage
Clipboard Items
Each clipboard tab shows a list of media items, which can be of different types:
-
Audio: Here the editor distinguish between takes and clips. Takes are represented as audio files (in the file system or database), clips are references to takes or parts of takes.
-
Text
-
Placeholder: Also called virtual elements
The layout of the items in the list depends on the size of the whole clipboard. In vertical layout the items' data is arranged in multiple lines. In horizontal layout all data is displayed in one line.
Vertical layout
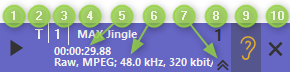
Horizontal layout

|
|
Element |
Description |
|---|---|---|
|
1 |
Play/Stop button |
Start playback for prelistening. (while playback the button changes to a Stop button) |
|
2 |
Object type |
T: Take or Text
|
|
3 |
Usage count |
Count of references to this object in timeline of currently open screen. Omitted for zero count. |
|
4 |
Title |
Object title or file name |
|
5 |
Duration
|
Length of audio |
|
6 |
Format info
|
Format info depends on actual data |
|
7 |
Collapse/enlarge button
|
Collapses the item's data to only the first line (to save display space) or enlarges it |
|
8 |
Selection index |
Shows the sequence number of selected items |
|
9 |
Loudness ear symbol |
Loudness ear indicating the loudness state of the item When hovering the mouse over it a tooltip with the full loudness data appears. |
|
10 |
Delete button |
Removes item from clipboard. If it is used in the editor's timeline, a warning appears. |
Item's Context Menu
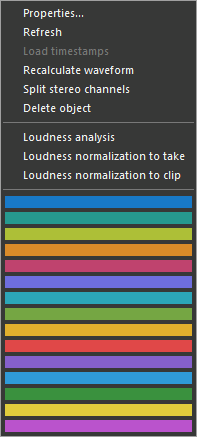
With a right-click on an item its context menu pops up:
|
Menu Item |
Description |
|---|---|
|
Properties... (or double-click on item) |
Opens the Properties dialog for the item. |
|
Refresh |
Refresh file length (for growing files). |
|
Load timestamps |
Load timestamps. |
|
Recalculate waveform |
Recalculates the waveform. |
|
Split stereo channels |
Create new stereo split items from clipboard objects, see Clipboard Stereo Split. |
|
Delete object |
Removes the object from clipboard (no files are deleted). If it is referenced in the timeline of any screen, a warning is posted. |
|
Loudness analysis |
Starts a loudness analysis for this data. When finished, the result appears as loudness ear state. |
|
Loudness normalization to take |
Starts a loudness normalization. The correction gain is calculated into a newly rendered take, which appears at the bottom of the clipboard's list. |
|
Loudness normalization to clip |
Starts a loudness normalization. The correction gain is set as meta data into a clip, which appears at the bottom of the clipboard's list. |
|
colors |
Select one of the provided colors to change the item's color in clipboard and at any location in the timeline where it's used. |
Sort and Search
In the top area of the clipboard there are control items to sort and search inside the item list below.
-
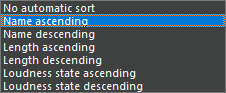
Sort order: Select a sort order
-
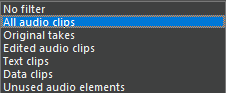
Filter: Select a filter
-
Search: Enter a search term to be applied on the items' title. Click the "x" symbol to clear this filter.
Data Exchange, Use Clipboard Objects
Media objects of supported types can be added to the clipboard by different ways:
-
Drag and drop a file from the Windows Explorer to the clipboard or to the timeline
-
Drag and drop an object from the DigaSystem Database Manager (DBM) or open it there by context menu, etc.
-
File open via main menu
-
Creation of new objects via various options inside the Audio Editors
Special Functions
Further documentation pages: