Overview
Individual Entries are located inside Tables, following a database structure. Tables are created by the administrator, using administrative tools (Digas Admin or DPE Admin).
Each table is located in a database, which is also called Server in these manuals, and has a (technical) name. For users' convenience, administrators can assign user friendly names to tables, which are sometimes called aliases.
Tables are connected with individual access rights which are also granted by the administrator. Access rights allow actions such as searching a table, opening or editing an entry, or creating new entries. DBM only displays the names of tables for which the current user has at least one access right.
The TABLES Grid
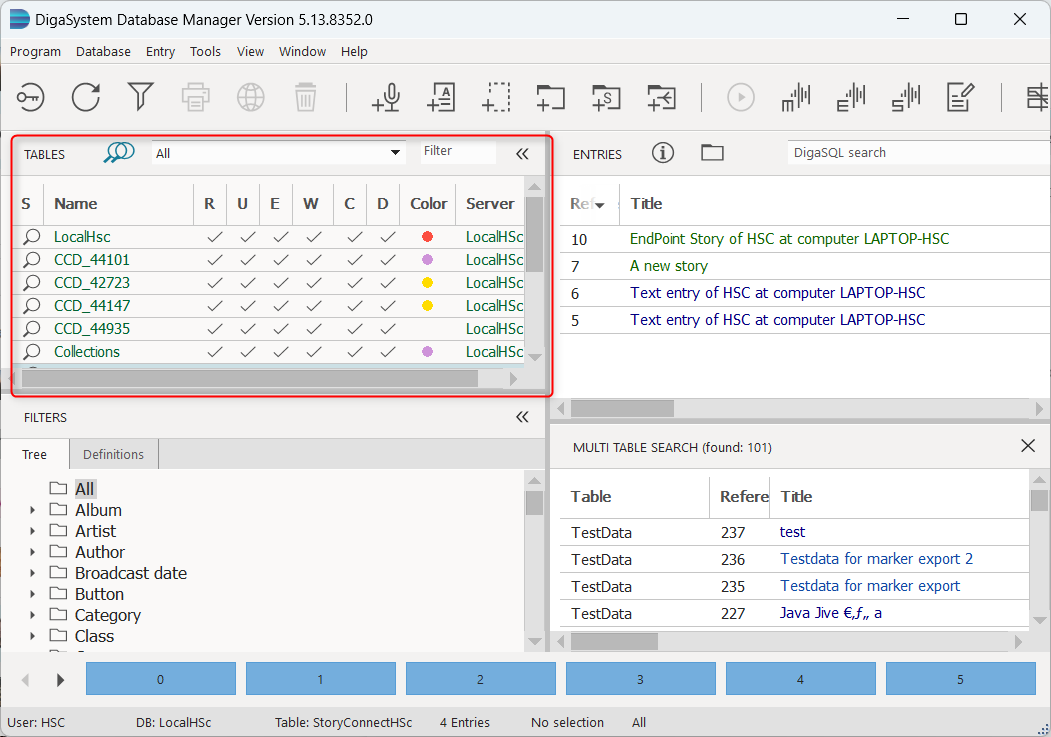
The TABLES grid in the upper left corner of the DBM GUI displays the list of tables. Technical and alias names, server name, access rights, and some additional data are indicated in the configurable columns of this grid.
Columns are selected in the "Settings" dialog. You can enlarge, shrink, and swap columns by dragging the mouse in the grid's title bar.
To view the entries in a table, click any part of the table's row in the grid with the left mouse button. The ENTRIES grid in the right part of the DBM GUI then loads and displays the entries. Depending on the connection speed and the number of entries in the table, this may take some time.
Columns of the TABLES grid
The following columns can be displayed in the TABLES grid. More details can be found in the following subsections of this page.
|
Column title |
Explanation |
|---|---|
|
Name |
User friendly table name |
|
Server |
Database name |
|
Table |
Technical table name |
|
Color |
User assigned color code |
|
A (align) |
Access right: Align tables |
|
C (create) |
Access right: Create entries |
|
D (delete) |
Access right: Soft delete entries |
|
E (erase) |
Access right: Erase (hard delete) entries |
|
R (read) |
Access right: Read table content |
|
S (search) (*) |
multi table search |
|
U (use) |
Access right: Open entry content |
|
W (write) |
Access right: Edit entries |
|
F (full-text index) |
Full-text index search available |
|
NCS |
Table is NCS aligned |
(*) The “S” column cannot be configured. It is displayed when multi-table search mode is active only.
Connection State
When a table’s content is accessed, DBM needs to establish the connection to the database. The connection is kept open until you either close DBM, or explicitly disconnect (more on this topic later).
The TABLES grid shows the connection state by different colors:
|
Color |
Connection State |
|---|---|
|
green |
conncted |
|
blue |
disconnected |
|
red |
access disabled by administrator |
Note that these colors are default values, and administrators can modify them in the color scheme.
Organizing and Finding Tables
The topics in this section help you to find more quickly the tables with which you work most frequently.
Table Colors
Table colors help you organize the tables with which you are working most frequently. You can assign one out of a list of 7 colors to your favorite tables. This makes a colored dot appear in the “Color” column. This feature comes in handy when you have a large list of tables, but your everyday work requires only a handful of them.
To assign a table color, right-click a table, then select “Color” from the pop-up menu.
If the “Color” column is not displayed, open the Settings dialog, go to the “Columns” page, and check the “Color” entry in the left grid. For details, see the chapter “Re-Arranging Table Columns” on this page.
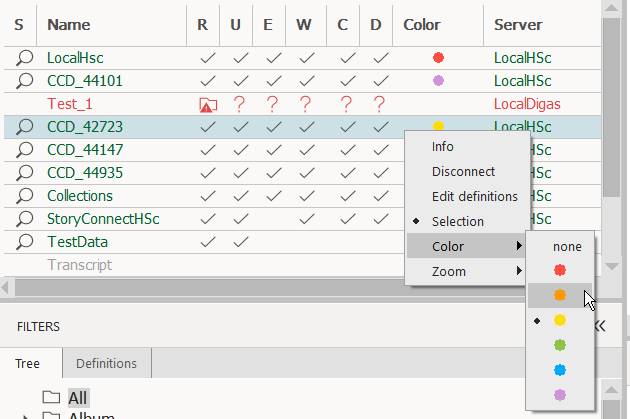
Table colors are saved to the personal (USER) registry and are not shared with other users. When you start DBM for the next time, and log on with the same user, the same colors are displayed.
DPE Content Manager uses the same table colors as DBM. The colors you define in DBM will also be available in CM, and vice versa.
Ordering the List
The initial order in which tables appear in the TABLES grid is defined by configuration settings made by an administrator.
To order tables according to a specific column, click the respective column header. When you order by “Color”, then the colored tables appear on top of the list.
Click a second time to invert the order (from ascending to descending), and a third time to return to the default order.
Using Table Groups
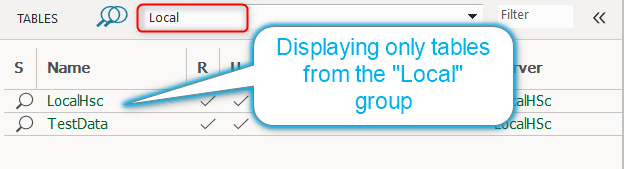
The Administrator can assign each table to a table group. The “Table group” combo box above the TABLES grid lets you display only the tables from this group.
Filtering Table Names
The “Filter” field next to the “Table group” combo allows you to filter tables by their (user friendly) name. This filter works as you type. Just type a fragment of the table name, and if you still see too many tables, type a blank (press the spacebar), and type another fragment.
Re-Arranging Table Columns
As was already briefly mentioned, you use the Configuration dialog to add or remove columns from the TABLES grid.
Go to main menu → Program → Settings → Columns. The column configuration for TALES is on the left side of this dialog. Add or remove the check marks in the “On” column to add or remove columns.

You only see the new column configuration after you click the “OK” button. New columns are added at the far right end of the grid.
To move a column to a different position, press the left mouse button over the column head and, without releasing the button, drag the column into the desired position. Then release the mouse button.
To change the column witth, place the mouse over the divider between two column headers where it takes the shape of a vertical line and two horizontal arrows. Press the left mouse button and drag the mouse until the column has the desired width, then release the mouse button.

Access Rights
As was mentioned on this page, each table is connected with a set of access rights which an administrator can grant to users. These rights are indicated in columns of the TABLES grid.
-
Align: This right allows to read data from mobile devices into the table.
-
Create: Allows to create new table entries.
-
Delete: Users can soft delete files. (Soft deleted files can be restored.)
-
Erase: Users can hard delete entries. (Hard deleted entries are gone forever and cannot be restored.)
-
Read: Users can display the content of the table.
-
Use: Users can open an entry in the metadata mask.
-
Write: Users can modify entries.
Context Menu
When you press the right mouse button on an entry in the TABLES grid, a menu pops up which offers additional operations.
These are the items on this menu:
|
Info |
Opens the "Table info" dialog |
|---|---|
|
Disconnect |
Disconnects from the current table in the database. |
|
Edit Definitions |
Opens a dialog where the values of entry mask fields can be edited, deleted or created (equivalent to menu option Database - Edit Definitions c.f. The Menu Bar) |
|
Selection |
When multi table search is active, this item selects or deselects the table for multi-table search. This is equivalent to clicking into the "S" column. |
|
Color |
Lets you define a table color as described further up in this page. |
|
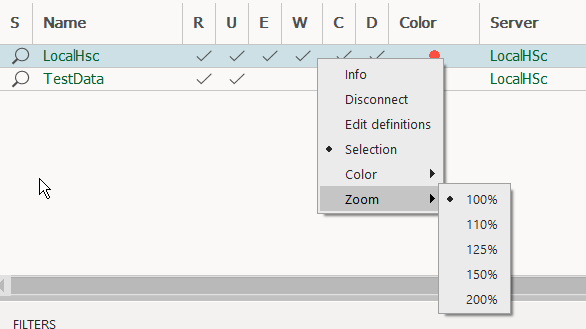
Zoom |
Enlarge the font of the TABLES grid. |
Selecting Tables
-
Click on a table to view its entries and use the arrow keys to navigate between tables.
You can configure DBM to open a specific table immediately after user logon: Open the Settings dialog (main menu → Program → Settings...) and go to the "View" tab where you find the "Initial table" combo box.
Multi Table Search
Multi table search allows to search for table entries across several tables. To activate multi table search, click the double-magnifier glass icon to the left of the “table group” combo.

While multi table search is active, the icon changes to a blueish color, and the multi table search result grid is inserted into the lower right part of the GUI.
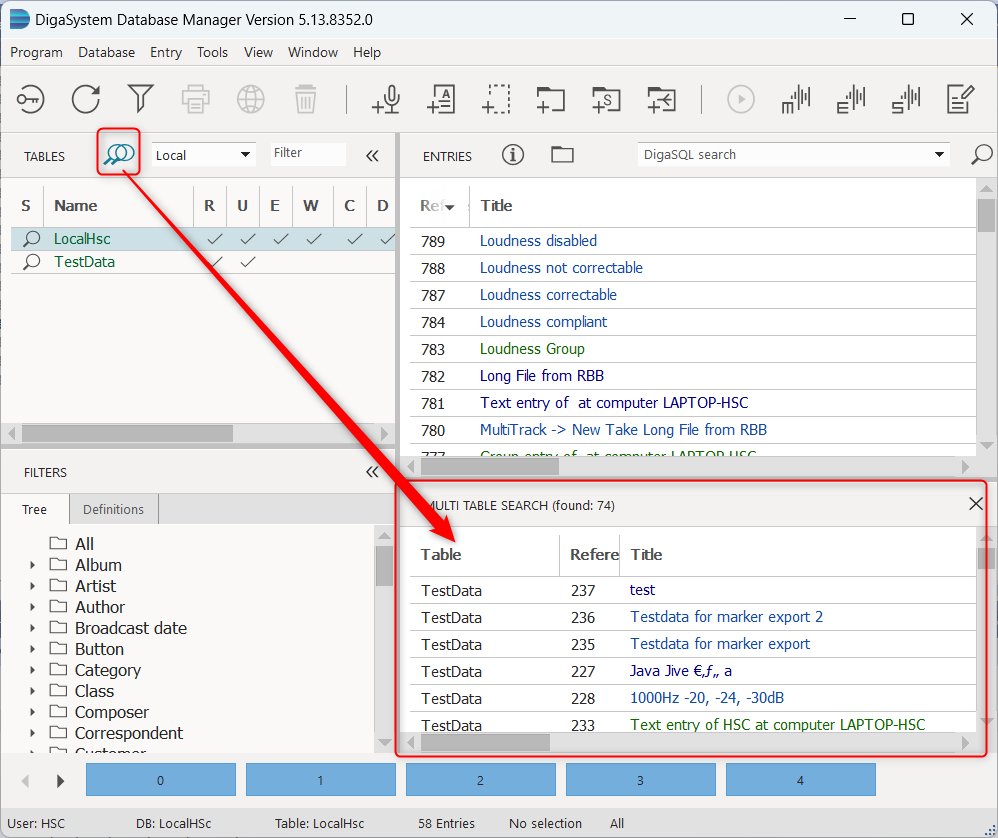
Click the button once more, or close the multi table search result, to deactivate multi table search.
In multi table search mode, the TABLES grid displays the “S” column. This column is clickable: To select a table for search, click the “S” column; to deselect it, click once more.
To quickly select or deselect a range of tables, click the first table, then hold down the SHIFT key while you click the last table. All tables in this range will switch to selected if the first table was deselected, or to deselected if the first table was selected.
As of now, multi-table search only works with the straightforward text search in the title bar of the ENTRIES grid. For details, see Finding Entries.