Prerequisites
Inside Digas Admin
-
A Table dedicated for Carts has to be created inside Admin, e.g. CartsTable
-
To enable the color editing view inside DBM for defining the cart colors (see step “Edit definitions“ bellow under “Inside DBM”), a BCS program/service has to be assigned to the Car Table →
-
Under Global\Digas\Database\<DatabaseName>\<CartsTable> assign a BCS program/service → add the Parameter AssignedProgram=<BCS program/service name>
-
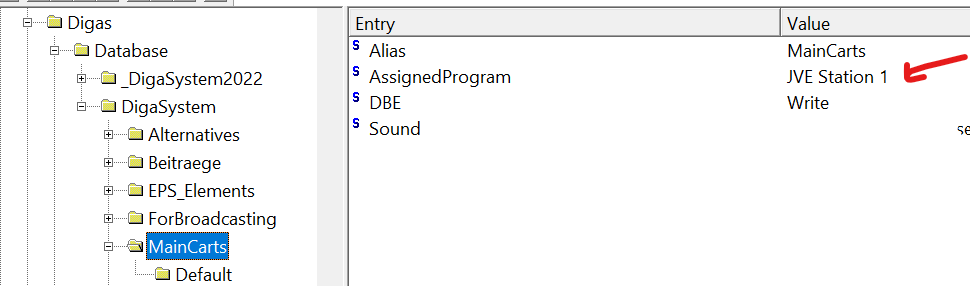
AssignedProgram Parameter
“Tells the DatabaseManager which colors should be used when displaying mini-carts in the corresponding column. In the global top-level key "Cart" colors can be defined for multiple programs (=services) and you have to define which program (color set) should be used for this table.”
The previous steps can also be done inside the DPE Admin
-
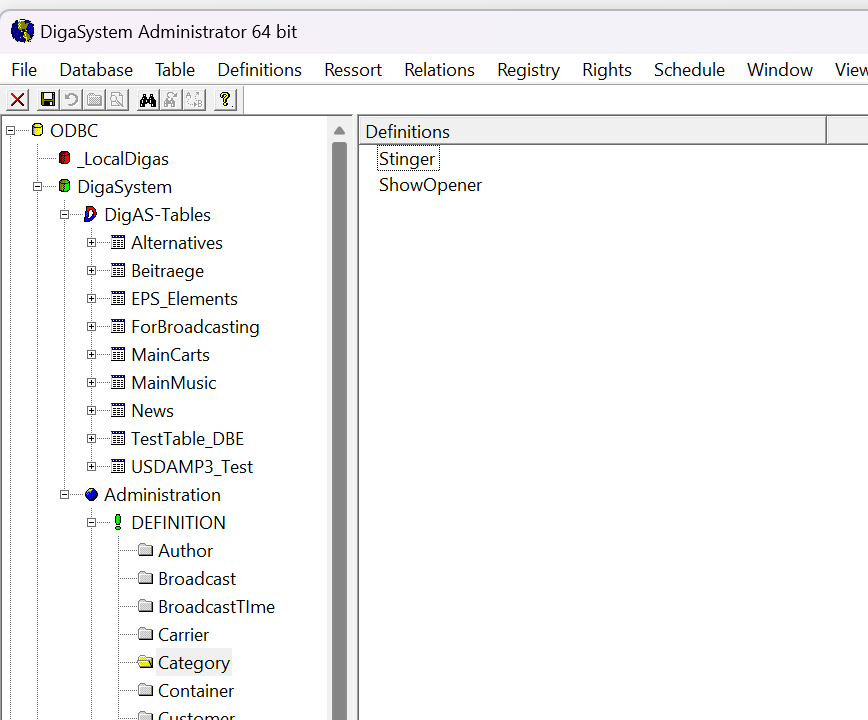
Definitions for the Cart categories need to be defined:
-
Inside ODBC\<Database>\Administration\DEFINITION\Category
-
E.g. Stinger, ShowOpener
-
-
Defining Cart Colors in DBM
Inside DBM
-
Open DBM with an account that has enough rights (e.g. Admin)
-
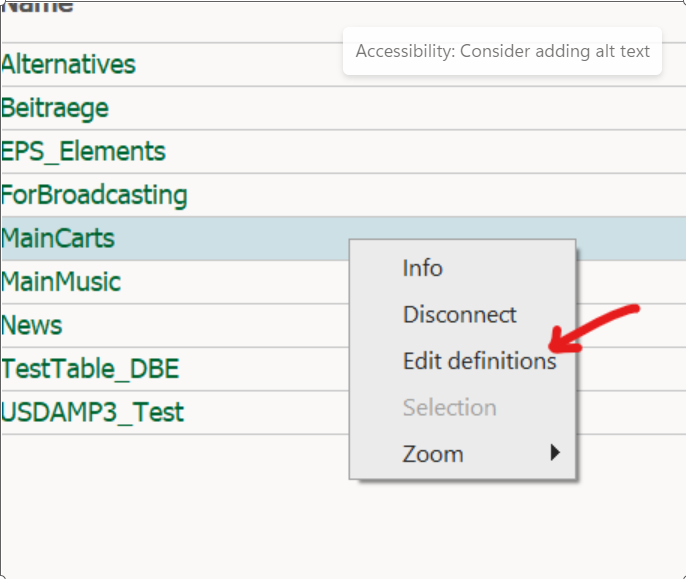
Select on the left the Cart Table (in the example bellow MainCarts).
-
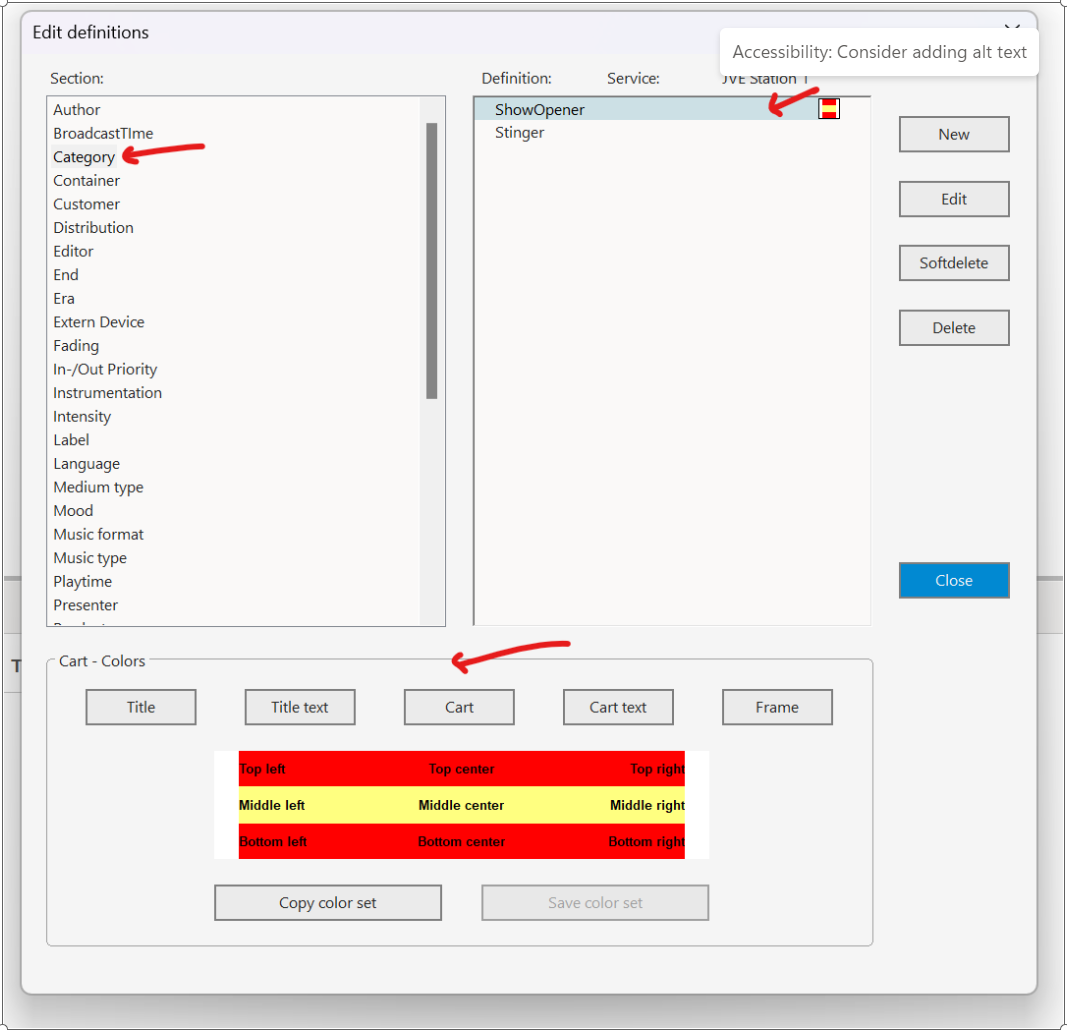
Right-Click on the Table name and select “Edit definitions”
-
In the “Edit definitions” window:
-
select under “Section” → “Category“
-
select under “Definition“ a Cart definition to edit and define its color (on the bottom of the window under “Cart - Colors”)
-
Inside Digas Admin
The following steps can also be done inside the DPE Admin
-
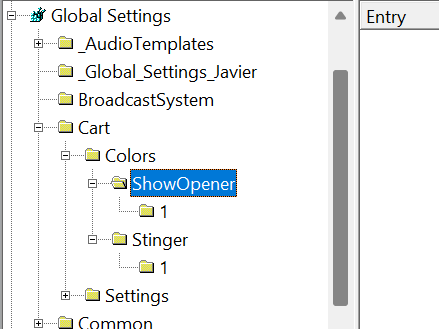
After defining the Carts colors in DBM, the following folders should be now available:
-
Global Settings\Cart
-
Global Settings\Cart\Colors
-
Global Settings\Cart\Colors\<CartCategoryDefinition>
-
Other Relevant Information regarding Carts Settings
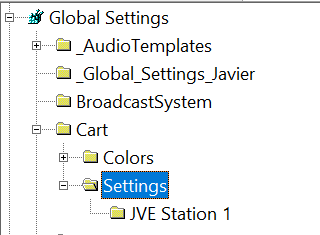
Under Global Settings\Cart a Subfolder “Settings“ can be added
-
“Settings” description:
-
“This key specifies one service name. Below are the settings for this service. In the parameters defining the cart content you can use placeholders for the database field as they are used within a DigasSectionStringXML. Examples: "%TITLE%" or "%CATEGORY%" or "%SPEAKER% ( %INTENSITY% )". If fields INTRO or INTRO2 are used, there is the possibility of changing the format in which these fields will be displayed. This is done my adding {m:ss} or {s} after the field name. If the first one is used, time is displayed in minutes:seconds format. For the second one it will be displayed in number of seconds. If none of these format changers are used, default formatting is used. You can also use conditional text, meaning: "If field ... is not empty print the text ...". This is done by writing: "%FIELDNAME?Conditional text%. Or you can query if a field is not empty and not 0 with the expression: "%FIELD!=0?Conditional text". Only the comparison to !=0 is allowed, other expressions are not supported so far. If "Conditional text" is exactly the same as the field name, the field content is printed. Example: "%RAMP!=0?R(:%%RAMP!=0?RAMP%%RAMP!=0?)%%DONUT!=0?D(:%%DONUT!=0?DONUT%%DONUT!=0?)%%LENGTH%". If you write the special string "%FLAGS%" icons for CartBeat and CartMotion are displayed instead of text. The flags cannot be combined with a text. (either icons or text).”
-
Possible Parameters: