This page guides you step by step through the DPE Nano Services Installation.
It starts with easy steps and incrementially adds more complexity to your installation.
If you want to update an existing DpeNanoServices installation check How to update DpeNanoServices (Windows).
Copy DpeNanoServices folder
-
Copy the complete folder (e.g. 20251126_DpeNanoServices_1.4.32) to the machine where you want to install DPE NanoServices
-
Rename the copied folder to something simpler, e.g. DpeNanoServices. Try to avoid spaces or special characters in the folder name as these characters increase the complexity when using command-line
Start DpeNanoServices from command-line window
We will now try to start DpeNanoServices with default settings, i.e. using http://localhost:5000
-
Open a command-line (with local Administrator privileges)
-
Navigate to the installation folder, e.g. DpeNanoServices
-
Type “DpeNanoServices.exe”
Normally you should now see something like the following
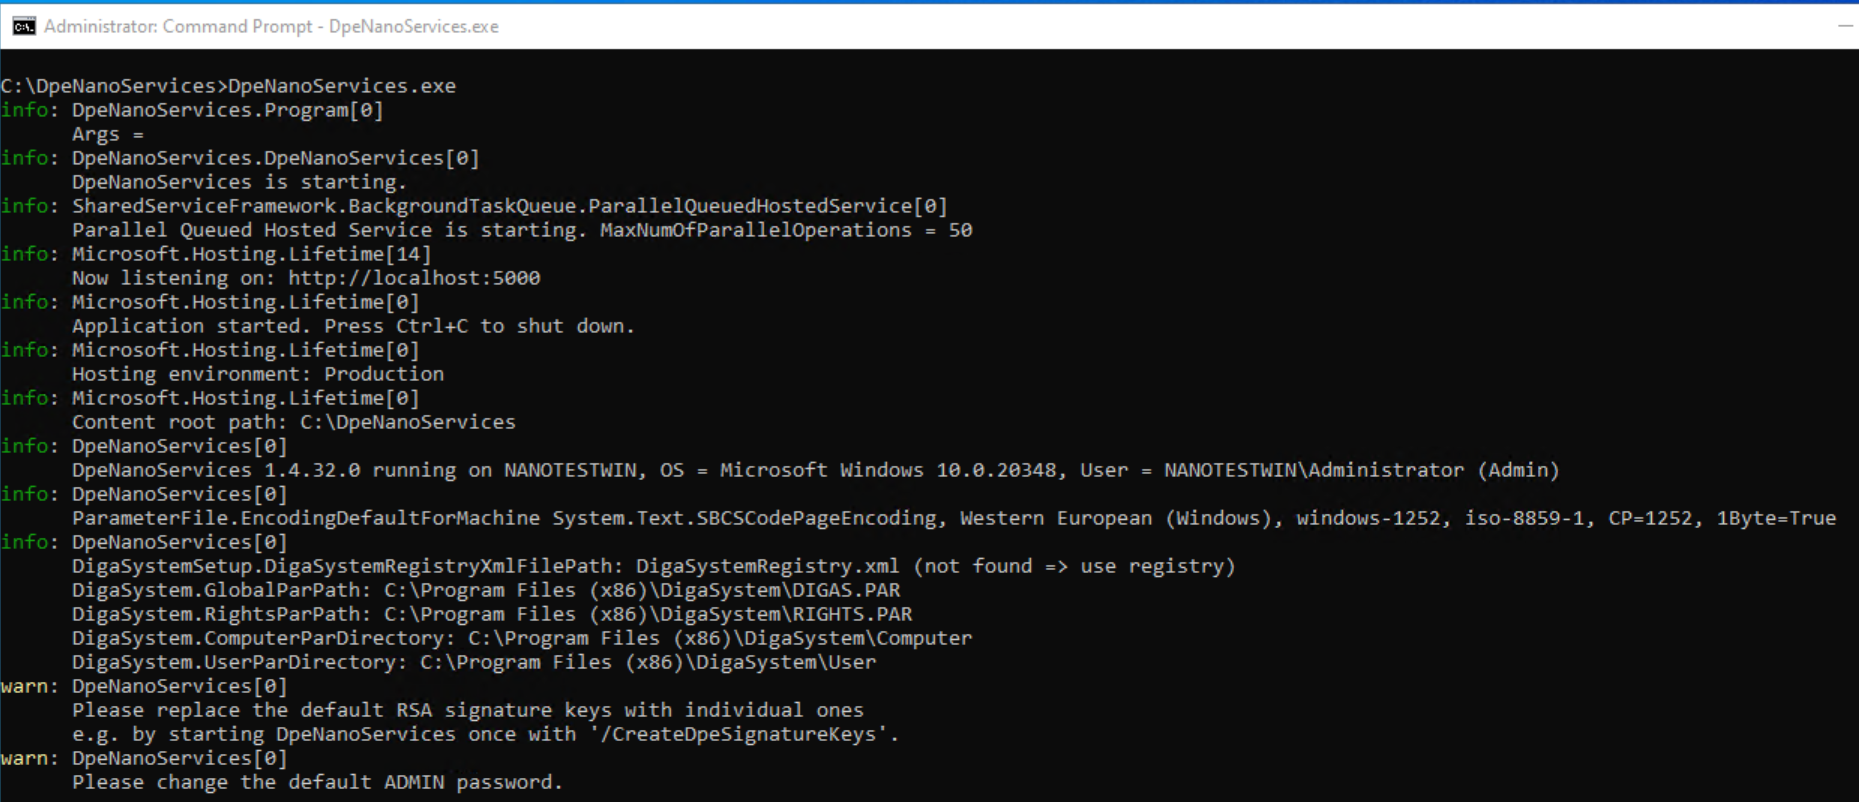
Press Ctrl-C to stop DpeNanoServices
Possible Problems and their solutions
Microsoft .Net 10 is not installed
See Prerequisites
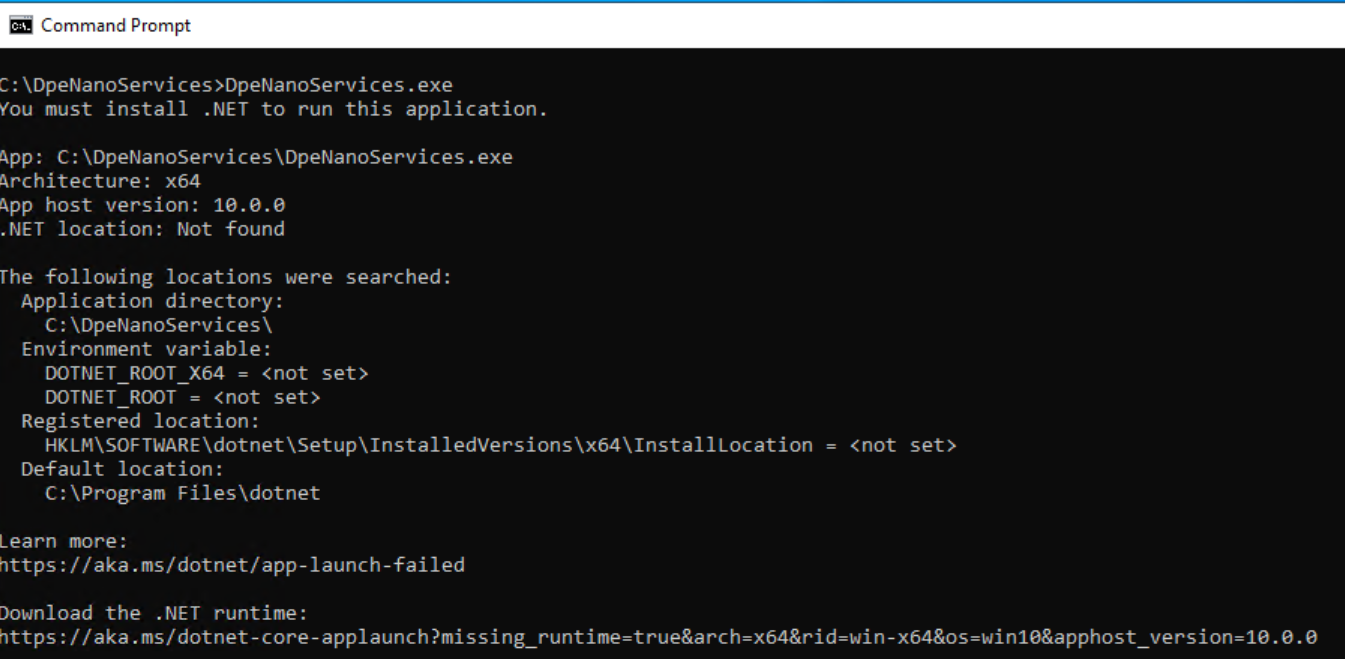
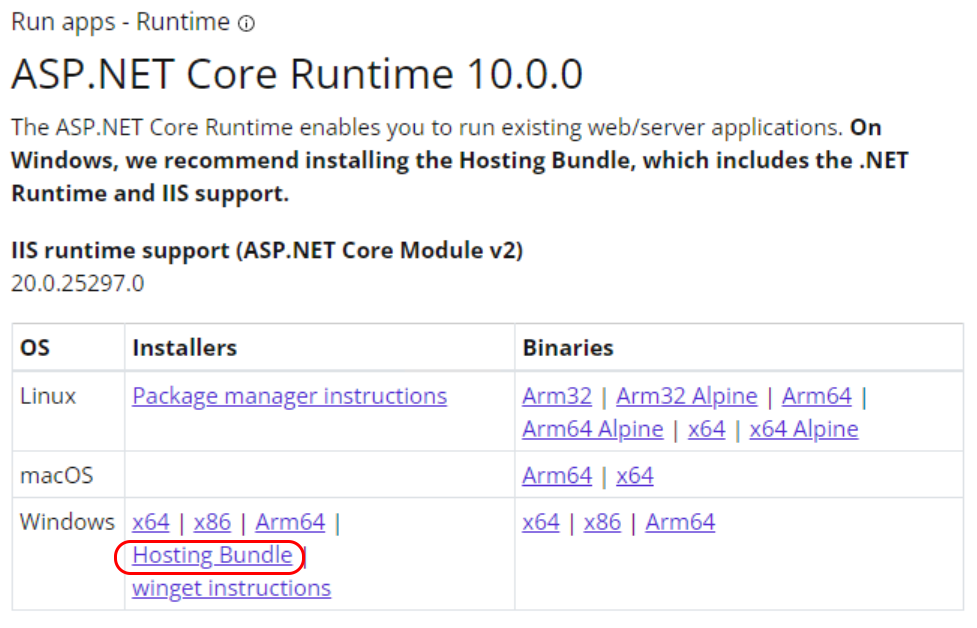
Solution: install Microsoft .Net 10
The http://ASP.NET Core Runtime enables you to run existing web/server applications. On Windows, we recommend installing the Hosting Bundle, which includes the .NET Runtime and IIS support.
Download from: https://dotnet.microsoft.com/en-us/download/dotnet/10.0
DigaSystem windows registry keys are not existing and DpeNanoServices cannot create them because it is not started with Administrator privileges

Solution: Please start DpeNanoServices .exe from a command-line with Administrator privileges
DigaSystem windows registry keys are existing but the PAR files are not accessible

Solution: check the paths and make sure they are accessible e.g. if they are located on a network share make sure you can access the network share and have write and change permissions to the share
Example:
net use \\MyServer\MyShare /user:mydomain\myuser password
Port 5000 is already in use

Solution: try to use a different port in the range between 1024 and 49151
DpeNanoServices --urls "http://localhost:5123"
Testing Access Locally
Open a browser on the machine where DpeNanoServices are installed and use the following URL
http://localhost:5000/DpeWebApplication/api/health
Something like the following should appear

Testing Access from a Remote Machine
The default hosting URL configuration (http://localhost:5000) does not allow to open the URL from a remote machine. Please change the hosting URL to a more public one, e.g.
DpeNanoServices --urls "http://+:5000"
DpeNanoServices --urls "http://MyMachineName:5000"
Also see Changing the hosting URL to discover all alternatives to change the hosting URL.
Please also configure an Incoming rule in your firewall that allows access to the specified port.
Afterwards the following should be possible from a remote browser

Configuring HTTPS
In enterprise environments HTTPS is often provided by a public-facing HTTPS-offloading proxy server (e.g. NGINX, Apache, IIS) and the requests are forwarded to DpeNanoServices via HTTP.
But, if you want to host DpeNanoServices directly under HTTPS you can find the configuration description here:
Example Kestrel Section in appsettings.json
{
...
  "Kestrel": {
    "Endpoints": {
      "Https": {
        "Url": "https://dpe.davidsystems-test.com:443"
        "Certificate": {
          "Path": "C:\\LetsEncrypt\\fullchain.pem",
          "KeyPath": "C:\\LetsEncrypt\\privkey.pem"
        }
      }
    }
  }
...
}
Do I need the DpeCoreDb database?
The DpeNanoServices default configuration is not using the DpeCoreDb database, this means
-
Logs are stored locally in files, instead of writing them to the DpeCoreDb database
-
WorkflowSystem functionality is not available (as WorkflowSystem requires DpeCoreDb)
In an enterprise environment we recommend to install and use the DpeCoreDb database.
Many functionalities of Content Manager rely on Workflow System,
e.g. copying entries between tables.
Adapt the following options in appsettings.json to match your DpeCoreDb:
  "DpeLogging": {
    "UseFileLogger": false,
    "ConnectionString": "Data Source=VM-DPEDEMO22\\sql2019;Initial Catalog=DpeCoreDb;user=sa;password=;Min Pool Size=100;Max Pool Size=1000;TrustServerCertificate=true;"
  },
  "DpeWorkflowService": {
    "ConnectionString": "Data Source=VM-DPEDEMO22\\SQL2019;Initial Catalog=DpeCoreDb;user=sa;password=;Min Pool Size=100;Max Pool Size=1000;TrustServerCertificate=true;"
  },
Configuring More Options in DpeNanoServices
Some options in the appsettings.json are commented out by prefixing the option name with an underscore.
TempFolder
A shared TempFolder is needed when distributed components need access to shared files.
Example scenario:
The on-the-fly audio processing delegates the creation of the files to audio processors, the component responsible for streaming the audios might be on a different machine.
Example config in appsettings.json:
"TempFolder": "\\\\MyShare\\Temp",
Adding License Files
Copy your DPE license files to the subfolder Features.
Running as a windows service
See also Running as Windows service for more details.
Running a process as windows service is different from running it in an interactive windows session:
-
a different user might be used
-
network shares might need explicit authentication
-
no network drive mappings are available
We provide the possibility to mount and authenticate your network shares in a StartupScript.bat, see Using StartupScript.bat
Starting with v1.4.36 the easiest way to create a windows service for DpeNanoServices is using the built-in option /createservice:
-
Open a command-line terminal with Administrator privileges
-
Change the directory to the directory where DpeNanoServices.exe is located
-
Use the same command-line arguments you would use when running DpeNanoServices from command-line AND add the option /createservice
-
This will also set some additional service configuration options, e.g. set NETMAN as dependency or setting the start mode to Auto
-
Please use the interactive windows service dialog to change the service user.
Examples:
DpeNanoServices.exe --urls http://+:5000 --environment Production /createservice
If everything is configured in appsettings.json then a simple /createservice would be sufficient:
DpeNanoServices.exe /createservice
If you want to create the service under a different name use the following syntax
DpeNanoServices.exe /createservice=MyTest