Advanced Voice Tracking (AVT)
Introduction
The "Advanced Voice Tracking" feature, or AVT in short, gives users a quick, intuitive approach to create transitions between music clips where the most frequently used functions are available by pressing just one or two buttons. AVT is designed to work with a specially designed external keypad, but it can as well be used with the keys of a standard PC keyboard, at the cost of some less comfort.
The functions provided by AVT are:
- Record the presenter's voice
- Start one of two music clips with full or reduced (ducked) volume
- Start one of several drop-in elements (e.g. jingles) with full or reduced (ducked) volume
- Adjust the volume of music or drop-in before or during play-out
- Stop any element during play-out with or without fade-out
AVT is available when OTM is run inside DigAIRange, or inside Turbo Player.
The following sketch is a suggestion on how to lay out an external keypad. Of course you are free to choose any layout you like, and/or combine the AVT keys with other function keys you may already be used to.
![]()
The keypad is divided into the sections "MUSIC 1", "MUSIC 2", "DROP 1", and "DROP 2", with 4 buttons in each section, and has two buttons that do not belong to any section. The meaning of each button will be explained later.
External keypads come with a configuration tool that allows to map keypad keys to "key codes". A key code is what Windows sees when you press a key on the PC keyboard. Thus, Windows cannot distinguish between keys pressed on the PC keyboard and keys pressed on the external keypad. This has two consequences:
- You should not configure key codes on the external keypad that correspond to alphanumeric characters as otherwise, there will always be some confusion when typing alphabetic text or numbers on the PC keyboard.
- On the other hand, if you use key codes that correspond to the function keys (F1...F12), with or without modifier keys (Shift, Alt, Ctrl), you will be able to use AVT functions from the external keypad or the PC keyboard, as seems best to you.
Configuration details depend on the brand and model of external keypad that you use. This document will provide you with configuration information that is common to all brands and models.
Workflow Example
This example describes how to use OTM in DigAIRange to create a transition between two music takes with spoken announcements and a few jingles. Let's assume that the show already exists, and that you have a jingle bank from which you can pick jingles.
Step 1: Open and Arrange the Transition
![]()
This is a fragment of the show we want to edit. Note three music clips which immediately follow each other. We want to create smooth transitions between these clips.
First, drag the item "Rhythm of the night" onto the "OTM" icon of DigAIRange, and drop it there.
![]()
This loads the transition into OTM. If OTM starts up in 1-track mode, switch into multi-track mode:
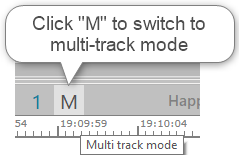
Now you can see the last few seconds of "Rhythm of the night", and the first few seconds of the following clip "Solsbury Hill".
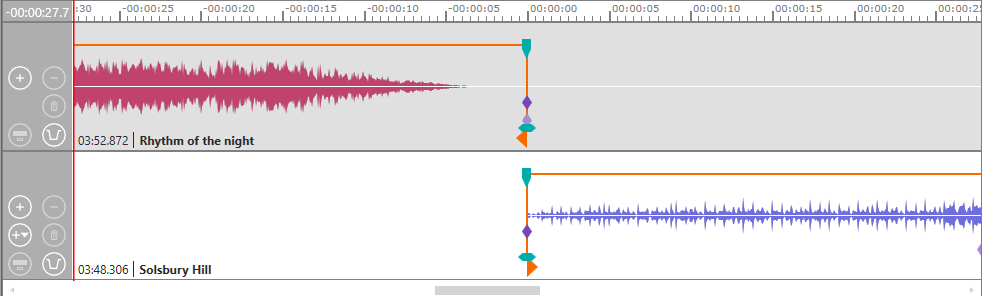
We are going to insert spoken announcements and three jingles in between these songs.
Click the "+" button in the head of track "Rhythm of the night" three times to insert three empty tracks. Is is a good idea to undock and enlarge the OTM window so that you can see all the tracks you are working with.
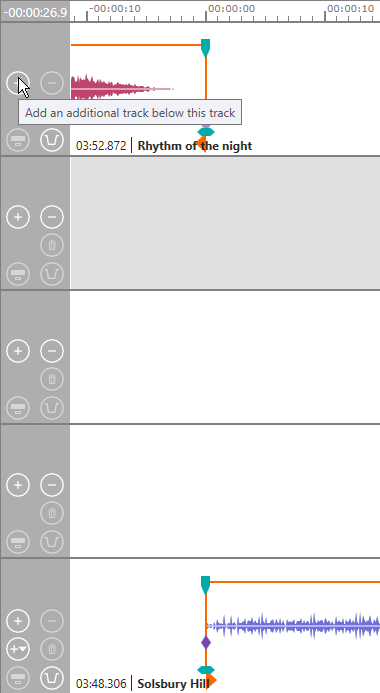
Drag the jingles from your jingle bank (probably a database in DBM) and drop them into the new tracks in the order in which you want them to be played, one jingle per track.
![]()
Shift the clip "Solsbury Hill" a few seconds to the right so that it starts after the third jingle. Now the transition is prepared for AVT. Save your project now so that you can start AVT over again if something goes wrong.
Step 2: Voice Tracking
Arrange the OTM window on your screen, and zoom into the timeline, so that you can see the relevant part of the timeline. Left-click into "Rhythm of the night" at a position 2-3 seconds before where you want to start your announcement.
Press "Enter AVT" on the external keypad, or the related key on the PC keyboard. This inserts a new unnamed track immediately below "Rhythm of the night". The microphone recording will go into this new track.
Hint
As was already said, and will be explained in more detail later, you can use an external keypad with keys specifically assigned to the AVT functions, or you can use the corresponding keys of your PC keyboard. In order to keep this document readable, we will only say things like Press "Enter AVT" instead of repeating over and over that you have the choice between external keypad and PC keyboard.
Press "MUSIC 1/START NORMAL/FADE OUT". "Rhythm of the night" starts playing from the sound head position. ![]() This opens the microphone line. Anything you say, or any noise you make, is recorded, up to the moment you press "Stop".
This opens the microphone line. Anything you say, or any noise you make, is recorded, up to the moment you press "Stop".
When the part of the song is played where you want to start the announcement, press "MUSIC 1/START DUCKED//DUCK/UNDUCK" to lower the volume, then start talking until you want to insert the first jingle "StationID 1". You can use the "MUSIC 1/↑" and "MUSIC 1/↓" keys to adapt the volume of the playing song. The jingles and the next song are continuously shifted to the right so that they maintain some distance from the sound head.
To insert the "StationID 1" jingle, press "DROP 1/START NORMAL/FADE OUT" (or "DROP 1/START DUCKED/DUCK/UNDUCK" if you want to have reduced volume). This makes "StationID 1" jump left to the current sound head position. "Rhythm of the night" continues to play, but you can use the "MUSIC 1/START NORMAL/FADE OUT" to fade out the music at any time.
Just continue talking into the microphone, or wait until the jingle has finished playing. Make the second part of the announcement and append "StationID 2" by pressing "DROP 2/START NORMAL/FADE OUT" or "DROP 2/START DUCKED/DUCK/UNDUCK".
Continue your announcement, then insert the third jungle "StationID 3". Now that you have no "DROP 3" keys available, you must use "DROP 1" again. You can, in fact, use as many drop-in elements as you want; the "DROP 1" and "DROP 2" areas are used in turn for all drop-in elements.
Finally, press "MUSIC 2/START NORMAL/FADE OUT" or "MUSIC 2/START DUCKED/DUCK/UNDUCK". This moves the second song, "Solsbury Hill", left to where the sound head currently is. The microphone line is still open, and you can continue the announcement. Use the "MUSIC 2/↑" and "MUSIC 2/↓" keys to adjust the volume.
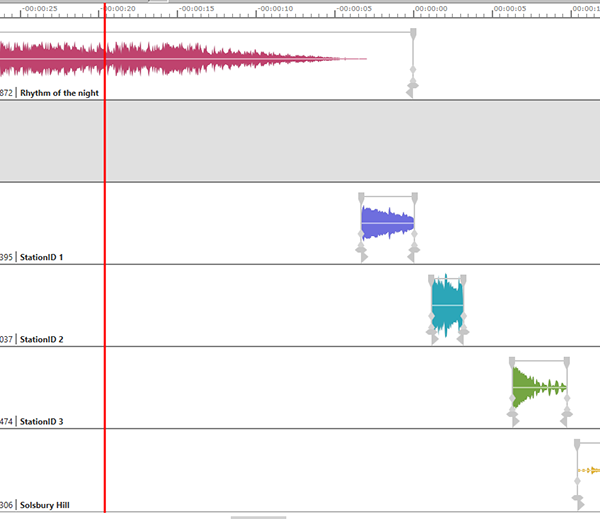
Once you are done, press "STOP". Playback stops, the microphone line is closed, and you can view the transition which you have created.
![]()
At this point, the AVT workflow is finished. You can prelisten the transition, edit all its elements and fade curves, and save it. When you click the OTM button "Next Transition" (below the last track), you can immediately move to the next transition in the show, and start another AVT workflow.
![]()
Presetting the Duck Level
When you press a "volume up/down" key of a music or drop item that is not yet started, the duck level of this element is adjusted. When you press the respective "Start element ducked, duck/unduck running element" key, the music or drop element is played at the level you have set. This level is indicated in the track next to the "mark in" of the music or drop element.
Explanation of Terms
This section explains the meaning of the terms used in the layout of the external keypad, and in the workflow example.
Elements of a Transition
A transition always contains two audio clips. One clip ends where the transition starts, and the other begins when the transition ends. AVT refers to these audio clips as "MUSIC1" and "MUSIC2", respectively, although they are of course not limited to containing music.
Between "MUSIC1" and "MUSIC2", a few short audio snippets can be inserted. These snippets are calls "drop-ins". For drop-ins, the names "DROP1" and "DROP2" are used alternately.
Buttons that Control Play-out
Each "MUSIC1", "MUSIC2", "DROP1", and "DROP2" area has four keys. Two keys have multiple functions, as described here.
| START NORMAL FADE OUT | If the element is not playing, play-out starts at full volume. For any element except MUSIC1, the element is moved left to the current sound head position. If the element is playing, its volume is gradually reduced to zero (fade out). |
START DUCKED | If the element is not playing, play-out starts at reduced volume (ducked). For any element except MUSIC1, the element is moved left to the current sound head position. If the element is playing, it volume alternates between reduced (ducked) and full level. |
| ↑ | If the element is not playing, its "reduced volume" is increased by a small step. If the element is playing, its current volume is increased by a small step. |
| ↓ | If the element is not playing, its "reduced volume" is decreased by a small step. |
Many details of these actions can be modified by parameters.
Ducked or not Ducked?
For a playing element, the START DUCKED/DUCK/UNDUCK key either decreases or increases the volume of this element. It is important to know which function is triggered by this key before you press it.
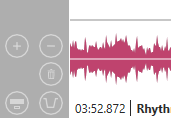
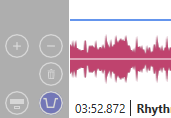
When the element is playing at high volume, volume is reduced to "ducked level" when you press the key. When it is playing at low volume, it is increased to full volume. A configuration parameter defines whether OTM considers the current volume "low" (ducked) or "high" (unducked), and the "ducked/unducked" state is indicated by a symbol in the track head:
unducked (high volume) DUCK/UNDUCK will decrease the volume |
|
ducked (low volume) DUCK/UNDUCK will increase the volume |
|
When you only use the DUCK/UNDUCK key to duck or unduck the audio signal, things are quite clear: Ducked state means low volume, and unducked state means high volume. However, when you use the ↑ and ↓ volume adjustment keys, the current fade value may be somewhere between ducked and normal. This is where the configurable threshold comes into play.
Keypad or Keyboard Configuration
The functions of AdvancedVoiceTracking are only available via keyboard shortcuts; they do not have buttons or menu entries in the user interface. The only exception is the "STOP" function which is also available through the STOP button 
As was already mentioned, AdvancedVoiceTracking handling becomes much easier when you use an external keypad that is specifically configured for use with this functionality. In this case the configuration of the keypad must match that of the keyboard shortcuts. For example, if you have assigned the key combination Alt+R to the function "Enter Advanced Voice Tracking", then you must configure the keypad so that the "ENTER AVT" key emits the key code Alt+R.
The following table lists shortcut names as you can see them in the configuration dialog of DigAIRange and the key names as they were used in this document.
| Shortcut | Key Name |
|---|---|
| Enter Advanced Voice Tracking | ENTER AVT |
| Music 1: Start element ducked, duck/unduck running element | MUSIC 1/START DUCKED/DUCK/UNDUCK |
| Music 1: Start element, fade out element | MUSIC 1/START NORMAL/FADE OUT |
| Music 2: Start element ducked, duck/unduck running element | MUSIC 2/START DUCKED/DUCK/UNDUCK |
| Music 2: Start element, fade out element | MUSIC 2/START NORMAL/FADE OUT |
| Drop 1: Start element ducked, duck/unduck running element | DROP 1/START DUCKED/DUCK/UNDUCK |
| Drop 1: Start element, fade out element | DROP 1/START NORMAL/FADE OUT |
| Drop 2: Start element ducked, duck/unduck running element | DROP 2/START DUCKED/DUCK/UNDUCK |
| Drop 2: Start element, fade out element | DROP 2/START NORMAL/FADE OUT |
| Music 1: Volume up | MUSIC 1/↑ |
| Music 1: Volume down | MUSIC 1/↓ |
| Music 2: Volume up | MUSIC 2/↑ |
| Music 2: Volume down | MUSIC 2/↓ |
| Drop 1: Volume up | DROP 1/↑ |
| Drop 1: Volume down | DROP 1/↓ |
| Drop 2: Volume up | DROP 2/↑ |
| Drop 2: Volume down | DROP 2/↓ |
| Stop | STOP |