Start Next Auto-Ducking
In this voice tracking mode with Auto-Ducking you have an automated ducking mechanism that ducks running elements according to your voice level or specific elements that are likely overlaying. The goal is to minimize the user interaction with the program and to quickly achieve voice tracking for simple transitions.
Auto-Ducking mode is only available in Start Next mode. You may enter this mode by clicking on the Start Next button 
The Auto-Ducking is applied to all elements flagged as "duck target".
Opposed to the "duck target" some elements in the transition such as drop-ins are "duck sources", e.g. elements that cause the underlying elements to be ducked. Therefore a "duck source" element cannot be ducked by "duck target" element. If an element is a "duck target" or a "duck source" is indicated by the duck icon in the track head.
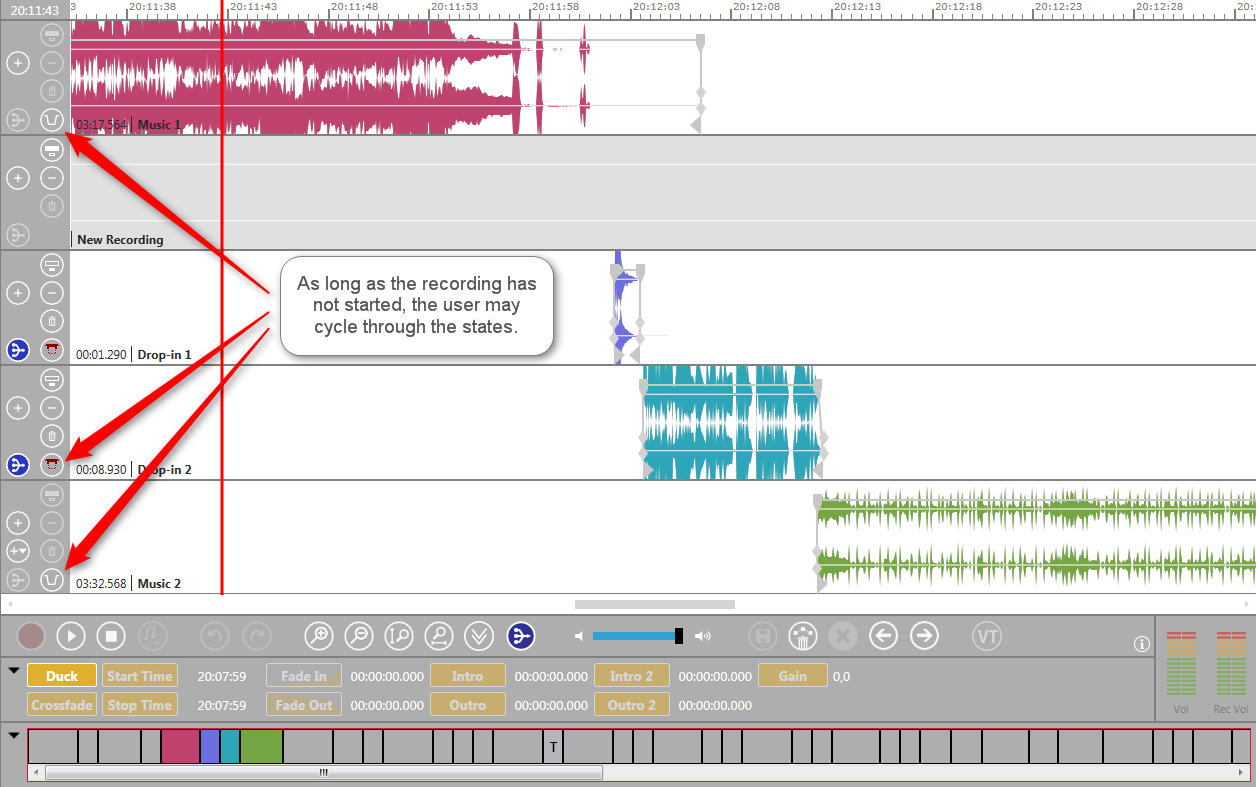
The duck toggle button in the track head of Start Next Auto-Ducking mode is altered so it becomes a tri-state button:
| The element can be ducked - "duck target" |
| The element causes OTM to duck other elements - "duck source" |
| The element is except from ducking |


When starting Start Next mode by clicking on the Start Next button while holding the Ctrl key, OTM will automatically set the following:
- Music1 and Music2 will be set as "duck target"
- Drop-ins will be set as "duck source"
- The recording track will be set as "duck source"
The user can override these settings by pressing the button which will cycle through the states
During a recording is not possible to change an element from "duck target" to "duck source" or from "duck source" to "duck target".
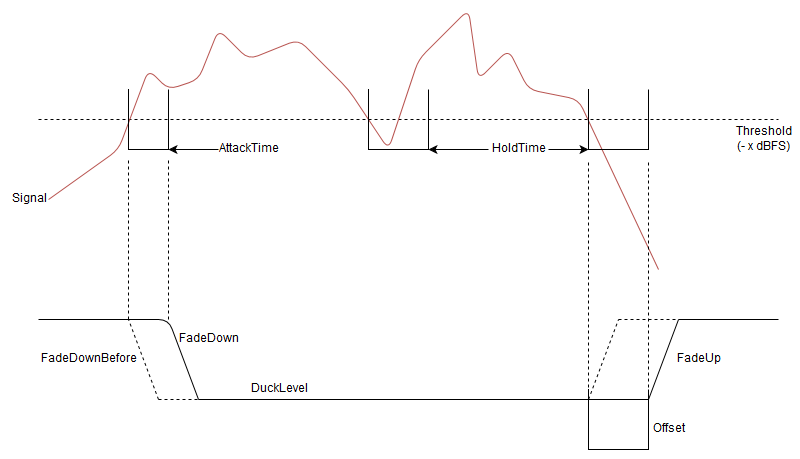
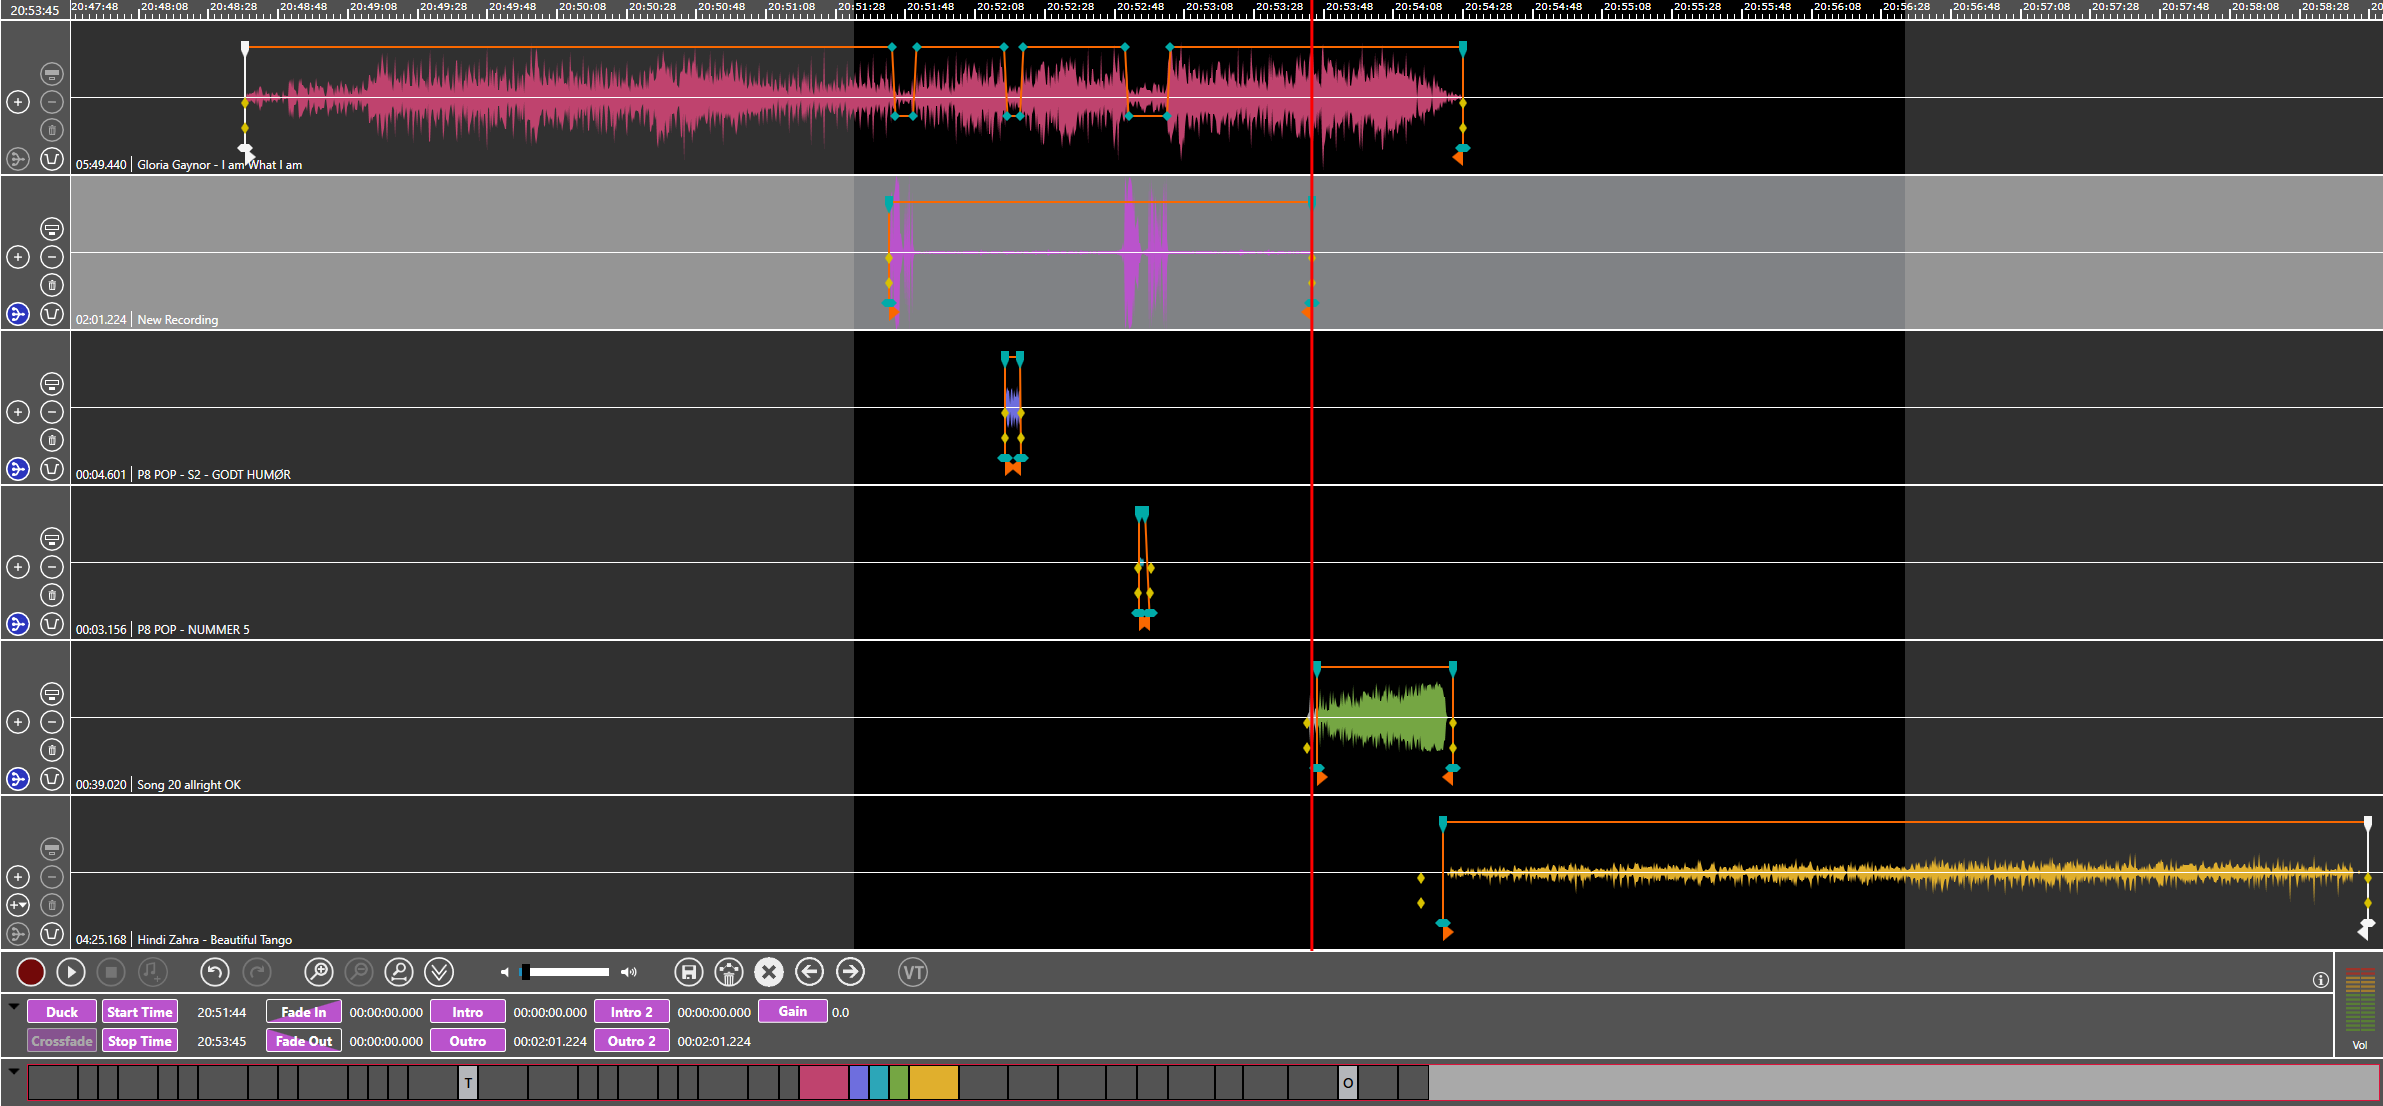
During recording OTM will evaluate the signal on all "duck sources". For the recording track, the actual signal level will be evaluated. For the existing elements the signal will not be evaluated but OTM assumes full level for the full duration of the element. According to the picture below, OTM will apply ducking to all "duck targets" as soon as the "duck sources" match the criteria.
This is how it works
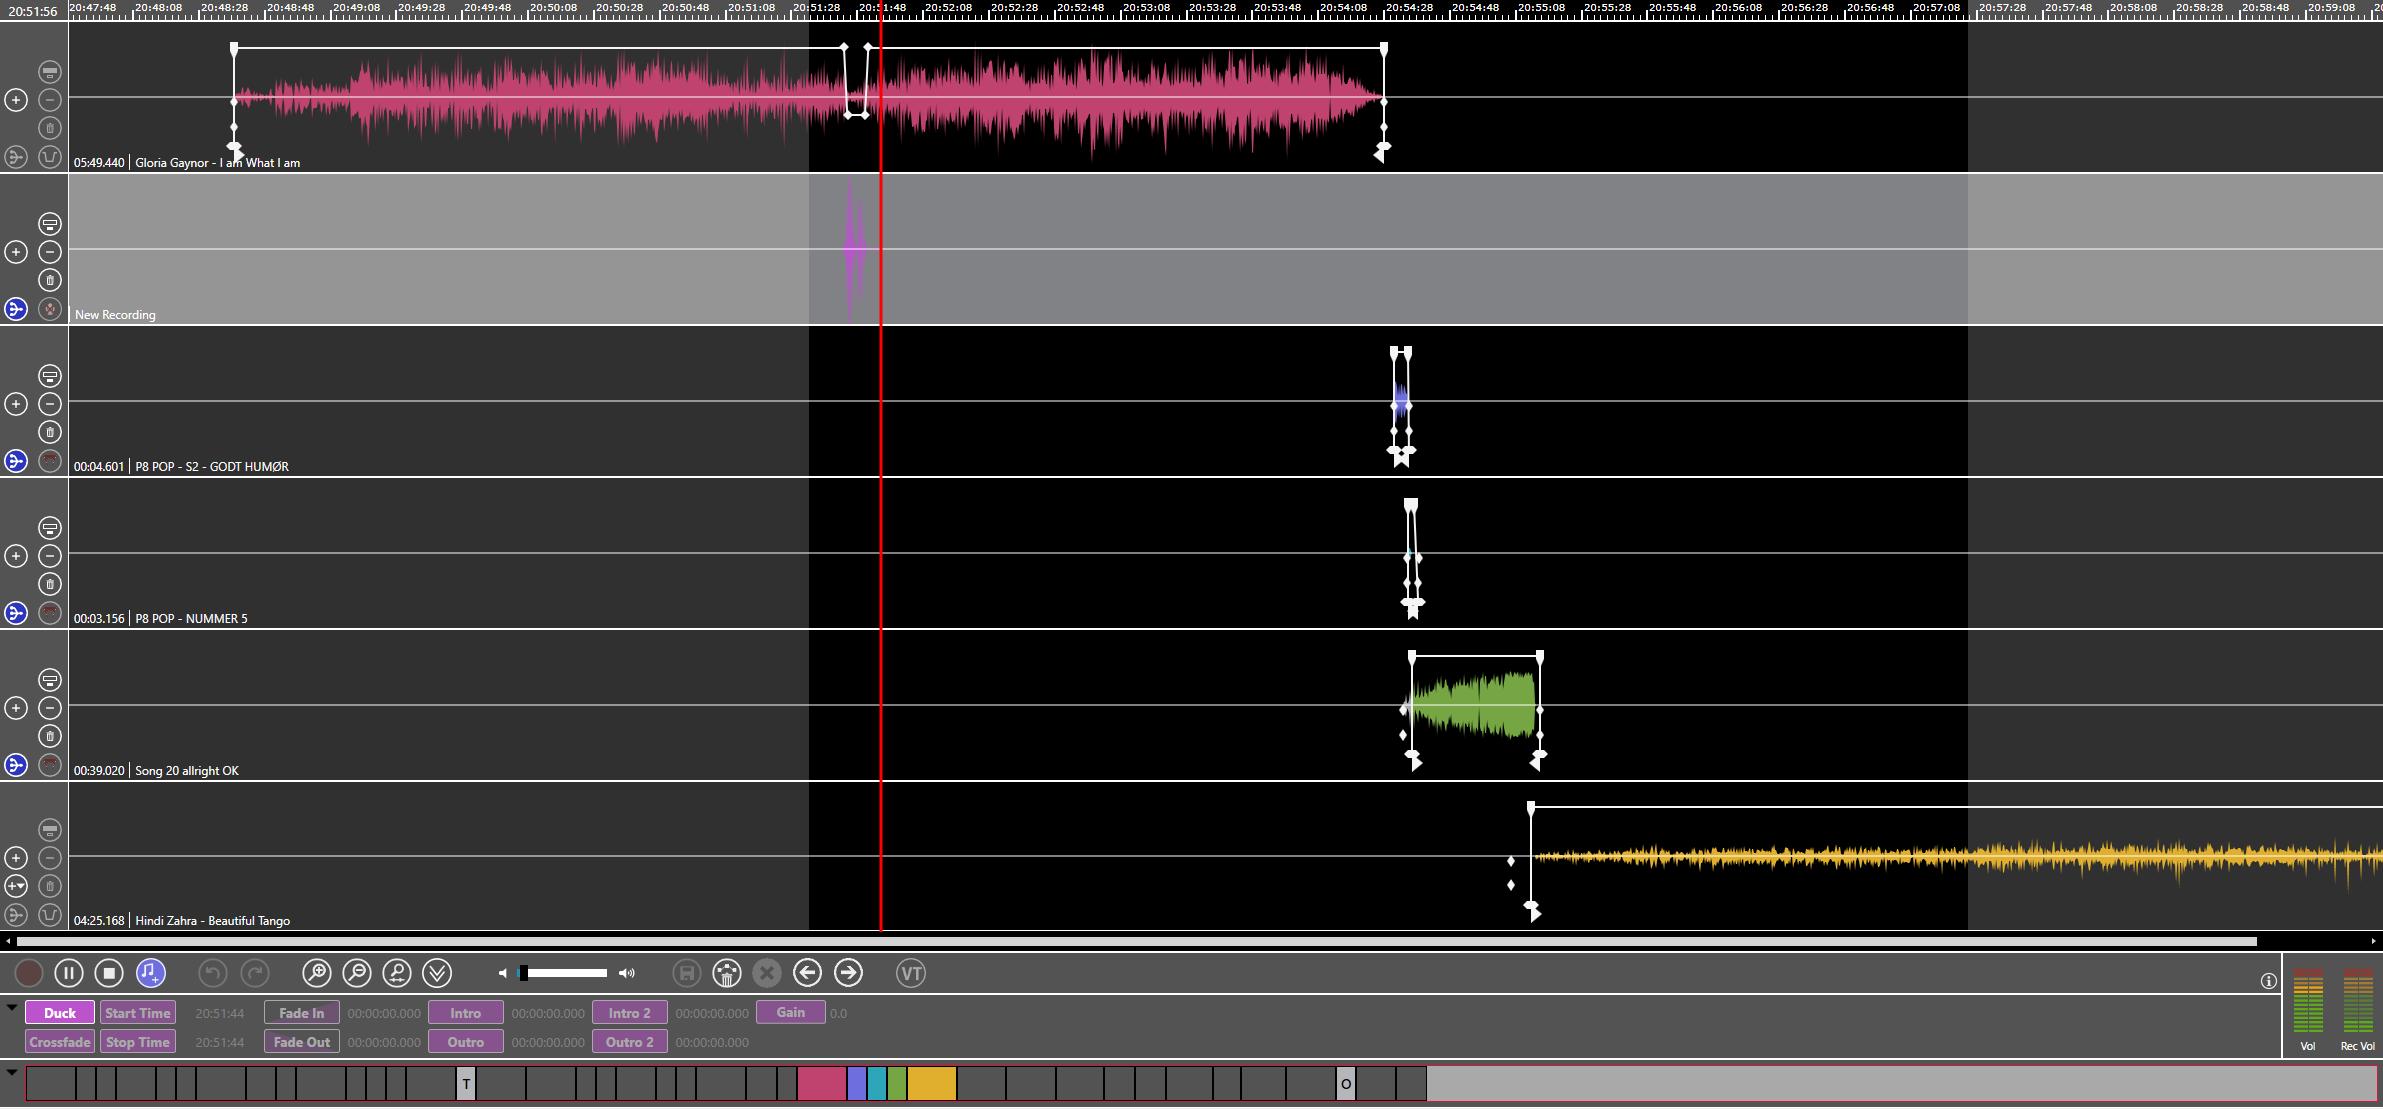
Please start the Start Next Auto-Ducking by clicking on the Start Next button while holding the Ctrl key.
In this example track 1 (Music 1) and track 4 (Music 2) are marked as "duck target". Track 2 is the recording. Track 3, track 4 and track 5 are marked as "duck source".
If you start talking now , track 1 (Music 1) is automatically ducked while you talk.
If you start the next audio with the Start Next button the first track (Music 1) is ducked while the audio in track 3 is played even if we stop talking.
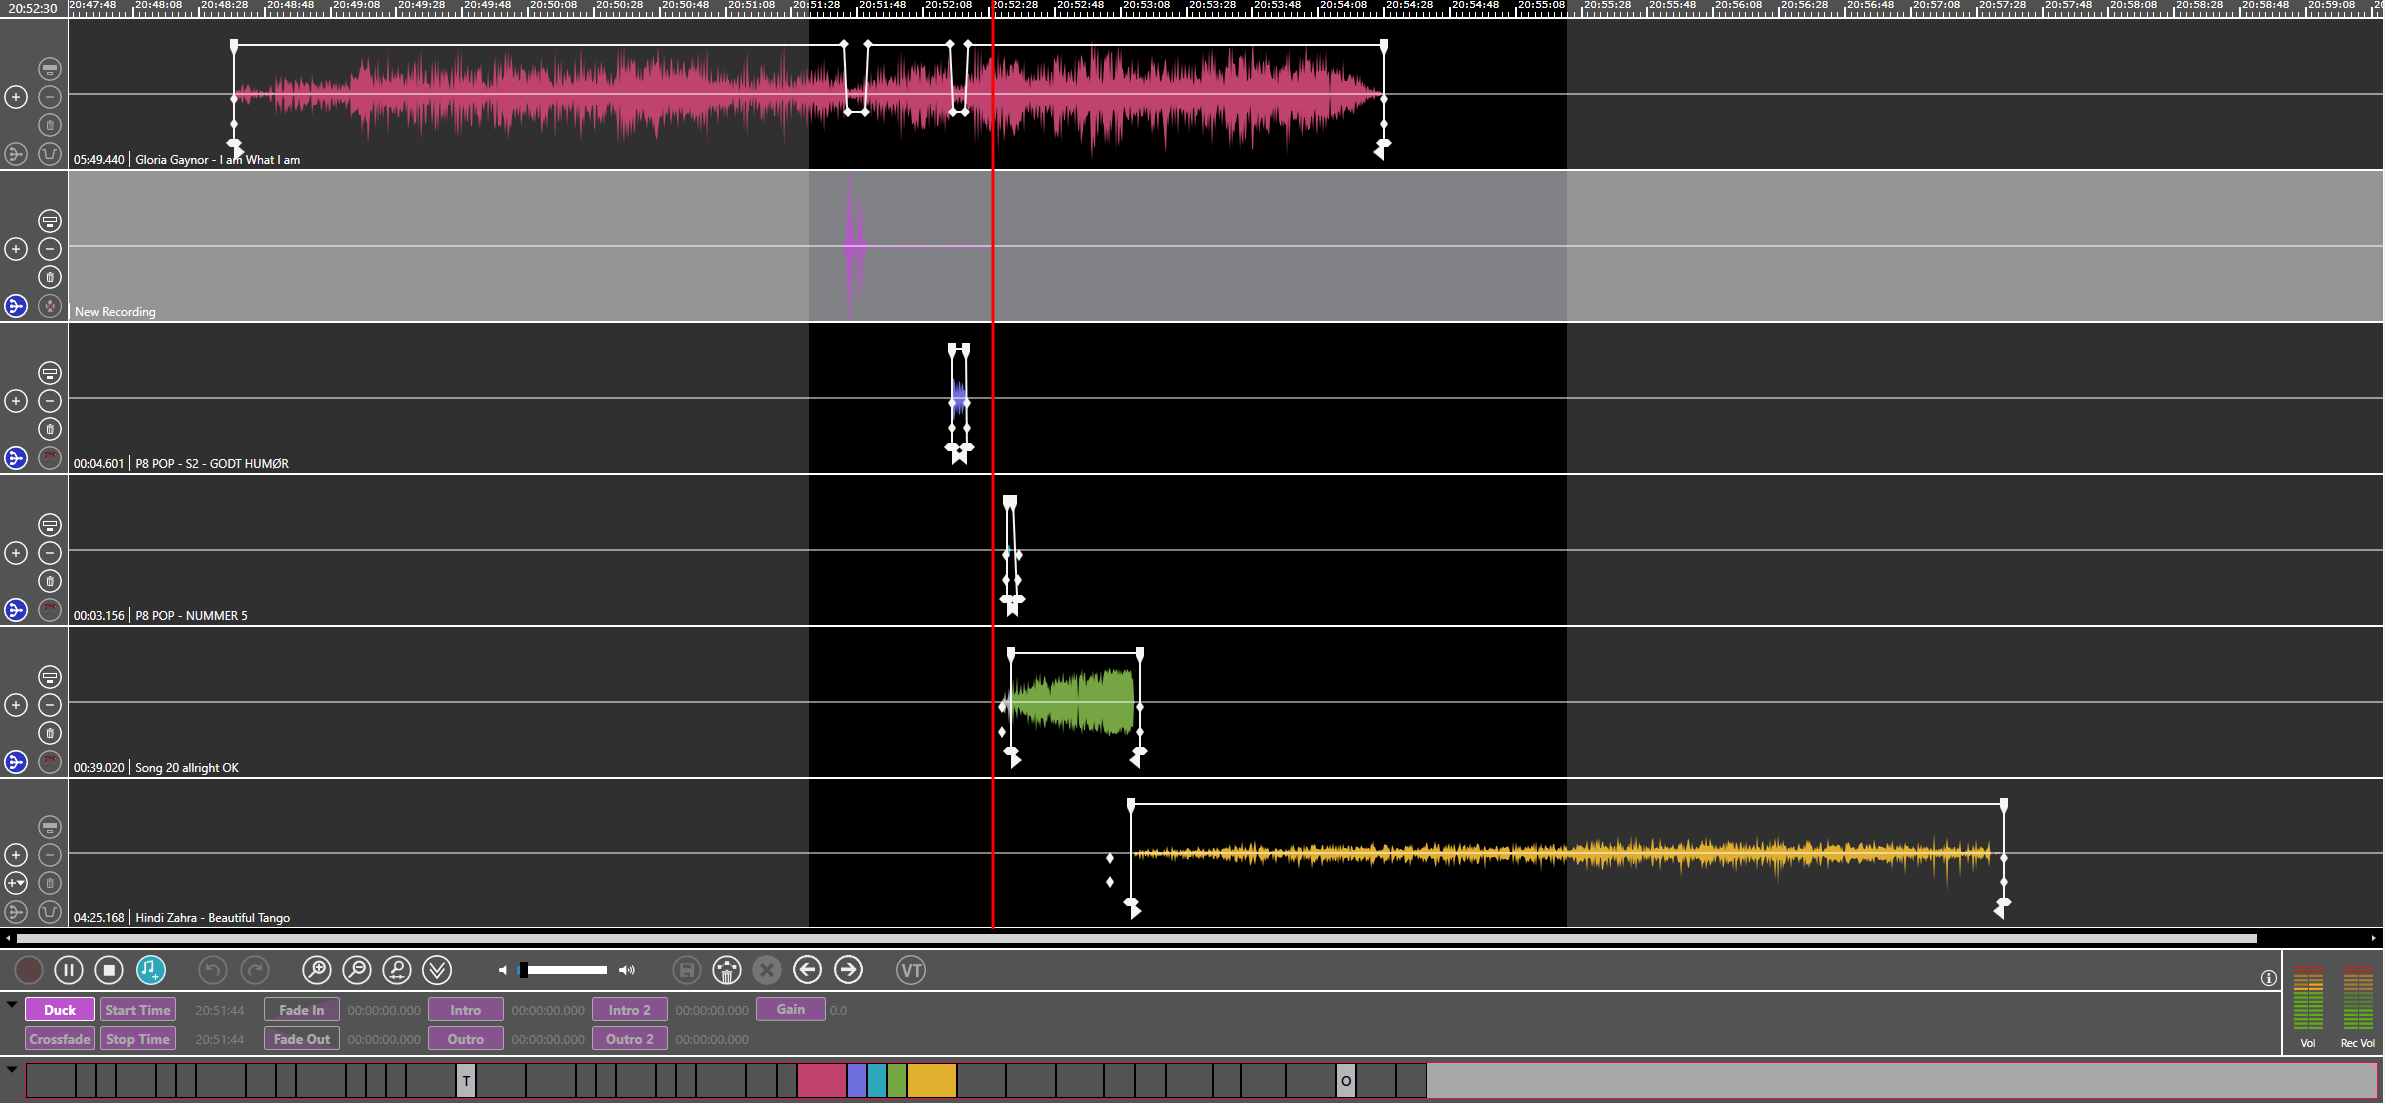
You can also combine the talking with the Start Next button. In this example we talk for some seconds, then start the next audio while keeping quiet and then continue talking after the audio in track 4 has stopped. You can see the result in track 1, track 2 and track 4.
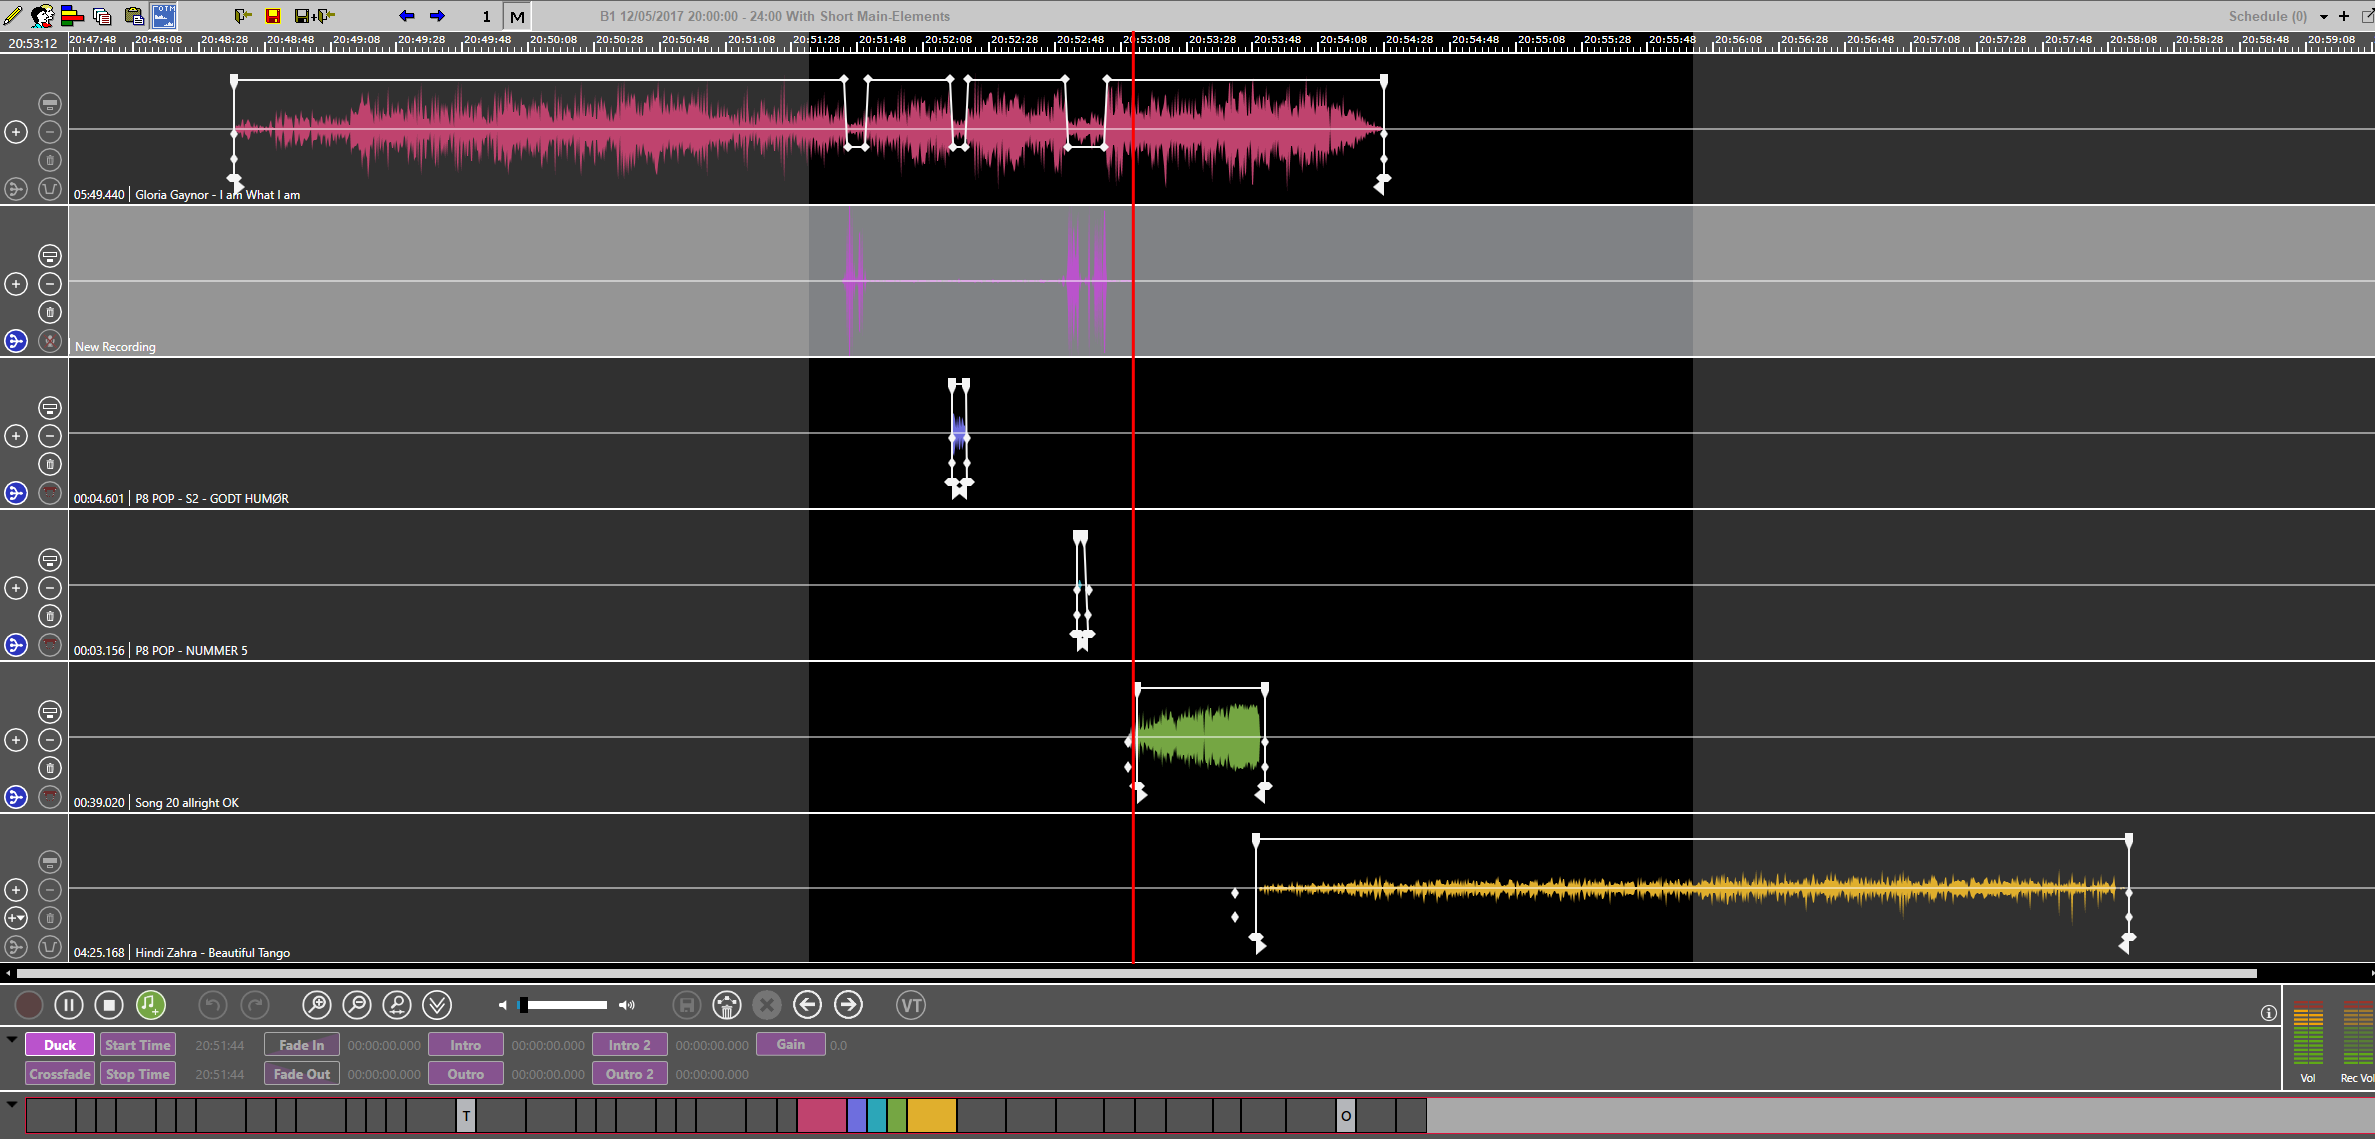
If you press the Stop button now, you get the following result and the element on track 5 will not duck any other element.
Administrators please click Start Next Auto-Ducking - Configuration.