Configure common Parameters for all clients
Currently many ROAD clients are only usable in combination with DPE. On this page, we will show you how to link DPE to them.
Create ROAD Clients' Base Configuration
Import the sample parameter file shipped with the ROAD clients
The ROAD client applications ship with each a sample .par file (ROAD_Admin.par, InstaRecorder.par, ROAD_Scheduling.par) in the doc/ folder which contains the base configuration for each ROAD client.
Import this parameter file into the Global\Default space in DPE Parameters.
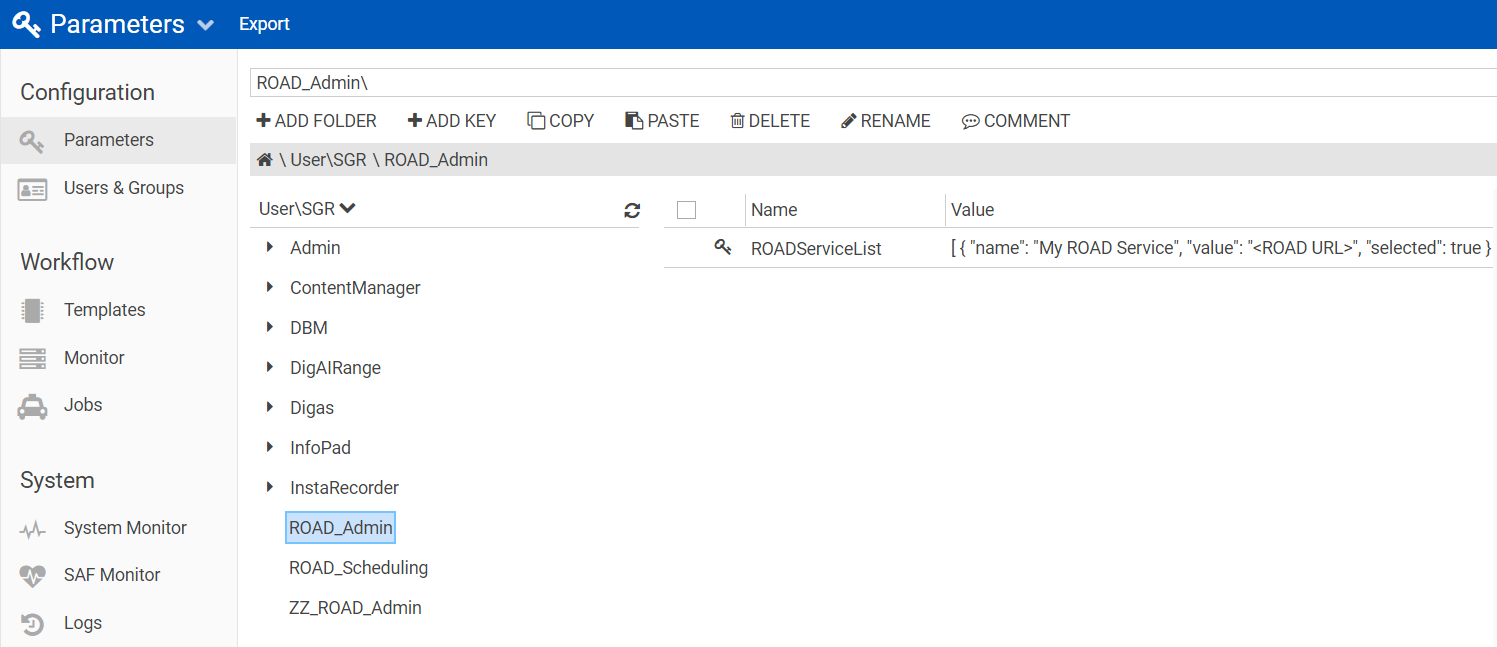
Your DPE Parameters should look like this (folder named according to the client):

Configure which ROAD Service(s) the ROAD Clients Should Connect to
All ROAD clients connect to a backend ROAD Service instance, which needs to be configured.
Better be secure!
Both HTTP and HTTPS connections are supported, HTTPS being recommended in most cases.
ROAD Service(s) for ROAD Admin and Scheduling
This parameter is mandatory for each ROAD client which is installed: Parameter location is ROAD_Admin\ROADServiceList or ROAD_Scheduling\ROADServiceList (note InstaRecorder currently supports only one ROAD Service via parameter RoadServiceUrl; see below)
ROADServiceList: example
[
  {
    "name": "My ROAD Service",
    "value": "https://my-road-service.internal.com:11005",
    "selected": true
  },
  {
    "name": "My ROAD Service 2",
    "value": "https://my-road-service2.internal.com:11005",
    "selected": false
  }
]nameis the human-readable name for your ROAD Servicevalueis the URL (including protocol and port) of where the ROAD client is hostedselectedshould be set to true to select your default or favorite ROAD Service
In most environments, we expect this list to contain only one ROAD Service. In case multiple ROAD Services are configured, a ROAD Service selector will appear in the top bar in the ROAD client application.
ROAD Service for InstaRecorder
This parameter is mandatory for InstaRecorder: Parameter location is InstaRecorder\RoadServiceUrl
RoadServiceUrl: example
InstaRecorder\RoadServiceUrl = https://my-road-admin.internal.com:11005/Add the link to ROAD client in DPE
Import the sample parameter file shipped with the ROAD clients
The ROAD Admin application ships with a ROAD_Admin_Content_Manager_link.par which contains the base configuration for configuring Content Manager to display a link to ROAD Admin.
The ROAD Scheduling application ships with a ROAD_Scheduling_Content_Manager_link.par which contains the base configuration for configuring Content Manager to display a link to ROAD Scheduling.
Import the parameter file into the Global\Default space in DPE Parameters.
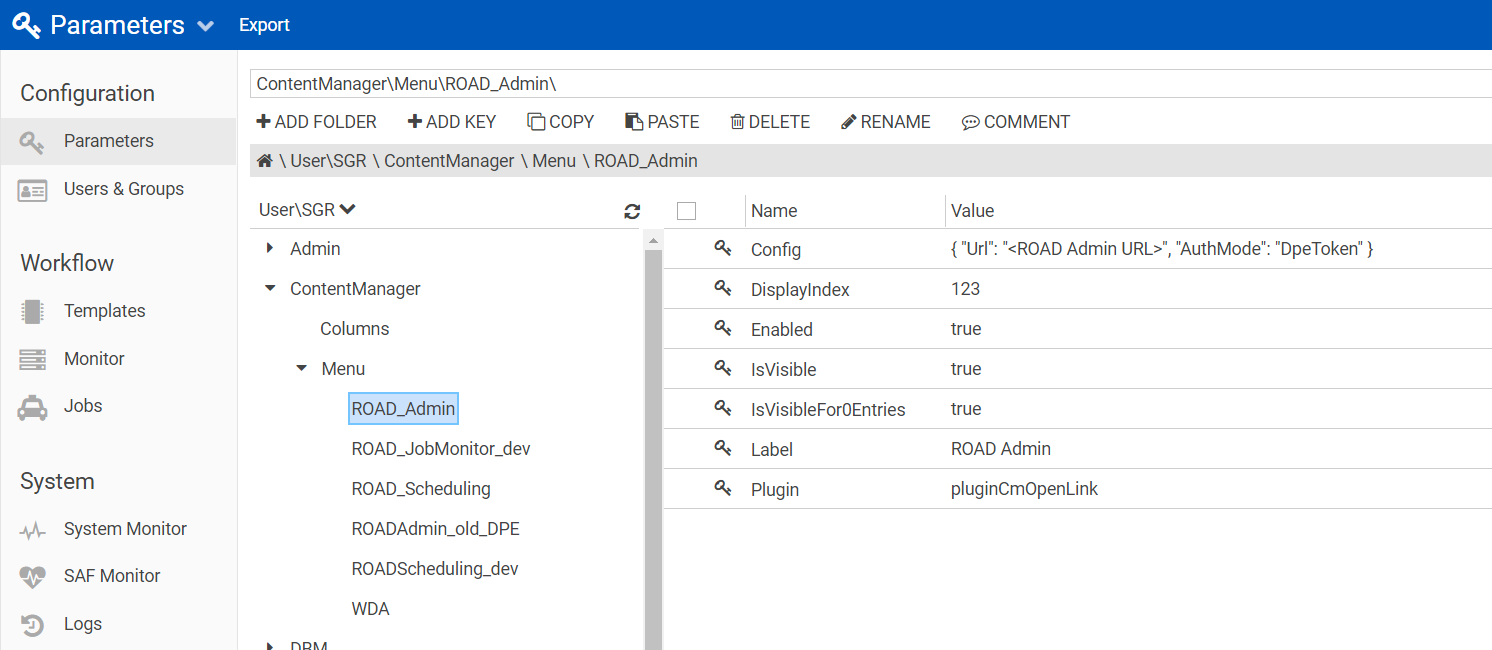
Your DPE Parameters should look like this:

Here is the general DPE documentation on how to configure this: Open Link in New Tab
Configure the URL of ROAD Client
In the Config key, replace <ROAD Admin URL> to the full URL where ROAD client is hosted:
ContentManager \ Menu \ ROADScheduling \ Config : example
{
  "Url": "http://my-road-admin.internal.com:8080/",
  "AuthMode": "DpeToken"
}Urlis the URL (including protocol and port) of where the ROAD Admin client is hostedAuthModeshould be set as"DpeToken". This way the authentication and authorization will be set when clicking on the link in DPE's menu
This configuration is currently mandatory for ROAD Admin and ROAD Scheduling! Currently these ROAD clients only supports authentication through DPE Token, so ROAD Admin needs to be launched through DPE to work.
Optional Configuration
Clients showing data in a list use a default set of columns for it. Users can change the order and width of these columns. Those changes are stored in user parameters.
It is possible to change the defaults on global level, which includes adding or removing specific columns.
The respective parameter locations are
- ROAD_Admin\Jobs\Columns
- ROAD_Scheduling\Schedules\Columns
There you can set the parameter "Current", which contains a comma-separated list of column names, each with a value for the width.
ROAD client column configuration example
Current = name=557,currentState=100,createdTime=180,updatedTime=147,processingHost=150Supported Columns for ROAD Admin
ROAD Admin can be configured to show these columns:
- name
- currentState
- createdTime
- updatedTime
- processingHost
Supported Columns for ROAD Scheduling
ROAD Scheduling can be configured to show these columns:
- name
- description
- nextOccurrence
- timezone
- workerHost
- templateName
- templateDescription
- scheduleId (not shown by default)
- templateId (not shown by default)
Further Configuration
For InstaRecorder there's more Digas configuration options described in sub-page Configure InstaRecorder.
