The loudness track can be displayed via the View menu or if you click the 
The data fields displayed in the track head is configurable; here the default is described. The data relates to the most recently performed loudness analysis. When you select "Settings..." via a right-click the loudness track head, the same dialog is displayed as in the loudness meter. Settings changes to the loudness track also apply to the loudness meter, and vice versa.
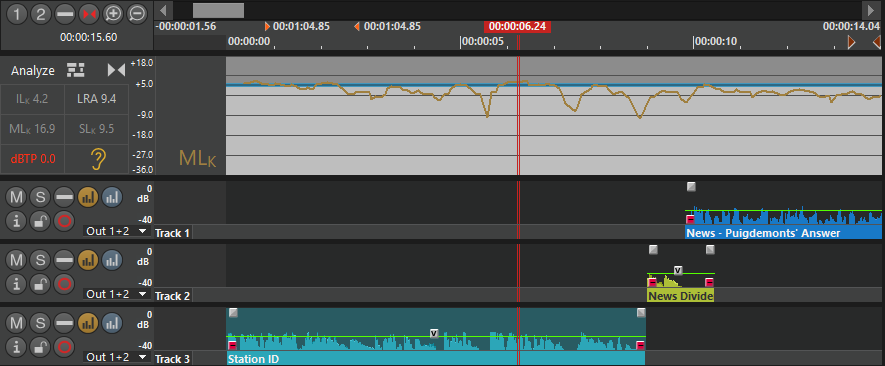
Loudness Track Header
The data fields shown in the loudness track header are similar to the ones in the Loudness meter, see description there.
|
Item |
Description |
|---|---|
|
|
Start loudness analysis of the complete timeline |
|
|
Start loudness analysis of the selected part of the timeline |


Loudness Track Timeline
The loudness track is initially empty unless an analysis is processed. After an analysis the loudness value graph appears for the concerning time range.
After changing the audio timeline by edit actions, the loudness data becomes invalid and is being displayed in another color. Likewise, the data in the track head is displayed with dimmed color. The loudness curve is not automatically recalculated because this is time consuming.
With re-analyzing a time range this becomes valid again, so parts may be valid and others invalid.

Finding Loudness Peaks
The loudness track provides a helper to find the time position where the highest MLk, SLk, or dBTP value is located. Only valid data in the loudness track is considered. The loudness track must contain some valid data for this function to work.
Double-click the "ML", "SL", or "TP" field of the loudness track head. The soundhead will then be positioned at the according position.
Locate Loudness Peaks with the Keyboard
Using the accelerator key "Loudness: Move soundhead to maximum True Peak", and/or "Loudness: Move soundhead to maximum MLk", and/or "Loudness: Move soundhead to maximum SLk" which can be defined in the Settings dialog separately for MultiTrack and SingleTrack screens.
Keyboard shortcuts can even be used when the loudness track is invisible, if it contains some valid data.