Understanding Basic Subclip Operations
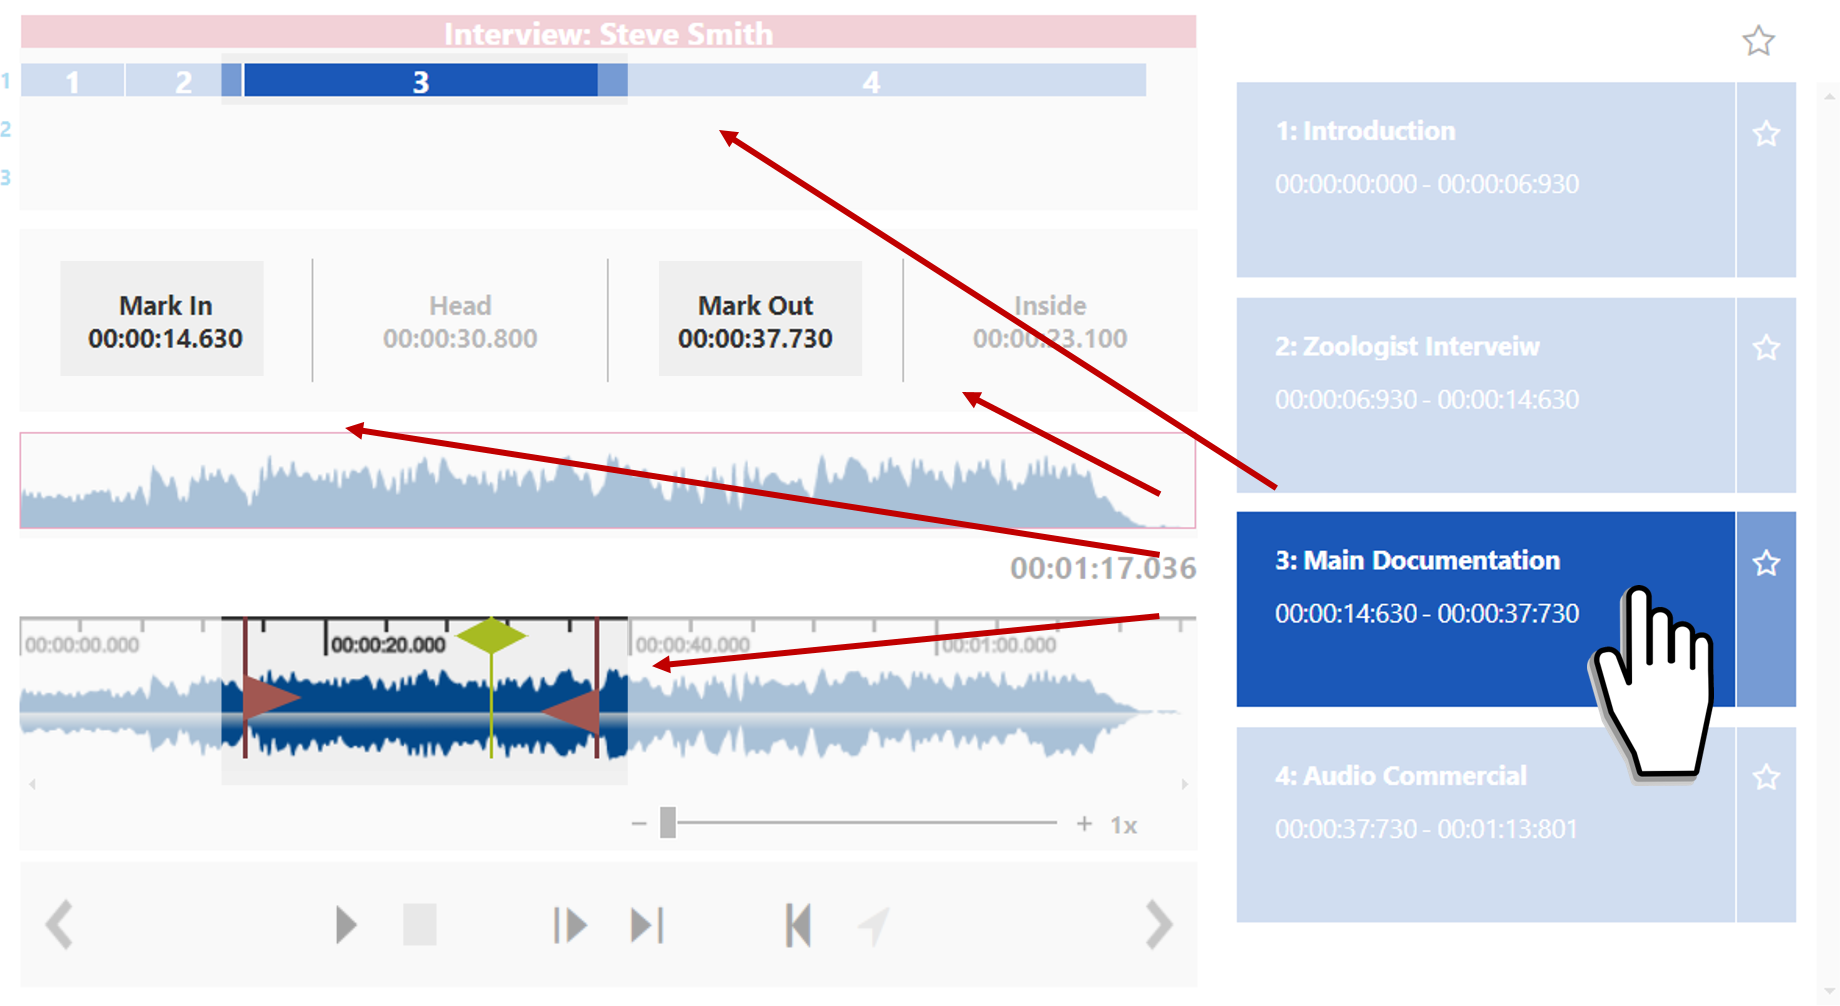
Understanding the Detail Area
In Marker | Marks the start of a subclip. |
|---|---|
Out Marker | Marks the end of a subclip. |
Soundhead | Time of playout (as in any conventional audio player). |
Waveform | Displays the amplitude of the sound wave. |
Moving the Soundhead
Scroll or Drag using the mouse to move the soundhead. To scroll in smaller / bigger time intervals, zoom in / out.
Middle mouse click to the desired position in Overview / Detail Area to set the soundhead.
To play first 3 seconds of subclip, press ' , ' or click

To play last 3 seconds of subclip, press ' . ' or click

To set the soundhead to last played position, press 'q' or click
To set the soundhead to In Marker position of the selected subclip, press 'l' or click
See Using Keyboard Shortcuts in SCE, for more methods of changing the soundhead position.
Creating a Subclip
1. Create in and out markers (optional)
Click on to an empty area to deselect any existing subclip
Set In / Out markers respectively by clicking Left / Right mouse button on the waveform in the Detail Area.
Or
Move the soundhead to the desired location and then set In / Out markers respectively by pressing 'i' / 'o'
2. Create subclip
Press 'Create Subclip' or press 'a'.
If the:
In and out markers are defined, a subclip between the markers will be created.
If marker is undefined, the subclip will start at the beginning of the audio.
If Out marker is undefined, the subclip will end at the end of the audio.
Creating a Marker
"Marker" is just a special term describing a subclip with zero duration (i.e., where MarkIn==MarkOut). It takes the current value of the soundhead as both MarkIn (In Marker) and MarkOut (Out Marker) and creates a new subclip with MarkIn == MarkOut. A marker can be created with the shortcut m.
See Using Keyboard Shortcuts in SCE for more advanced subclip creation techniques, such as Dividing Audio into Seamless Segments.
Saving or Undoing Changes
Any changes, if creating or editing subclips, have to be saved manually by:
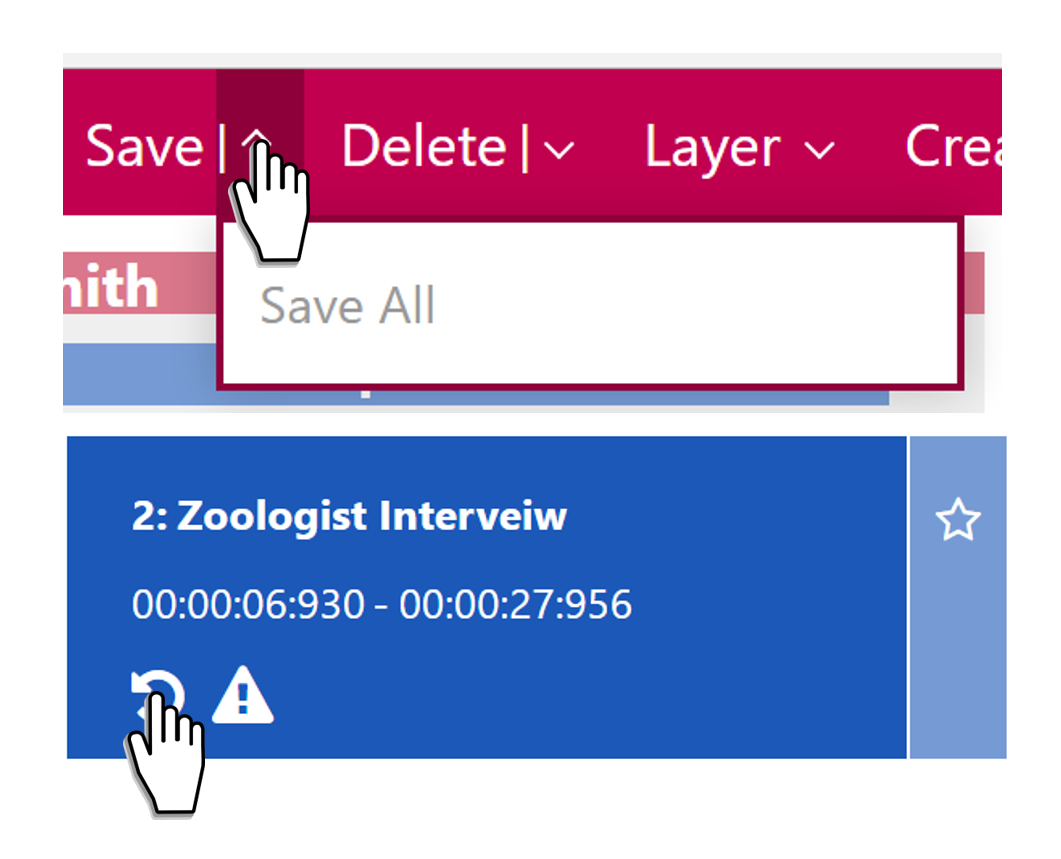
Clicking the Save button, to save changes made on the selected subclip.
Clicking the Save All button, to save all changes.
To undo/discard all unsaved changes made to a subclip:
Click the 'rewind' button.
Reload the page
As soon as changes are saved, they cannot be undone.
If there are pending changes, the user will be warned before closing or reloading the Subclip Editor.

Deleting a Subclip
The editor provides options to delete one/many/all subclips at once.

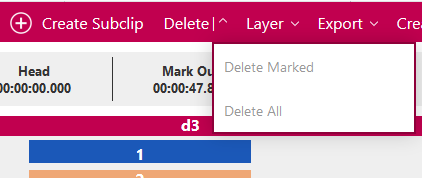
Delete All: Pressing Delete All button in Top Menu deletes all the subclips.
One at a time: Selecting a subclip enables Delete button in the Top Menu bar, pressing which deletes the selected subclip.
More than One: You could also star select more than one subclips which enables "Delete Marked" button. Pressing Delete Marked button deletes all the marked subclips.
Manual Refresh of Entry Metadata
Clicking on the refresh button updates the meta data of the current entry if there has been any changes made to the subclips or if there is any growing file.
For example,
If an entry is opened in two different browsers.
Modify a subclip in one of the browsers and save it.
Click on refresh in the other browser.
It loads the modified content.
Selecting and Editing a Subclip
Basic Duration Editing
There are two different types of selecting: selecting an entry to view and edit it in the Detail Area (Edit select), or selecting entries for workflow usage (Workflow select). For more information on Workflow select, see Processing Subclips with Workflows.
Click and select any subclip from the Clip Area. This:
Highlights the subclip in the Layer Area
Shows the in and out markers in the Detail Area
Shows the time of the in and out markers in the Time Area
Edit the in and out markers the same way they were set, i.e. using the 'o' and 'i' keyboard shortcuts or the right and left mouse buttons.

Advanced Editing and Renaming Subclips
A subclip's title and in/out markers can be edited.
Single Click on the desired field and type in the desired title or time.

Time Conventions
See the Time Conventions used in throughout David's preview players.
Filtering and Sorting
The subclips in the Clip Area can be filtered by layer (1-9) and can be sorted in various ways.
Filtering and Sorting of subclips in the Clip Area does not affect the Layer Area. It remains the same.
Filtering Subclips by Layer
The subclips in the Clip Area can be filtered by layer (1-9); the default is None which means no filter option is selected and it displays the whole subclips. Multiple layer numbers can be chosen for filtering and the subclips from selected layers are displayed. The filter icon right before the label allows to disable the filter which means clicking on that will show the full subclips and clicking again on the icon shows the filtered clips.
Sorting Subclips
The subclips can be sorted with different sorting options.
Option | Description |
|---|---|
Layer,Time | Default sorting option. It sorts the subclips by layer first (Layer 1 comes first and so on..) and within the layer, the subclips are sorted by the start time. |
Layer,Title | It sorts the subclips by layer first and within the layer, the subclips are sorted by their title. |
Time,Layer | It sorts the subclips by their starting time first and if two subclips have the same starting time, then they are sorted by layer. |
Title,Layer | It sorts the subclips by their title first and if two subclips have the same title, then they are sorted by layer. |
