Starting with OTM version 2.0, you can select more than one track, and move the elements of selected tracks together along the time axis as a bulk operation.
Selecting by Mouse Clicks
To select the first (or only) track, click the track with the left mouse button.
To select a group of adjacent tracks, click the first track of the group, then hold down one of the Shift keys as you click the last track.
To select an additional track, hold down one of the Ctrl keys while you click the additional track.
To remove a specific track from your selection, hold down one of the Ctrl keys on the keyboard while you click the selected track.
Notes:
-
All clicks need to be executed in an empty space in the track (i.e a location that is not occupied by either a button or waveform). You may select tracks also using the track head area.
-
This also works in "collapsed tracks" view
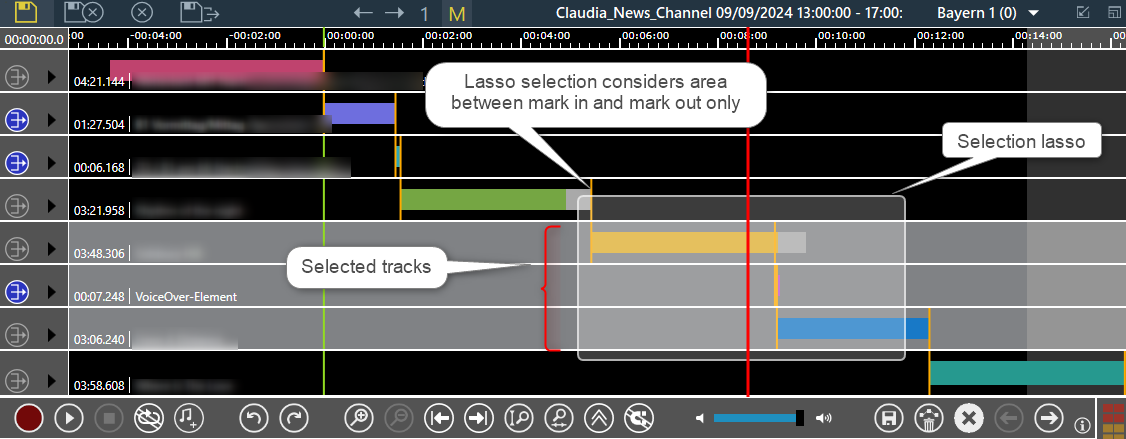
Selecting by Dragging a Lasso
When you click the left mouse button over a track and move the mouse while holding the button down, a "selection lasso" is drawn on the screen. All tracks which are touched by this lasso are selected. The exact behavior depends on where you push the mouse button down:
-
If the mouse button is clicked over the track head, selection applies to all tracks touched by the lasso.
-
If the mouse button is clicked over the track timeline, selection applies to all tracks whose audios are touched by the lasso.
This also works in "collapsed tracks" view.
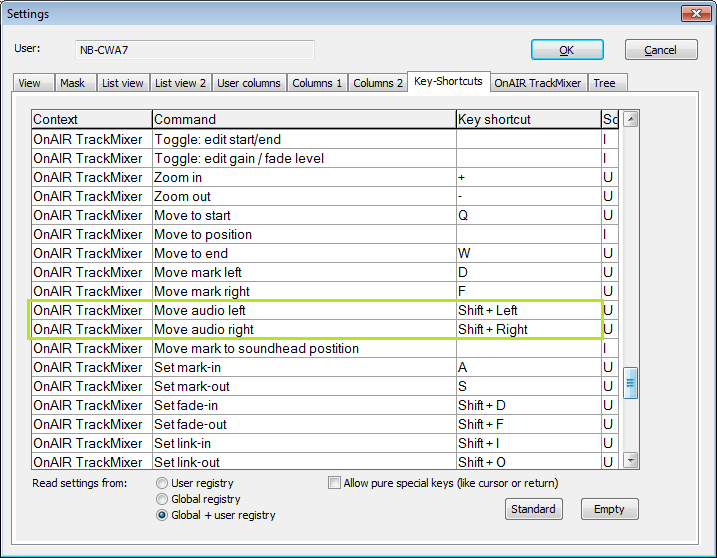
Selecting by Keyboard and / or Glue Button with Defined ‘DragTailElements’ Parameter
If the user drags a single track element horizontally all the track elements below this track should follow the moving element and keep their distance or overlap to it. If the feature is active by default or only with shift or alt key is controlled by the parameter ‘DragTailElements’.
The following values are supported:
-
Never: Feature is disabled. This is the default if the parameter is not set. The glue button is not shown and the feature is disabled.
-
WithShift: Feature is active, if the shift key is pressed before dragging the audio element. The glue button is shown and deactivated at the start of the OTM. The state can be changed with Shift key.
-
WithoutShift: Feature is active, if the Shift key is not pressed and not active otherwise. The glue button is shown and is active at the start of the OTM. The state can be changed with the Shift key.
-
WithAlt: Feature is active, if the Alt key is pressed before dragging the audio element. The glue button is shown and deactivated at the start of the OTM. The state can be changed with Alt key.
-
WithoutAlt: Feature is active, if the Alt key is not pressed and not active otherwise. The glue button is shown and is active at the start of the OTM. The state can be changed with the Alt key.
When the parameter ‘DragTailElements’ is enabled, a glue button in the toolbar appears.
The new glue button in the toolbar can have 3 states:
-
Active:

-
Inactive:

-
Hidden
There is some overlap with the Transition View feature, which has similar behavior in some instances.
Use case: The journalist moves an element in the OTM timeline and all following elements are moved as well.
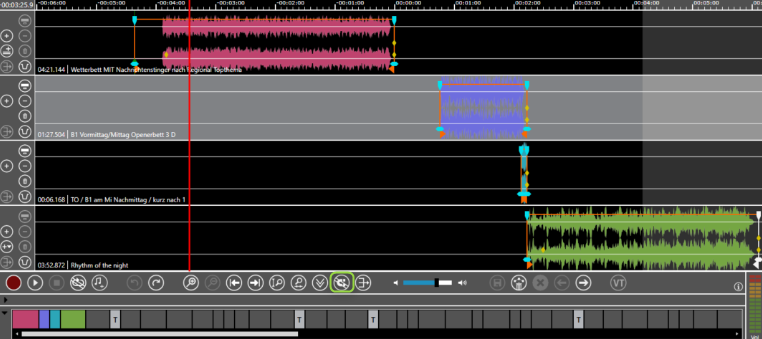
Example 1: The glue button is active.
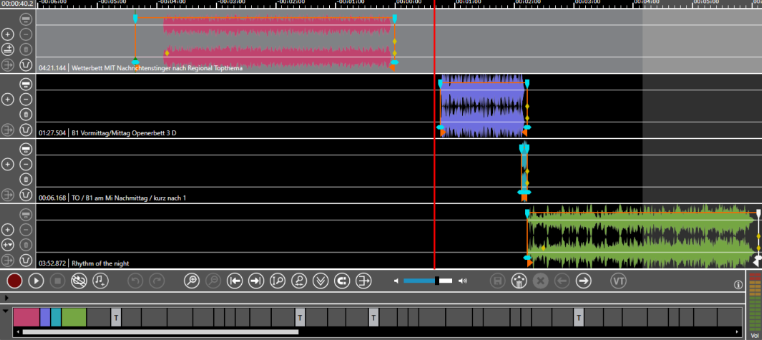
The journalist drags the audio element in track 2 to the left and all following elements are moved to the left as the glue button is active.
Example 2:
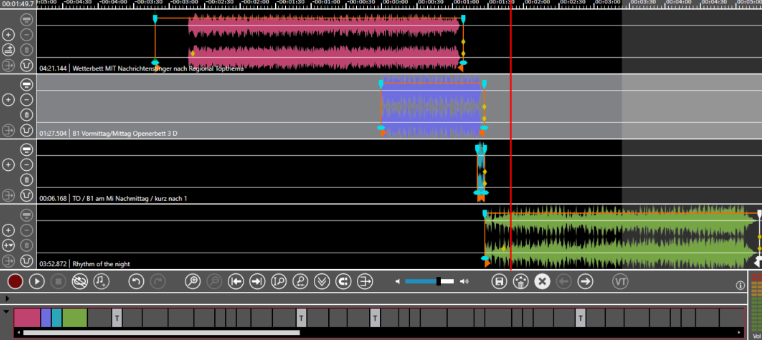
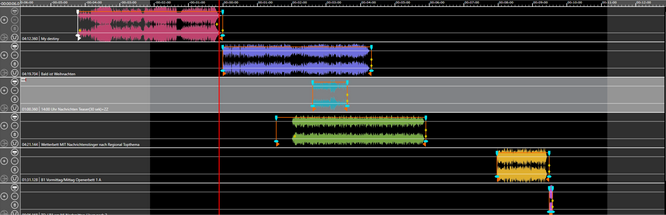
If we have the following timeline:
Now the journalist drags the light blue element in track 3 about 1 minute to the left. Because the feature is active the elements in track 4 to track 6 are also moved about a minute the left.
Use case: The journalist moves only one element in the OTM timeline and all following elements stay where they are.
The journalist can toggle the glue button with:
-
a mouse click
-
the Alt key if ‘DragTailElements’ parameter is ‘WithAlt’ or ‘WithoutAlt’
-
the Shift key if ‘DragTailElements’ parameter is ‘WithShift’ or ‘WithoutShift’.
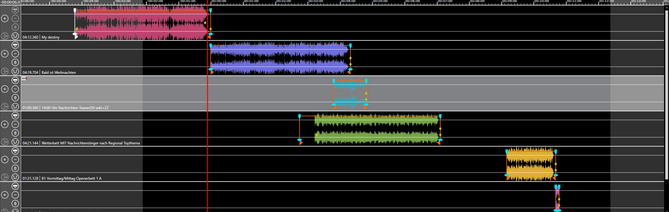
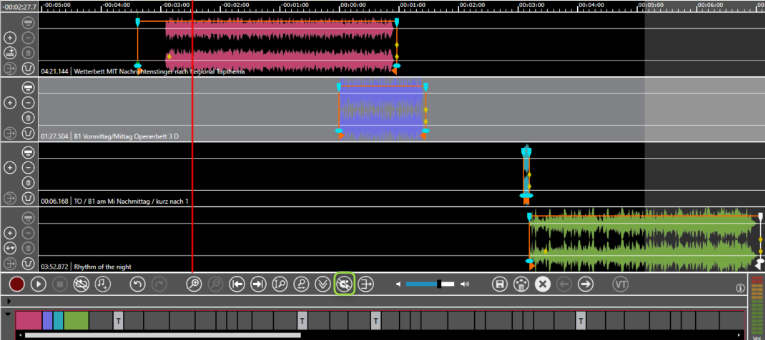
Example 3: The glue button is inactive
The journalist drags the audio element in track 2 to the left. As the feature is disabled only the dragged element is moved and all other elements stay where they are.
Reverting to Single Track Selection
To end multiple track selection, simply click into a track. This selects the clicked track and deselects all other tracks.
If you configured the parameter ‘DragTailElements’, this feature is disabled, if more than one track is selected with shift-click, ctrl-click or lasso. In this case only elements at selected tracks will be moved.
Working with Multiple Selections
When multiple tracks are selected, the buttons in the "marker details" area are disabled because these actions don't make sense when applied to multiple tracks.
However, when multiple tracks are selected, you can move all selected elements together. Place the mouse over one selected element, Hold down the left mouse button and move the mouse left or right. All selected elements now follow the mouse movement, and are dropped when the mouse button is released.
If you have configured the a shortcut, you may move the selected elements with the appropriate shortcuts..
As with all edits on OTM, any changes to the positions of audio elements must be saved to be applied.