Configuring Transition Editor in the Transition View
To ensure compatibility between OTM and the Transition Editor, please set the DigaSystem parameter DigAIRange|Crossfade|Extra|FadePointUpperScale=12
If you do not see the Transition Editor, please contact Support via Customer Care Desk.
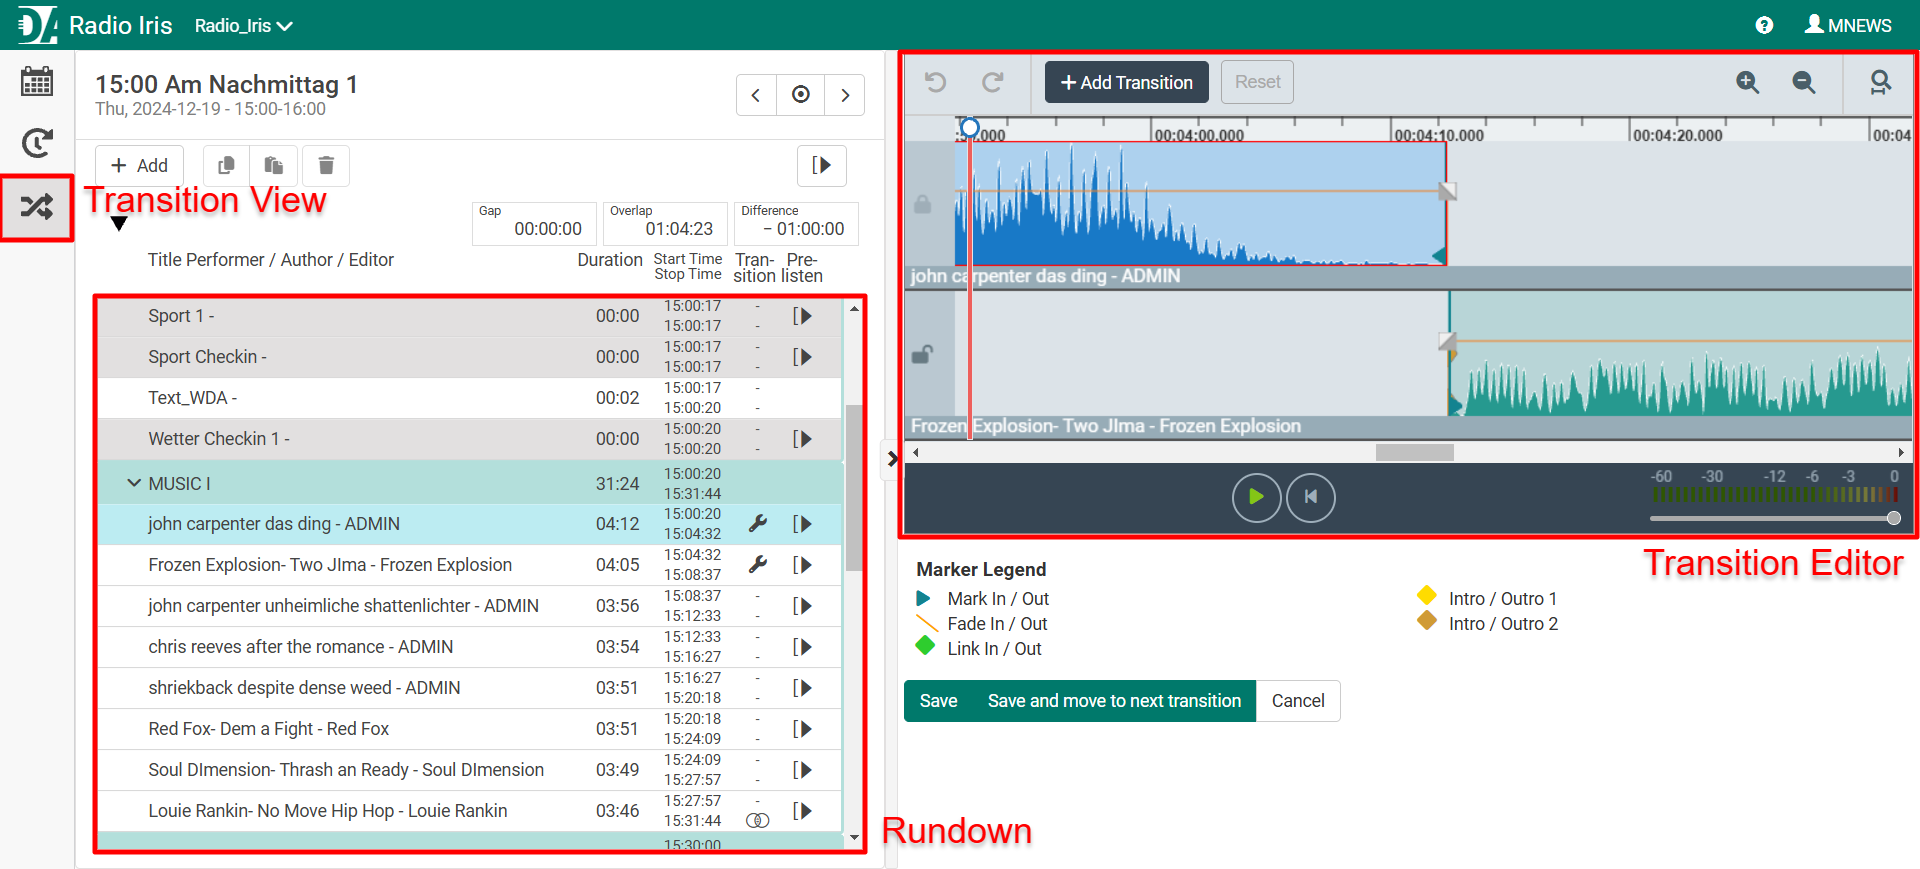
The Transition Editor is a licensed feature designed to create simple transitions between the elements in your rundown. It supports creation of fade points, including fade-in and fade-out by using the provided handles, as well as gain automations by CTRL-clicking anywhere on the gain line.
To utilize the Transition Editor, simply drag and drop an element onto the first track; the next element will be added automatically in the second track. Elements currently loaded in the Transition Editor will be indicated by a wrench icon in the transitions column of the rundown.
To display the transitions column in the rundown, please add it to the settings.json e.g.
"columns": "Transitions",
The transitions column will indicate which elements have been used in a transition.
Elements and Sub-Elements
The Transition Editor is designed to create a multitrack transition in-between two contiguous elements of a rundown. Sub-elements can be added by clicking on the “Add Transition“ button. Upon saving the changes, the sub-elements part of the transition will be added to the rundown. There is no limitation on the number of sub-elements that can be added to create a transition.
Currently we support two ways of adding sub-elements to create a transition:
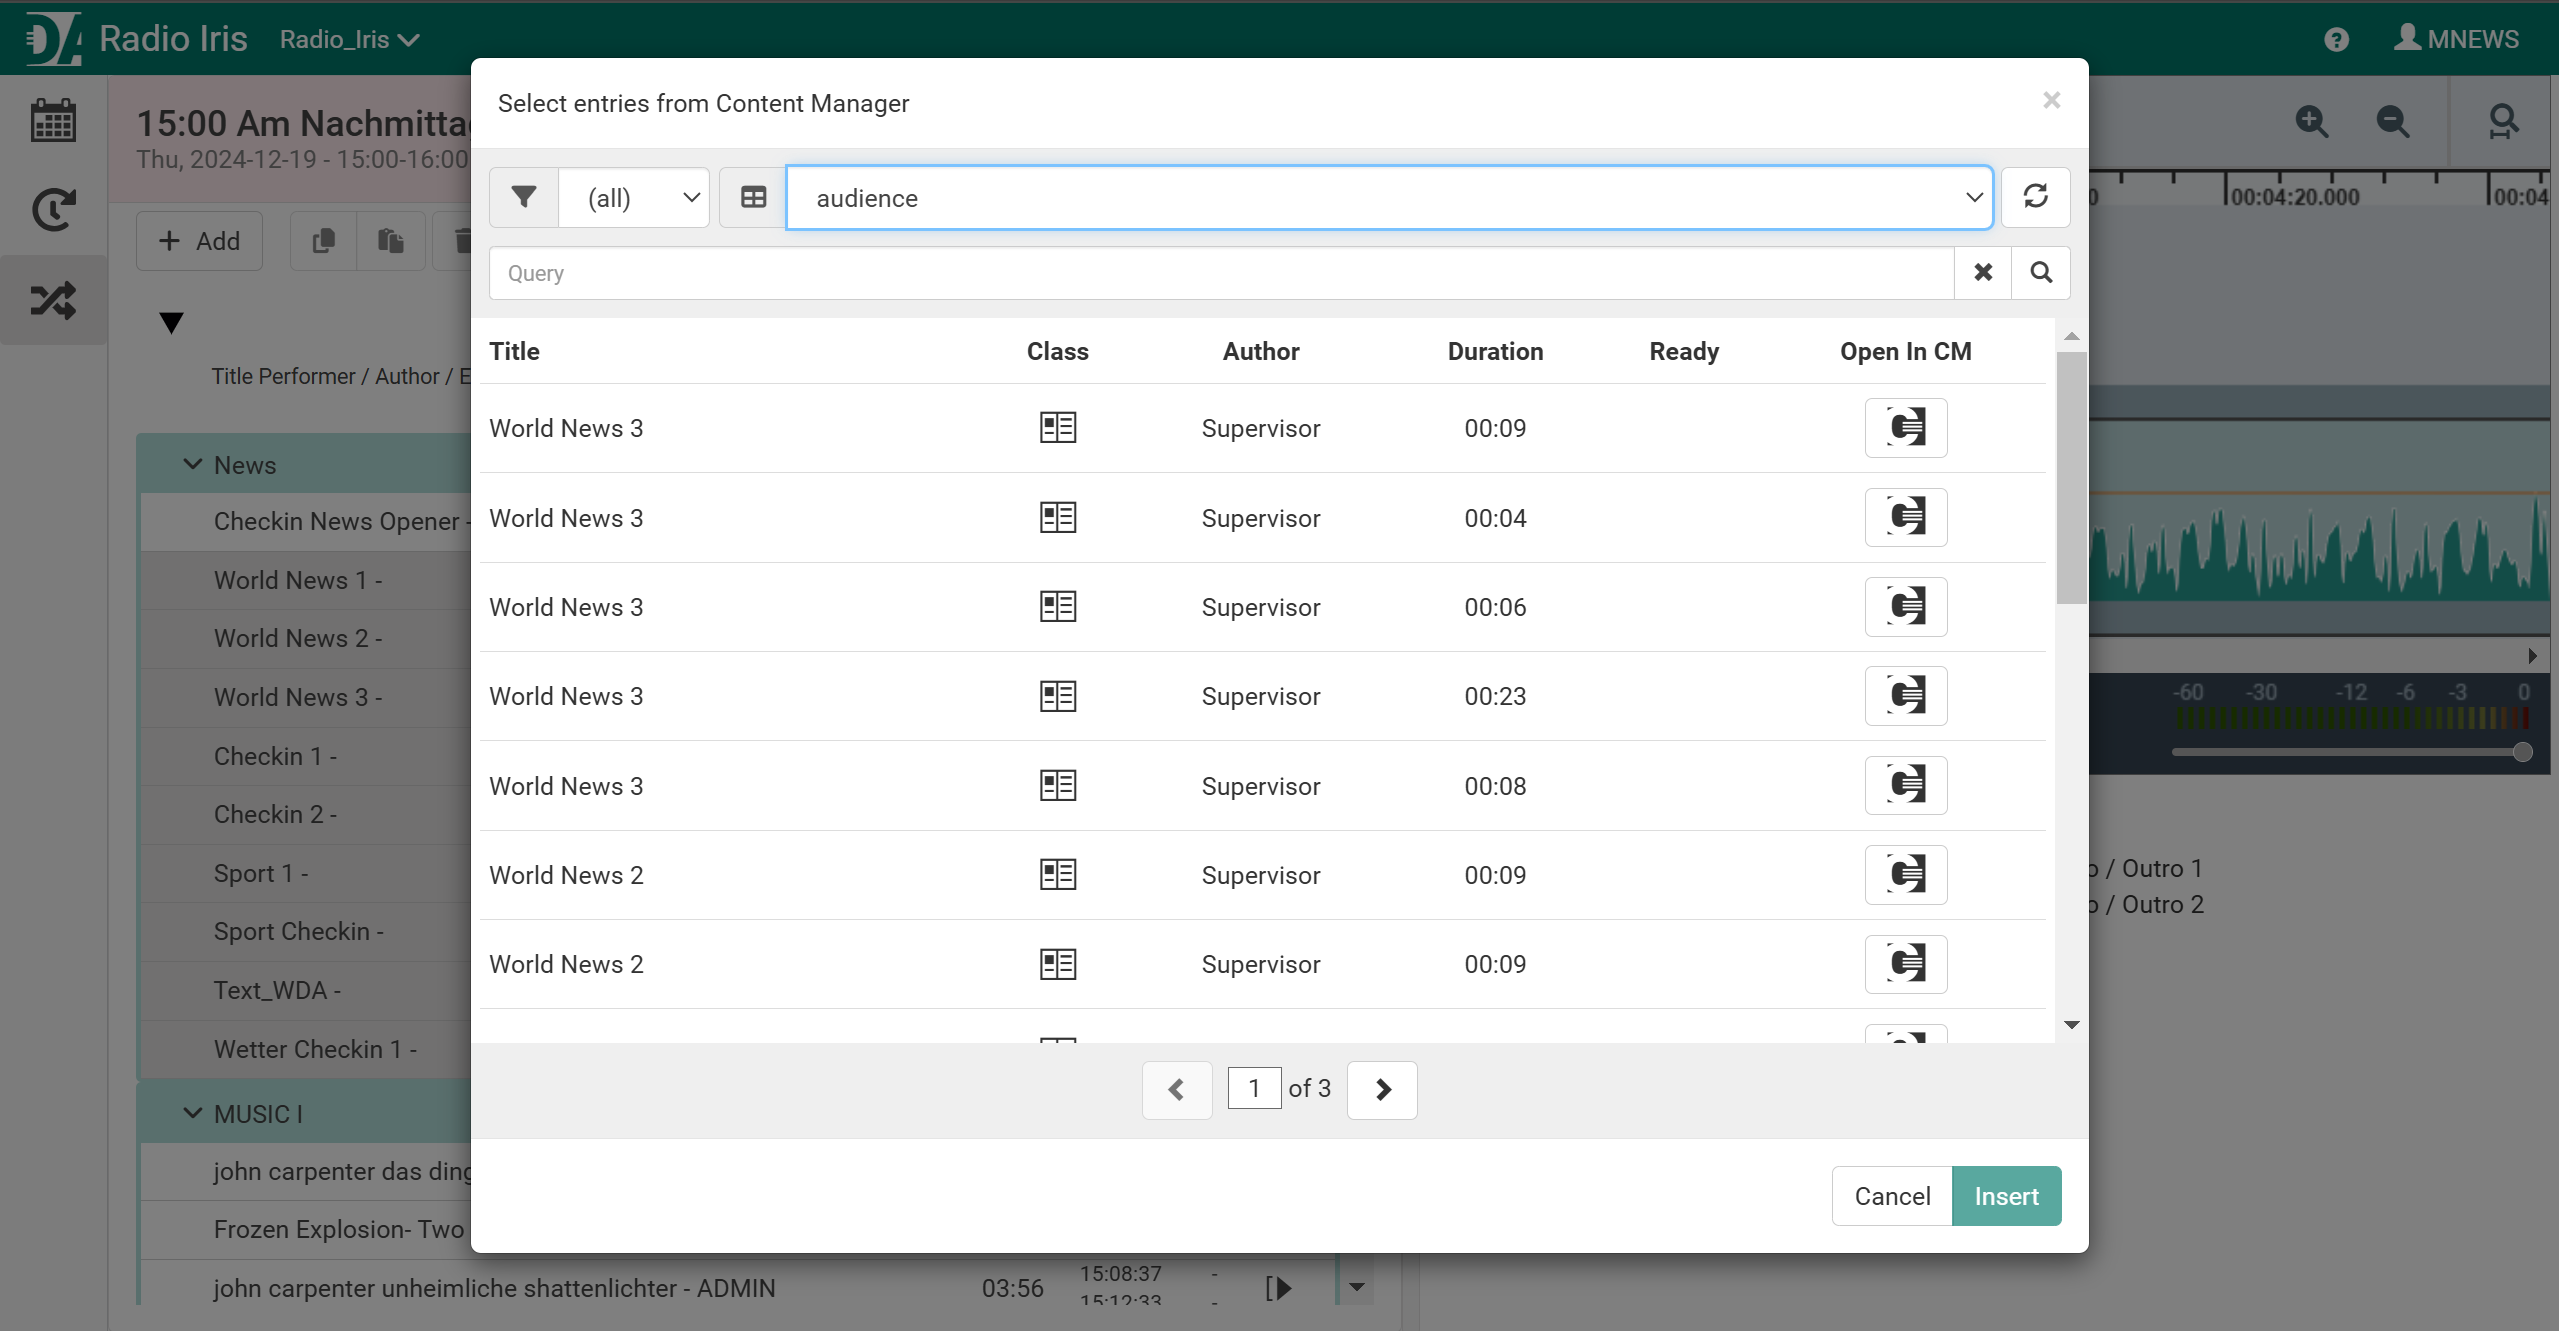
Adding elements from Content Manager, by using the dedicated modal dialog, as shown below.
Recording a voice over, directly in the Transition View, as shown in the video below:
It's important to note that due to browser limitations, hosting WebDigAIRange on a HTTPS server is necessary for the microphone to function properly.
You can also configure automatic voice ducking in the settings.json, please refer to the “Transitions” settings on the main configuration page. Main Configuration Settings