
Track Recording can be used to record directly in a track in the MultiTrack screen.
Create a Recording
Select a track for recording
The record button in the Transport window is greyed out until a track is selected for recording. For this, the small record button in the track head needs to be enabled.
Click the record button in the track head of the track you want to use for the recording. When active, the button will be completely red 
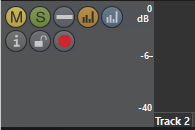
For recording, only one track can be selected at a time. All other track's record buttons are greyed out then. When you select a different track for recording, the current one becomes deselected.
If a track is locked 
Activate record wait state
|
|
After selecting a track for recording, the big Record button in the Transport window is enabled. Clicking this button makes the record track ready for recording. Then, you click on the play button to start the recording at the sound head position. |
|
|
It is also possible to start a recording during playback. For doing this you select a track for recording and start the playback by pressing the Play button. Then, when you want to start the recording, you click on the Record button. |
|
|
A click on the Stop button will either stop the recording or (if there is currently no playback/recording) cancel the recording status (the transport window record button will be disabled). |


After recording is completed, a new take appears in the clipboard, titled "New Take".
Channel Output Routing
Please note that if the MultiTrack Editor works in Multi-channel mode. The monitoring output might not be assigned to the same channel pair as the playback output. The monitoring is always routed to “Out 1+2”.
Drop Mode during Recording
The currently selected Drop Mode affects the behavior of the recording function in the following ways:
You find the Drop mode button in the Toolbar. Clicking it advances its state from Normal to Ripple and to Ripple all and to Overwrite.
|
|
Track recording is only possible in empty space, where no audio object is placed. The recording will stop shortly before reaching an audio element in this track to avoid an overlap. During recording all other tracks are played and audible |
|
|
Track Recording is possible at any point. If Recording is started upon or reaches another audio object in the same track, this audio object will be (split and) moved until the end of the recording. During recording all other tracks are played and audible |
|
|
Track Recording is possible at any point. The content of all tracks is moved over the length of the recording (and split, if the recording starts at a position overlapping with other audio parts). During recording only the recording itself is audible |
|
|
Track Recording is possible at any point. If Recording is started upon or reaches another audio object in the same track, this audio object is overwritten. During recording all tracks (including the selected track) are played and audible |


It is not possible to change the Drop Mode during a recording.
Markers
You can set markers in the ongoing recording, using either the buttons or keyboard shortcuts.
-
Normally, when not recording, markers are placed in the currently selected track. But during track recording, markers always go to the current recording, regardless which or how many tracks are selected.
-
You can only place markers during recording, but not move or edit them. Once the recording is stopped, the new markers can be changed or deleted as usual.