
The Edit tools pane is available for MTS and STS in slight different variants. It provides several sub-pages which are accessible by clicking on the respective tabs.
Some of the functions described here are available via the Sub Menu Edit, too.
MTS Edit Tools

Most edit functions apply to the current selection (part of the timeline from mark in to mark out) of all selected tracks.
STS Edit Tools

Most edit functions apply to the current selection (part of the timeline from mark in to mark out).
Edit Tab
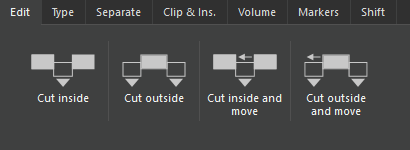
Sub-page Edit in MTS
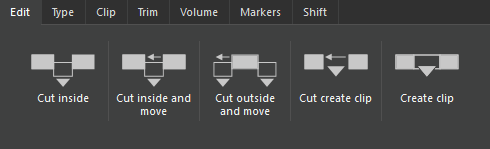
Sub-page Edit in STS
|
Item |
Description |
|---|---|
|
Cut inside |
Cut off audio selection in selected tracks (makes time range silent). Cut off audio is put to clipboard. |
|
Cut outside
|
Cut off audio outside selection in selected tracks. (So the selected time range remains there.) |
|
Cut inside and move |
Cut inside (see above), then shift tracks' content to fill the gap. The area marked with in and out markers will be cut, resulting in a pause. Both parts before and after the cut will not be separated, however, but after synchronization will be treated as one object. |
|
Cut outside and move |
Cut inside and move (see above), then shift tracks' remaining content to the beginning of timeline. |
|
Cut create clip
|
The area marked with in and out markers will be cut and saved in the clipboard as a new clip. Next, a dialog field for the name and color appears. Cut off audio selection in selected tracks (makes time range silent). |
|
Create clip
|
Creates a clip from the selected time range in the selected track which is added to the Clipboardwith a user-defined title. |
Type Tab
Define the way the editor handles setting a mark in / out position to get the best results avoiding audio artifacts. The exact position of mark in / out will be adjusted depending on the currently selected edit type. In ETS some direct cut commands (which do not refer to current mark in/out) also apply this method on the exact cut positions.
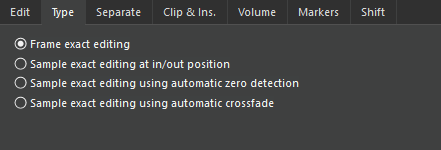
Available Edit Types
|
Frame exact editing |
All editors are able to cut not only linear, but also compressed audio formats in a sample correct way.This option allows cutting at the edges of the MPEG frames. |
|
Sample exact editing at in/out position |
The selection will be aligned exactly where set. This may create an audio click at the cut position, if the cut has been done at the plus and minus wave. |
|
Sample exact editing using automatic zero detection |
The selection will be adjusted to the wave’s next zero crossing point. This avoids an audio click, resulting from a cut of a plus wave with a minus wave. |
|
Sample exact editing using automatic crossfade |
The selection will be aligned exactly where set. An automatic crossfade inhibits a potential audio click. |
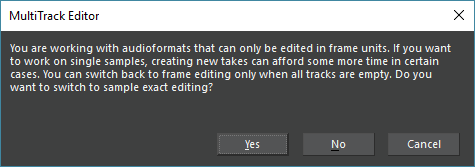
When switching to sample exact editing, there will be an info-window displayed, informing the user that it is only possible to switch back to frame exact editing when all tracks are empty. Background to this behavior is the technical track transformation into a sample exact format, which cannot be undone in the current session with the same files.
Separate Tab
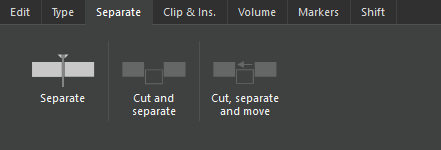
This sub-page is available for MTS only.
|
Item |
Description |
|---|---|
|
Separate |
Separates all objects of all selected tracks at the soundhead position, so two objects result from each. |
|
Cut and separate |
Cut off audio selection in selected tracks and creates two objects from the remaining. |
|
Cut, separate and move |
Like Cut and separate, but shifts remaining audio to fill the gap. |
Clip & Ins. Tab
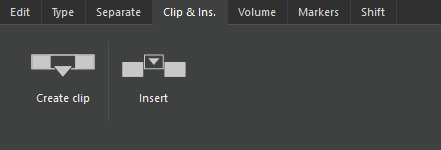
This sub-page is available for MTS only.
|
Item |
Description |
|---|---|
|
Create clip |
Creates a clip from the selected time range in the selected track which is added to the Clipboardwith a user-defined title. |
|
Insert |
Inserts silence in the selected time range of all selected tracks and separates audio objects affected by this. |
Clip Tab
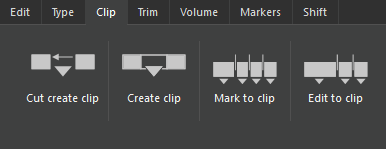
This sub-page is available for STS only.
|
Item |
Description |
|---|---|
|
Cut create clip |
Creates a clip from the selected time range, which is added to the Clipboard with a user-defined title. Cut the selection off, then shift tracks' content to fill the gap. |
|
Create clip |
Creates a clip from the selected time range in the selected track, which is added to the Clipboard with a user-defined title. |
|
Mark to clip |
Ranges between markers will be split into individual clips being added to the Clipboard. For this the name of the in marker will be assigned automatically to the clips. |
|
Edit to clip |
Areas between cuts, i.e. cut markers, are split into individual clips and added to the clipboard pane. |
Trim Tab
This sub-page is available for STS only.
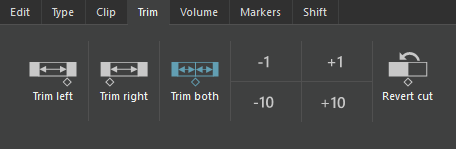
This trim function can be used to trim one or both edges of a cut edge. Set the soundhead to the cut position (e.g. by right-clicking the cut marker), then select the trim side (left, right or both), then use the +/- 1/10 buttons to shift the cut edges.
|
Item |
Description |
|---|---|
|
Trim left |
Trim mode: Select if trimming is to be applied to left, right or both sides. |
|
Trim right |
|
|
Trim both |
|
|
-1 / +1 -10 / +10 |
At the soundhead position 1 / 10 frames will be removed / restored. |
|
Revert cut |
The selected cut will be undone. Then the in and out markers represent the original cut positions. |
Volume Tab
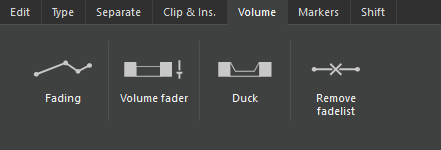
Sub-page Volume in MTS
Sub-page Volume in STS
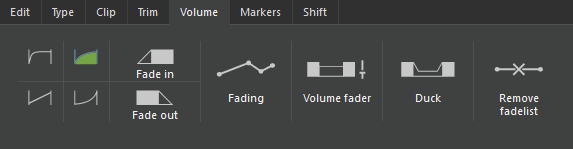
These volume edit functions allow changing the volume progress inside the selected time range.
|
Item |
Description |
|---|---|
|
Fade characteristic |
Select one of four provided fade characteristics to be applied when pressing Fade in / out. The linear or logarithmic characteristics will be set. |
|
Fade in |
Apply fading on the current selection as a fade in (becoming louder) or fade out (becoming more silent). The parameter for the start volume of the fade in is in the menu Options/Settings/Track/ Fade In/Out. |
|
Fade out |
|
|
Fading |
Open the Fading dialog where a fade curve can be edited. |
|
Volume fader |
Adjusts the amplification of the selected area. |
|
Duck |
Within the marked area the volume is decreased. In contrary to the Volume Fader there is a volume transition created, so there is no sudden volume change. |
|
Remove fadelist |
Removes all fade points inside selection. |
Markers Tab
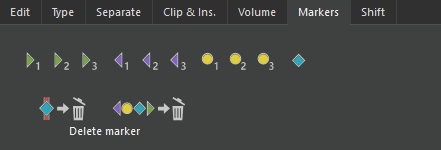
|
Item |
Description |
|---|---|
|
Markers 1, 2, 3
|
Click on one of the marker symbols to add a respective marker at the current soundhead position. In MTS this is applied to the selected track. |
|
Delete marker |
Delete marker at soundhead position. |
|
Delete all markers |
Delete all markers in the selected track. |
Shift Tab
Sub-page Shift in MTS
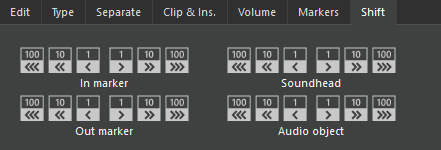
Sub-page Shift in STS
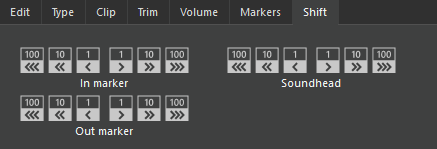
With these functions selections can be shifted in different sized steps to the left or right.
|
Item |
Description |
|---|---|
|
In marker |
Shift mark in position |
|
Out marker |
Shift mark out position |
|
Soundhead |
Shift soundhead position |
|
Audio object |
Shift selected audio object(s) |