Transition View - Move Music Elements Together with their Jingles
Transition View is designed to create your transitions in an easy way focusing on the transition itself. If you already prepared some transitions which you do not need to edit further, in this view you easily move main elements together with its related elements. By default TransitionView is activated. If you do not want to work with this view, the parameter TransitionView needs to be set to False.
Here is how it works
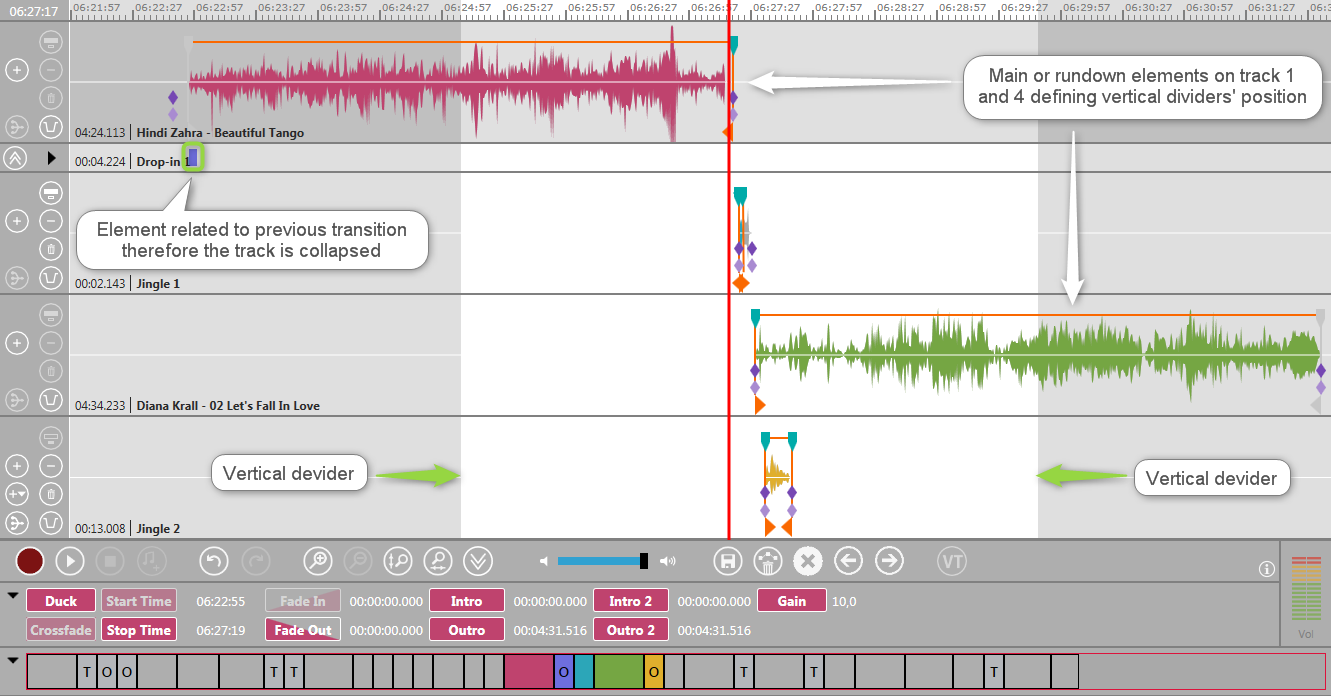
After loading a transition OTM may look like the following screenshot. The main elements are in track 1 and track 4. These elements define the vertical dividers' position. The divider is in the middle between a main element's Mark In and Mark Out. Elements completely located inside an area which belong to the last transition or the next transition are collapsed. In this case that means track 2 is collapsed.
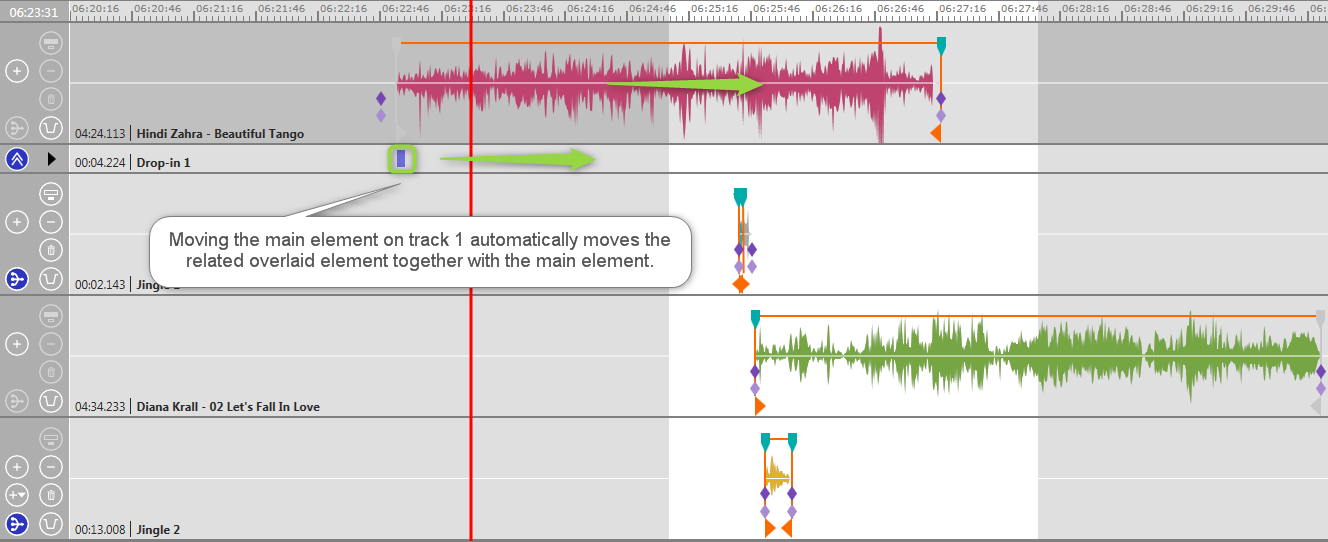
In TransitionView whenever you move, to the left or right, a main element automatically its related overlaid element moves together with the main element keeping the distance.
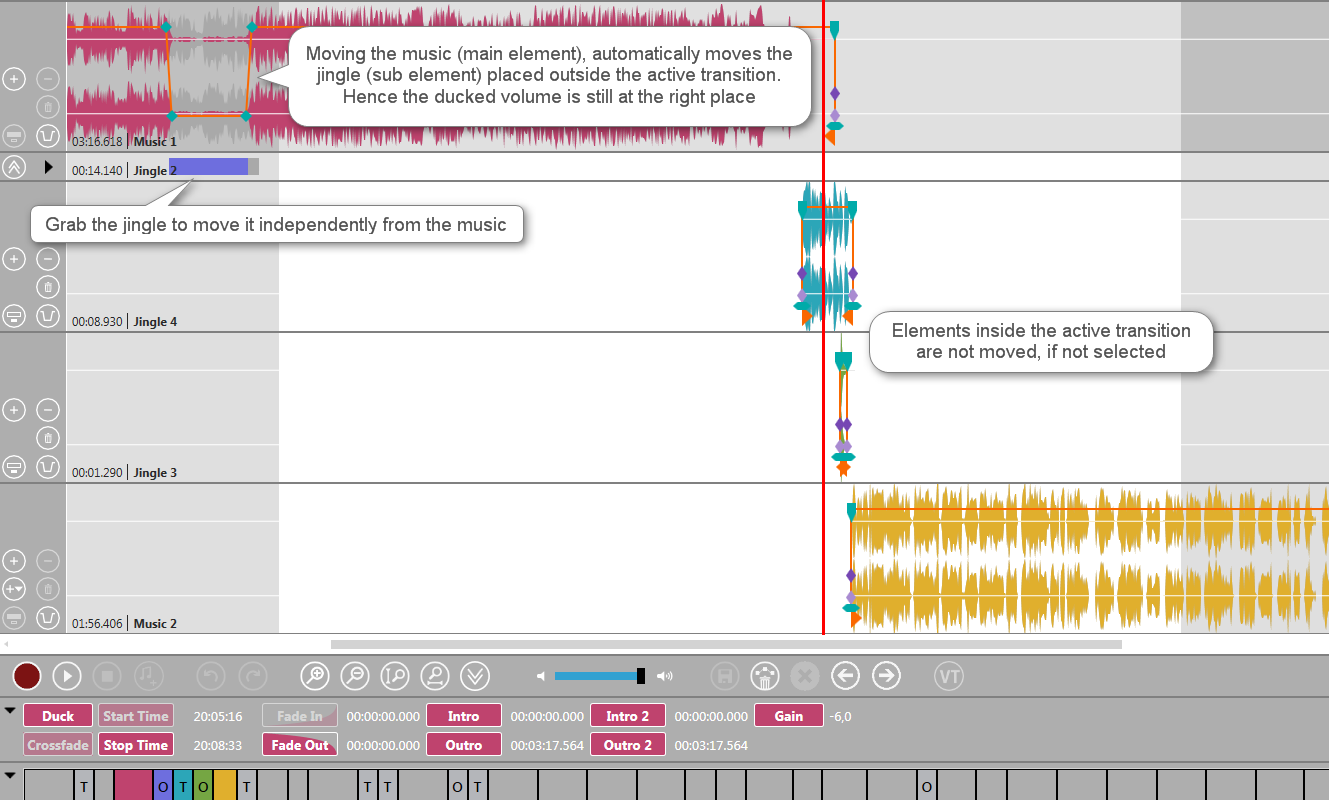
Here is another example. If you have ducked the music and once saved, elements on collapsed tracks are automatically moved with its related main element. Now you may easily move the music element and its jingle by moving the music. The jingle located on a collapsed track is connected to its music and moves together with the music element. If you want to move the jingle only, but not the music, click on the jingle and move it. The main element stays where it is. When the jingle's Mark In crosses the active transition, its track expands again.
A side effect of the movement of the element located at track 1 is the movement of the divider to the right of track 3. The new position of the divider means track 3 is collapsed because it now belongs to the previous transition.
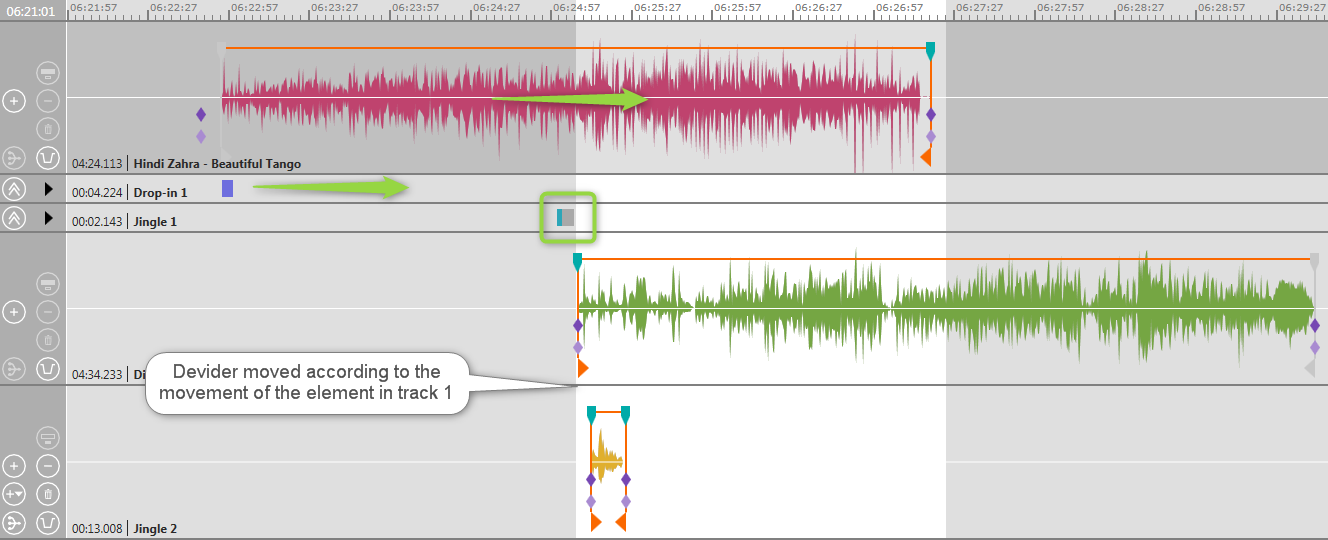
If you drag an element to the left or right across the divider, it will automatically expand or collapse these tracks.
If you want to change the element's fade curve or its markers located at the collapsed track, you have a button in the track header to expand this track.
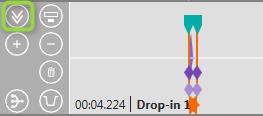
Here you see the expanded track 2. It has a button in the track header to collapse it again.

